 The Twelve Days of Zentangle is an annual year-end holiday tradition from Zentangle HQ where Rick and Maria and the HQ crew lead us through twelve consecutive days of tangling together.
This year’s Zentangle Spinner event had two extra days, one on each end of the series. It began Sunday, December 2nd with a preparation lesson and the series finished earlier today, Saturday, December 15th, with a lesson on how to assemble and use the spinner. The 12 Days of videos tangling the Spinner came between those two.
The theme for 2018 is explained:
Maria always has these fanciful ideas she comes up with in the middle of the night. One day, months ago, she told us about an idea to create a spinner covered with tangles. This would help people choose what tangles to do next.
Well before we knew it, there were spinner parts and prototypes all over the dining room table. It was obvious that this would be our next project pack. What a fun way to create something beautiful, useful, and that would also serve as a way for us to learn some new tangles and revisit some familiar ones.
This year the “12 Days of Zentangle” coincides with Project Pack #04. This project includes a custom made template* designed by Zentangle HQ and printed on the same paper as our white tiles. It also includes the mechanical spinner parts to make it come alive.
Note: it is not necessary to follow these videos in sequence, they can easily be done in any order you like.
While it certainly is convenient, it isn’t necessary to have Project Pack #04 to follow along with this year’s series. Simply use your own supplies:
- a large piece of watercolor paper on which you’ve constructed a circle divided like a pie into 12 equal wedges. You can find instructions online: hint 360°/12 = 30° wedges.
- *The Spinner card is copyrighted and may not be reproduced.
- watercolor pencil or paint
- watercolor brush
- vessel with water, paper towels
- Sakura Micron pens
- Game spinner
The following chronology includes the links to the Zentangle blog posts with commentary for the video demonstrations. Either click the Day #’s title link or the image itself to go to the Zentangle blog to view the full video.
NOTE: For future reference, the video clip for all 54 tangles included in the “Twelve Days of Zentangle” series can be located on each tangle’s page on TanglePatterns.
December 2 – Preparation Lesson
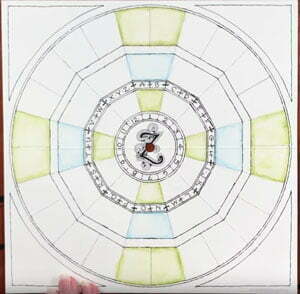
This video lesson (not on the Zentangle blog) demonstrates how to use watercolor pencils to add optional color to your Zentangle Spinner.
It’s totally okay to skip this if you prefer to have your Spinner black and white.
In the video (10:17) Maria Thomas and her daughter and CZT Molly Hollibaugh demonstrate how to add background colors to your Zentangle Spinner in Project Pack #04. They recommend letting it dry overnight before tangling, but you could also add color at any stage of this project if you prefer. Or not at all, your choice.
Be sure to watch the whole video through before you start your project because at the end you’ll see a variety of ideas for adding color to your spinner, including the example above on the left. Patterns, always patterns!
At about 08:30 in the video Maria shares a way to flatten your Spinner once it has dried if the watercolor has caused a little buckling.
Day 1
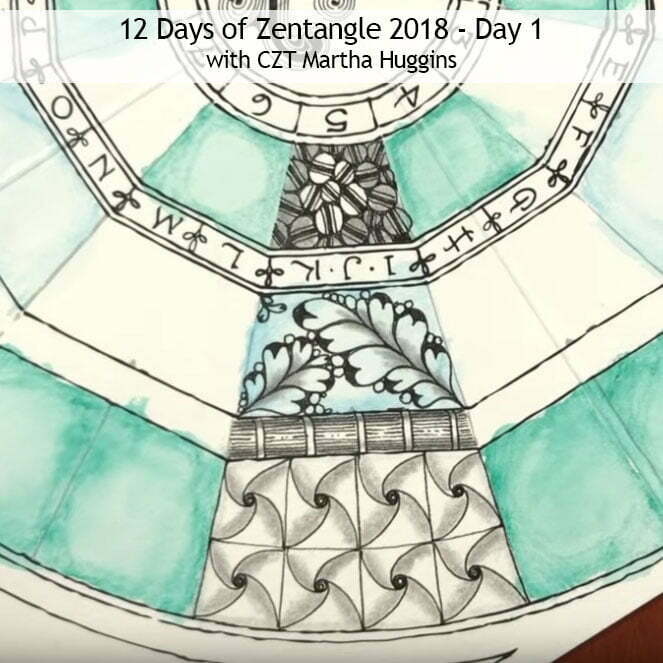
Monday, December 3. In Day 1’s video (24:44), Maria’s daughter and CZT Martha Huggins tangles the first slice of our Zentangle Spinner pie and gives tips about each tangle.
Martha also points out that it isn’t necessary to watch the Project 04 videos in sequence, you can skip around if you wish.
Working from the inner ring to the outside, Martha adds Jetties (01:35), then Flux (6:00), at 10:30 she adds Zander, and at 13:45 she adds Well.
From 19:15 on Martha adds shading as the finishing touch to the four tangles.
Day 2
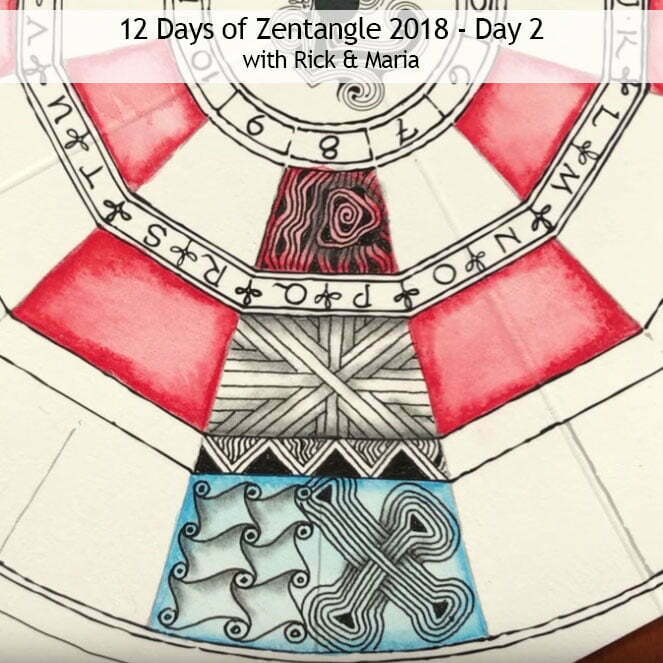
Tuesday, December 4. In Day 2’s video (18:58) with Rick and Maria, Rick fills the second wedge of the Zentangle Spinner.
He begins with Diva Dance, then adds Hurry (02:46), Knase (06:54), Cadent (09:42) and IX (11:55).
At 15:35 Rick adds shading to the tangles to finish up the wedge.
During the video Rick and Maria encourage you to look for the steps instructions in their newsletters for variations. But of course you can always find the links to those steps for every Zentangle-original tangle here on TanglePatterns AND it’s much faster/easier to find the tangle you’re looking for than searching through the newsletters. Just sayin’. IMHO.
Day 3
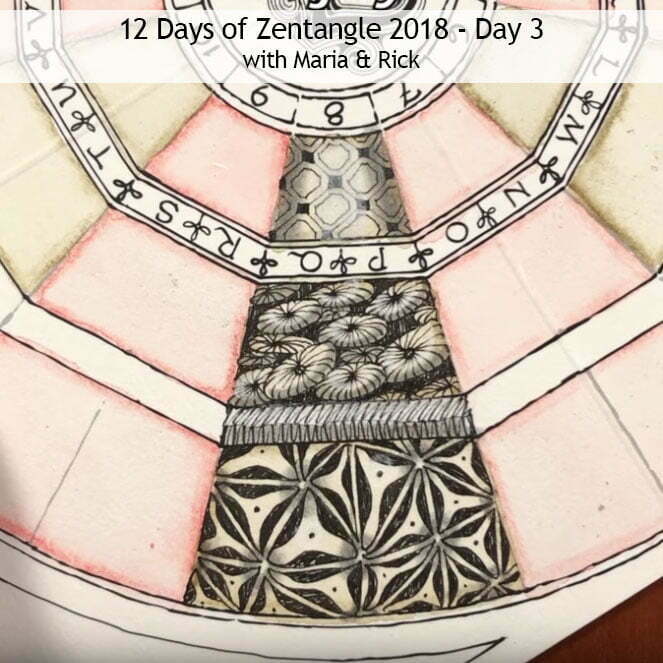
In Day 3’s video (11:14) Rick joins Maria as she fills another Spinner wedge beginning with Florz.
Then she adds two tangles from the very early days of Zentangle that haven’t officially been presented online until now, first Festune (01:22) then Wadical (04:38).
Wadical was introduced in the “Beginning Zentangle” booklet included with the Official Zentangle Kit.
And lastly Maria adds Tripoli (05:38) to this section of the Zentangle Spinner and adds shading to the four tangles.
Day 4
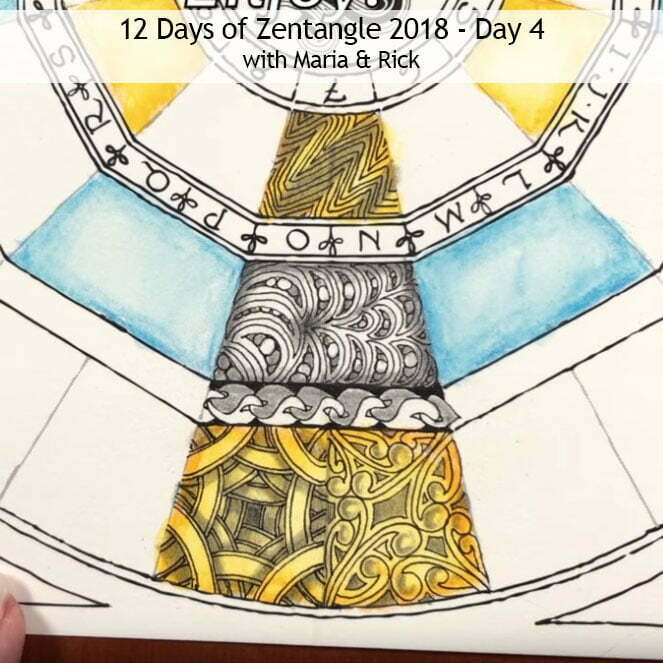
In Day 4’s video (18:15) with Rick and Maria, Maria tangles the fourth wedge, beginning the first section with the tangle Static.
Then she adds Molygon (01:18), Noom (03:43), Umble (06:51) and Mooka (09:27). Beginning at 12:28 Maria shades all five tangles.
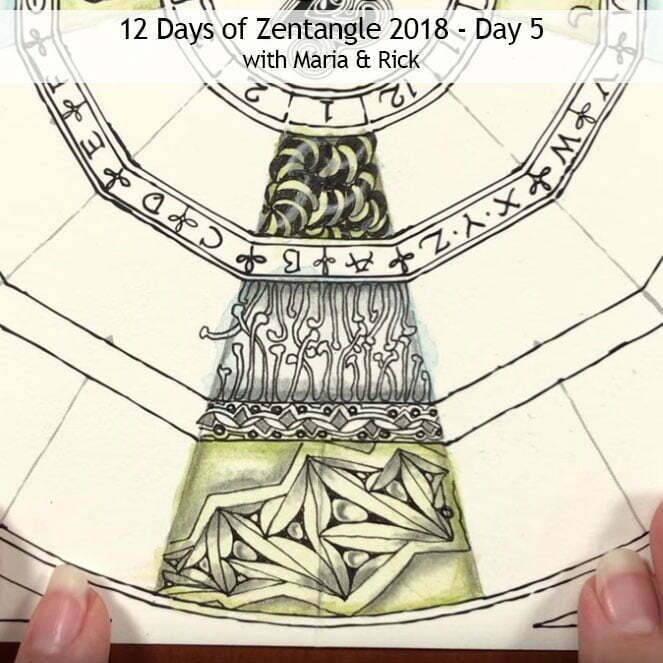
Day 5
In Day 5’s video (13:27) with Rick and Maria, Maria begins today’s wedge with Bunzo.
Next she adds Quabog (01:55), Zenith (03:38), and finally Ing (6:02). Beginning at 08:44 Maria shades today’s tangles.
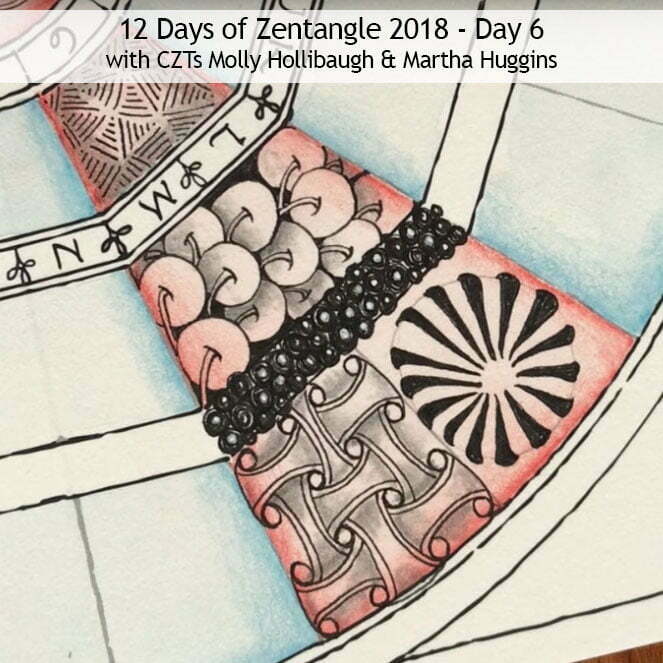
Day 6
In Day 6’s video (29:40), Maria’s daughters Molly and Martha take turns tangling and shading the next wedge. Martha begins with Swarm (1:03) and she adds shading to it.
Next for Molly’s turn she adds Pokeroot (6:04) and Bronx Cheer (11:03). Martha adds Huggins (14:33), and lastly Molly adds Pepper (24:03)
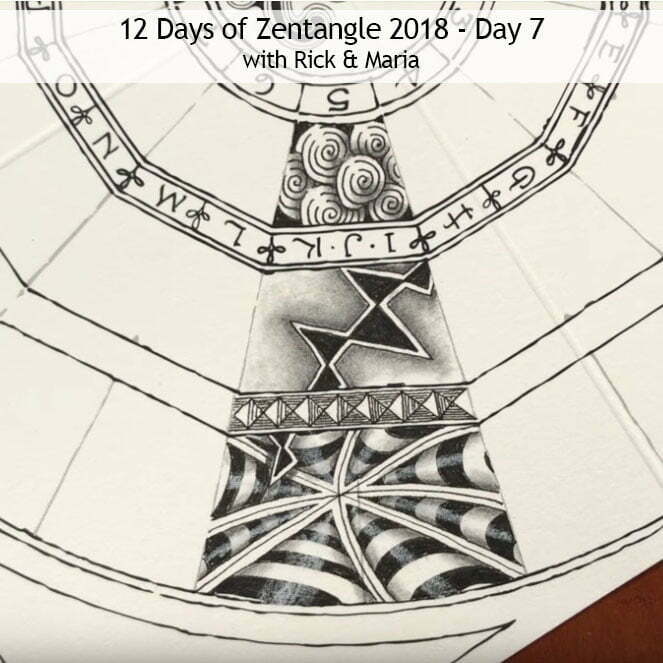
Day 7
In Day 7’s video (14:25) with Rick and Maria, Rick begins the video tangling Printemps.
In the next section he adds Rain (02:26), he skips to the outside section to add Fracas (04:09), and then adds Avreal (08:05) in the thinner border section. He adds shading to the four tangles (10:26).
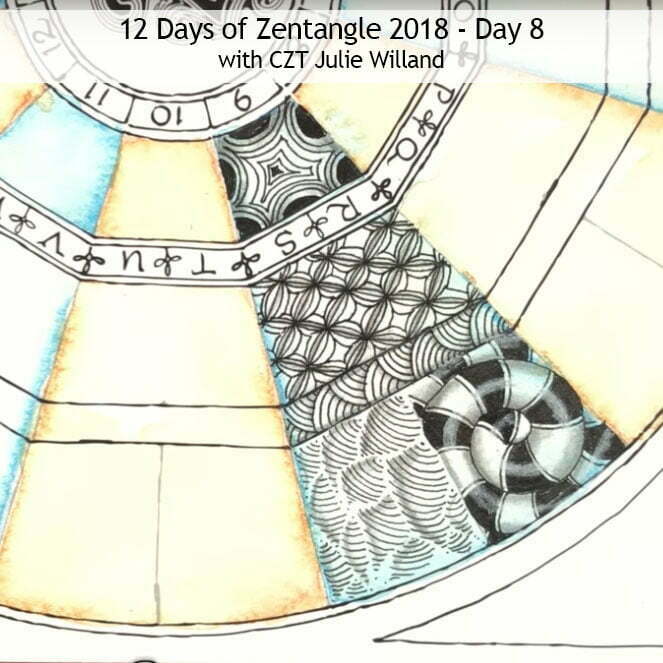
Day 8
In Day 8’s video (27:32) CZT Julie Willand of Zentangle HQ tangles the eighth wedge of the Zentangle Spinner.
Julie begins with the classic Crescent Moon (00:56), she then adds Bales (04:05), Shattuck (08:40), Marasu (10:43), and Indy-rella (16:11). Julie finishes by shading all five tangles (20:04).
Day 9
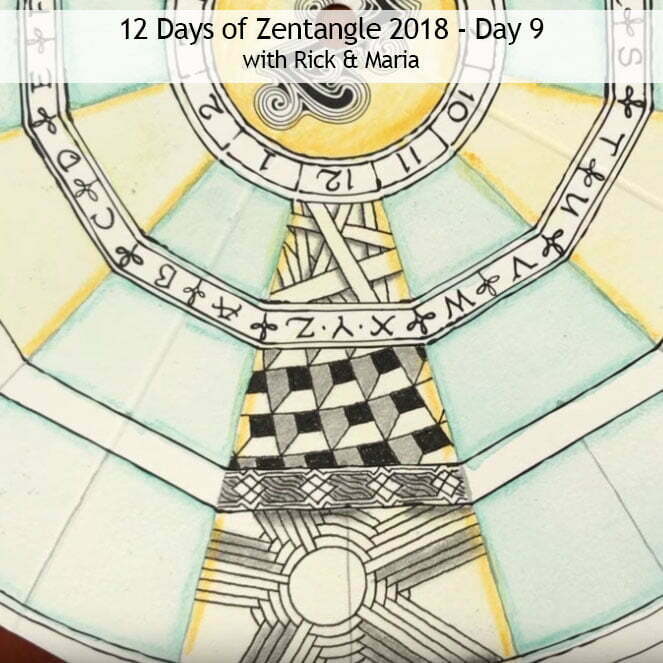
In Day 9’s video (12:32) Rick tangles the day’s wedge with Maria keeping him company with their conversational exchanges.
Rick begins with Hollibaugh (00:32), he then adds Cubine (01:31) XYP (03:54), and Arukas (06:15). Finally, Rick shades all four of the day’s tangles (09:13) to complete the ninth wedge.
Day 10
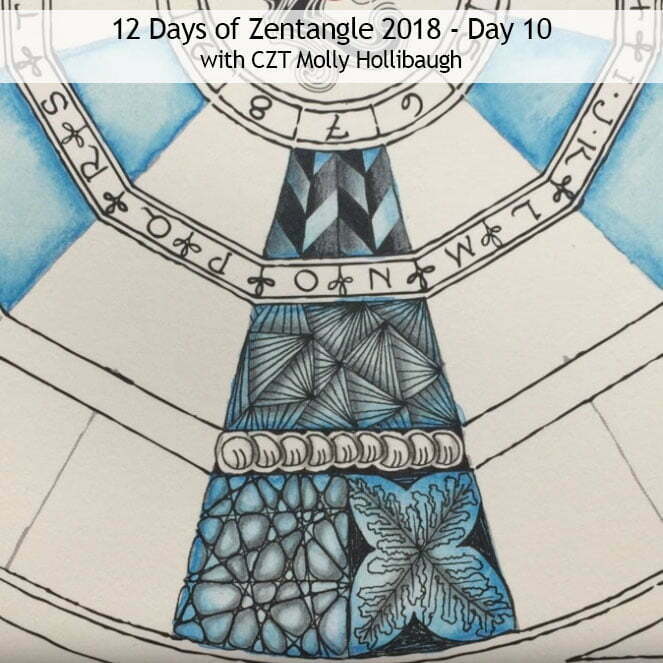
In Day 10’s video (23:23) Molly tangles today’s wedge starting with Jonqal (01:00).
From there Molly adds Munchin (05:34), Centipede (08:27), ‘Nzeppel (12:01), and Sampson (14:43) in the remaining sections. She finishes Day 10’s wedge by shading (18:41) all five tangles.
Day 11
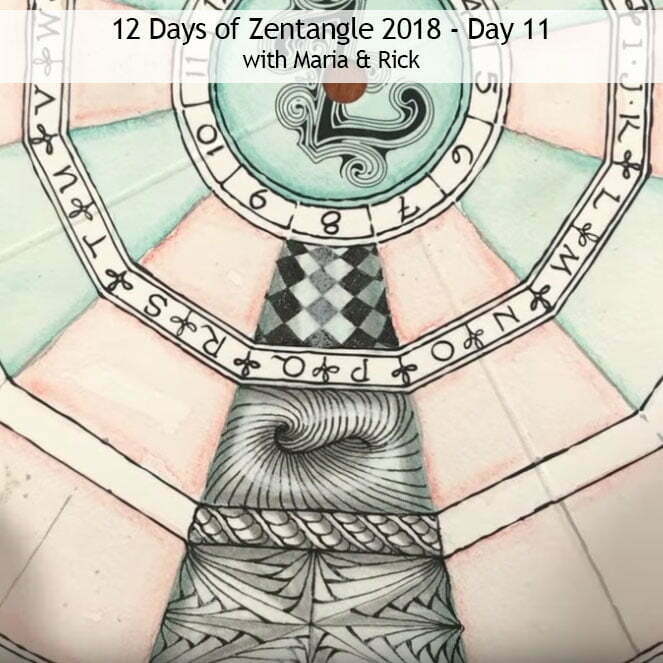
In Day 11’s video (12:35) Rick joins Maria as she begins today’s wedge tangling Knightsbridge (00:37).
Int he second section she adds Scena (1:54); in the border section she adds Purk (03:51), and in the outside section she adds Betweed (05:00).
To finish off Day 11’s wedge, Maria adds shading to all four tangles (07:42).
Day 12
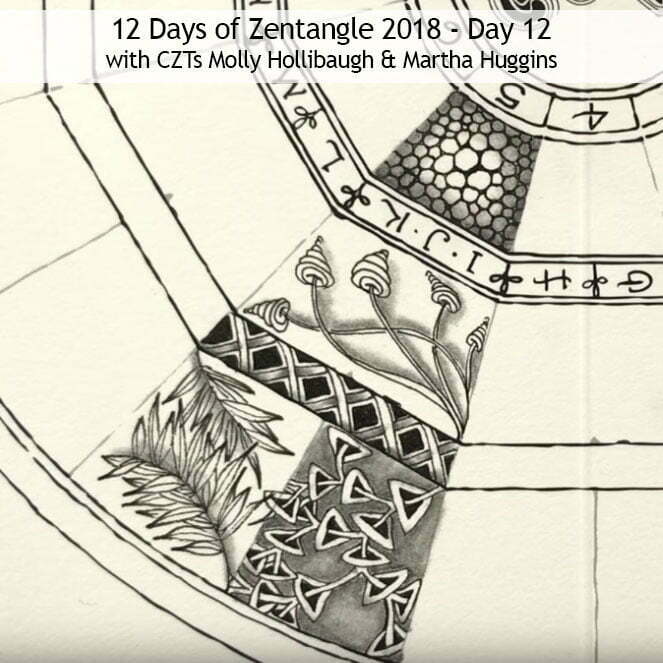
In Day 12’s video (23:54), the dynamic sisterly duo of Martha and Molly team up once again to finish up the last wedge of our Zentangle Spinner.
They begin with Tipple (00:50), then add Zinger (03:50), Vega (06:53), Verdigogh (10:10), and then Rixty (14:21). They add shading to the wedge’s tangles beginning at (18:01).
Celebration Day & how to use your Zentangle Spinner
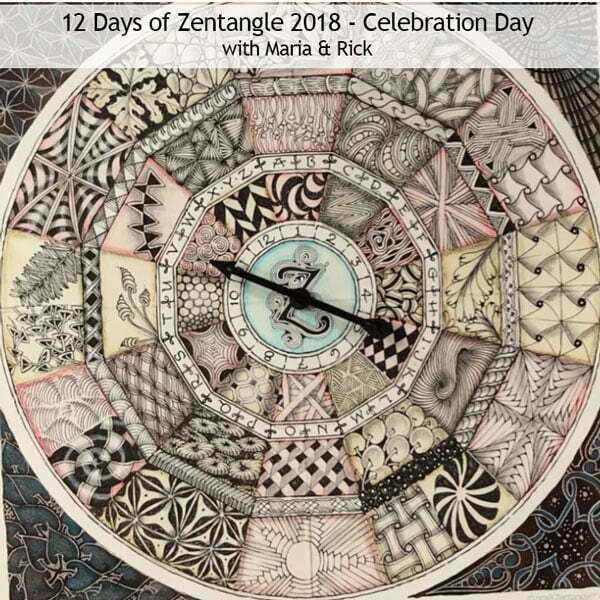
My scanner isn’t wide enough to capture the full size image, but here’s what I managed to get of my completed Zentangle Spinner.
Was it a coincidence I ended up with “716 Helioptrope” (TanglePatterns’ signature Fuchsia/magenta color) as one of my General’s Kimberly Watercolor pencils? The second color in my Project Pack #04 is 712 Light Blue.
I’m wondering about laminating … it could also be turned into a pretty stunning clock with the addition of a clock movement mechanism.
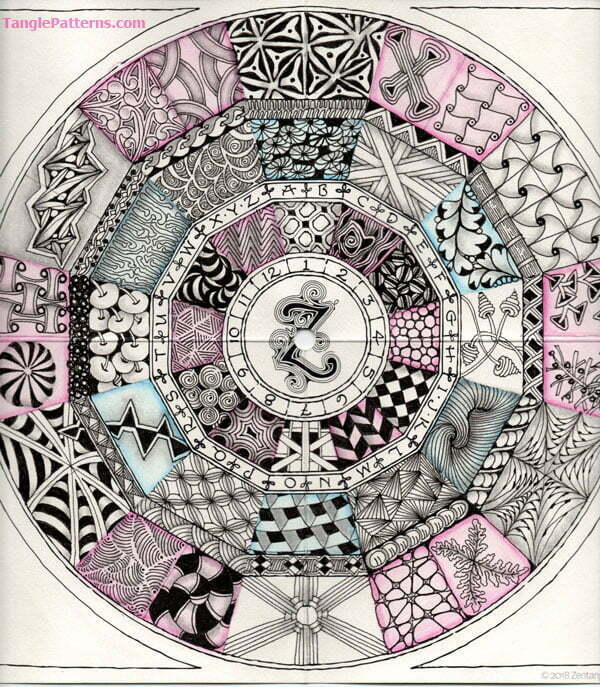
“Assemble and Play Day … join Rick and Maria as they assemble their spinner and have some fun.”
Rick and Maria assemble the Spinner by adding the game spinner to the center. Maria has also added several tangles to the outer corners of their Spinner.
They explain several ways you can use the Spinner to select tangles in addition to the arrow spinner including using the numbers and letters, AND a way to use the spinner with pages 31, 32 and 42 to 43 from the Zentangle PRIMER Vol 1.
And that’s it for the Twelve Days of Zentangle, 2018 edition!
I hope you enjoyed this recap which will also make it easy for you to find all the Zentangle Spinner videos for future reference.
Remember, each of the videos is also included on the TanglePatterns page for the relevant linked tangles. (For future reference you can locate this post on the TUTORIALS tab.)
For a complete list of Zentangle’s Project Packs click the PROJECT PACKS link in the pink alphabetic tangle menu bar.
The Twelve Days of Zentangle, Past Editions
For those who just can’t get enough! The Ghosts of Christmas past …
- 2017 — Twelve Days of Zentangle, 2017 Edition – “a stroll down Zentangle memory lane. Each day in the series we revisit moments in Zentangle history as we reminisce about the tiles, the tangles, and the techniques of the past while creating things completely new.”
- 2016 — The 12 days of 3Zs “celebrates the fun new three-sided tiles”
- 2015 — The 12 days of Christmas with Bijou
- 2013 —The 12 days of Christmas with ATCs
|
.oOo. |
|
Enhance your Zentangle experience while supporting TanglePatterns: |
|
BRAND NEW! TanglePatterns.com TANGLE GUIDE, 2026 Edition |
|
 |
The 15th Edition of the TanglePatterns.com TANGLE GUIDE is an instant-download 123-page interactive digital eBook/PDF containing over 2,300 tangles on the site from May 2010 through December 31, 2025. It's a great resource and a must-have digital tool for using the site. Visit the STORE > E-BOOKS page and help keep TanglePatterns.com going by getting your copy now! |
|
"Linda, Thank you! I was relying on too few and getting stuck after 3 years of daily working with Zentangle. This has inspired me to ‘begin again’ with renewed excitement." ~ Barbara R. |
|
| See the BOOK REVIEWS page for more details on its features and view a sample page. Note: this is a digital product to download immediately when ordering, nothing will be physically mailed to you. | |
| If you're new to Zentangle® and tangling, my TanglePatterns.com BEGINNER'S GUIDE TO ZENTANGLE is just what you need to get started. Also available en Français and en Español. | |
|
|
|
 |
This is the only Zentangle book you'll ever need: the fabulous Zentangle PRIMER Vol 1. It's your CZT-in-a-book by the founders of Zentangle®. For more about the content and to read the rave reviews, visit the BOOK REVIEWS tab. |
| Available in KINDLE format for $9.99. Spanish Edition here. Japanese Edition here. | |
| "Absolutely the best Zentangle Book yet! As an accomplished artist I used to think I did not need instruction on this art form. How wrong I was! My tangling improved by leaps and bounds after reading this book. If you think you have Zentangle down then you need this book more than ever!" ~ Kris H | |
|
|
|
|
.oOo. |
|







It really is spectacular and compliments for all that hard work. I don’t think I’ll be making one but I have watched all the videos and wonder if the idea would not be nice as a wall clock? A “spinner” in the right size could replace the plain background in quite a simple but larger clock and be very decorative. Thanks for taking all that trouble.
Thanks Faith, it was a LOT of work ! 🙂 And I also wrote above I thought it would make a pretty amazing clock, but adding it to a larger one is also a great idea.
Thank you linda for this resource all in one easily accessible spot I followed along daily but did not shade. This will make it easy to go back and refer to shading tips from each day!
Thank you very much Linda for this extra work.
Your spinner looks great!!!
I followed all 12 segments of your Spinner in order and loved the final outcome so much that I am now considering ordering one! I think I would do mine in lilac and pale turquoise, my favourite colours. Thank you for all that you do, Linda, and also to Maria and Rick.
Merry Christmas to you and all your families!
merci beaucoup j ‘adore cette idée que je vais metre en pratique des mardi c’est tres jolies merci de vos merveilleux partages’ j ‘adore le Zentagle cela me detend beaucoup. je vous souhaite de merveilleuse fetes de de fin d année bise amitiés yvette du midi de France
Google Translate: thank you very much I love this idea that I will practice Tuesday is very pretty thank you for your wonderful sharing ‘I love the Zentagle it relaxes me a lot. I wish you wonderful holidays of end of the year bise friendships yvette du midi de France
merci pour tout vos beau partage. joyeux noel
thank you for all your beautiful sharing. Merry Christmas
I had a great time following the daily tangles in this Project Pack. I wasn’t in a position to buy it so I made my own. Fortunately I had a pad of mixed media paper on hand and made a sectioned circle with a compass and ruler. I was so happy with the results, but when I scanned the image, the very pale colors I had used didn’t come through. I colored it in GIMP, the free Photoshop analog. See here; https://gotthedoodlebug.blogspot.com/2018/12/december-15-2018.html
Thank you so much for your hard work every day, I follow your page religiously and always find new, challenging ideas to keep me inspired.
Thank you Linda for posting the recap. Love that it will be very easy to find now. I did the spinner in multi colors. I added the name of each tangle done on the appropriate spot on the back, so now when I can’t remember the tangle name it will be easier to find. I plan to laminate mine and use at classes as a fun “tangle picker”.
Thank you Linda for taking the time to put this recap together. This will be a great, easy to find resource as a refresher to creating a spinner. My appreciation also goes to you for all your continuous, hard work in keeping this valuable resource available to all the tanglers around the world.
This is wonderful that you put the whole 12 Days of Zentangle 2018 on here. I’m still working on the last 2 days and I’m having fun with it. But I didn’t want to buy anything (I’m not buying much this winter but using what I have on hand). Plus, I just wouldn’t have room for this spinner. So, I got out three 4″ square tiles and divided up each into 4 quarters and concentric circles. Then I put the tangles into this in the same sequence (well, pretty much anyway LOL ) They’ve turned out really nice.
After a 7-month hiatus, this series got my attention again, and I feel like a part of my day has come back to life. Thank you.
I have REALLY enjoyed this project pack, it’s got me right back into tangling again. However I have a question after totally ruining my work with the white chalk pencil. I don’t know if anyone else has found this but all it does is take the surface off the tile. I abandoned the pencil I got with a zentangle kit and waited 5 days for a £13 Faber Castell soft white chalk pencil to arrive in the post. Same thing happened. No white chalk, just a ruined tile. Such a shame after so much enjoyment. Anyone else had similar problems and any good suggestions? Maria’s pencil leaves a beautiful white highlight but I looked it up and the cost upwards of £40 Just for the one white pencil.
Hi Henny, sorry to hear you had such a disappointing problem.
I can’t imagine what kind of pencil costs £40 when you can get 2 of the General Pencil’s White Charcoal pencils for less than $5 on Amazon.
I haven’t had the issue you speak of but perhaps others can jump in with some advice. I find that scribbling a bit on another sheet of paper can take the “rough edges” off a pencil before use, and the charcoal pencils do have to be used with gentle pressure.
Hi Linda thanks so much for getting back to me. I wish I could leave a screenshot of my Amazon results here so I can show everyone how expensive art supplies are in the UK! Although I do beg your pardon, it was a pack of two General’s white pencils that costs £39.99. I found a single General’s white for £23. My white faber castell cost £12 I had to wait until I was paid on Friday so I could order it. Thanks so much for the tip. I’ll try going gentler. Until then I’ll put a General’s charcoal pencil on my Christmas list for next year. And be a very good girl. ???
Or you could just order from Zentangle, they’re only 75 cents each (golf-size pencils) I believe.
Are the zentangle individual pencils made by General? It was the white pencil I got in my kit that was too hard for the cottony paper and hence prompted my search.
Yes, they’re from General Pencil. Maybe try working down the white charcoal a bit to soften it up??
Hi Linda, that’s a good idea. I’ll give it a go. Thank you!
Thank you, Linda, for doing this for us. With it being such a busy time of year, I always find it hard to participate. You are such a gift to the Zentangle community! Merry Christmas to you and yours. May your 2019 be filled with love, joy and laughter.
Thanks so much for your wishes, Jill. Looking forward to 2019 with great hopes for all.
Happy New Year, y’all! Just dropping in to share this link with you. If you are new to watercolor pencils you might enjoy checking out this new article from JetPens called How to Use Watercolor Pencils. Helpful tips there. “See” you again soon!
love this ! am returning to ZT after a too long break dye to work and life. I think I had seen a few years ago it was possible to do the ink first and then water color ? Doesn’t drawing over the watercolor damage the pens? I’ve also found that watercolor paper is also hard on them ?
Maybe I missed something! Thank you !
Just saw your post about JetPens article on using watercolor pencils! Thanks, Linda – another useful treasure.