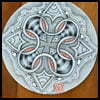
 VIDEOS RETIRING December 30, 2026.
From the Zentangle newsletter introduction for Project Pack 20:
Loved by both new and seasoned tanglers, Zentangle Project Packs are a curated collection of supplies that pair with a series of online tutorials. Each series has a theme that overlaps specific tangling techniques with philosophical musings. Tangle along with Rick, Maria, Martha, Molly and others from Zentangle HQ as they guide you through each lesson, unleashing the inner artist in all of us.
In our previous Zentangle Project Pack, we studied the concept of Zentomology, the system of categorizing the various characteristics of tangles and their relationships with other tangles within the study and practice of the Zentangle Method. In this very playful approach, we learned about and explored tangle genuses, which are categories of tangles with common characteristics. In Project Pack No. 20 we will take a deep dive into the tangle genus of blossoming tangles. Join us on yet another tangled journey, as we create beautiful compositions with carefully curated tools featuring these graceful, exciting tangles.
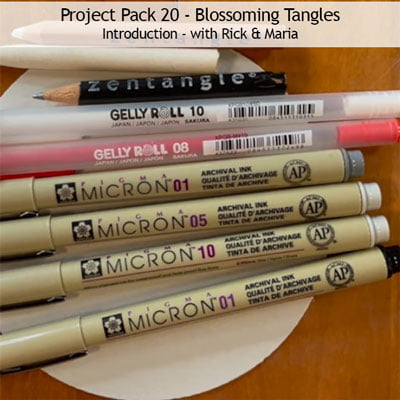
SUPPLIES: This Project Pack is available here ($36.95) in the zentangle.com store and it’s a convenient way to get all the supplies for the project. However, the first video reviews the items in the Project Pack and you might discover you have suitable alternatives in your own Zentangle supplies:
- One Sakura Micron 01 pen, Black
- One Sakura Micron 05 pen, Light Gray
- One Sakura Micron 10 pen, Light Gray
- One Sakura Micron 01 pen, Dark Gray
- One Sakura Gelly Roll 08 pen, White
- One Sakura Gelly Roll 08 pen, Red
- Zentangle graphite pencil
- Zentangle General’s white charcoal pencil
- tortillions (2)
- Zendala tiles: Gray (3), Renaissance Tan (3), White (6)
The following chronology is a summary of the videos for this Project Pack with links to the individual videos. Either click the Day #’s title link or the image itself to view the full video on YouTube.
It isn’t necessary to watch the videos in sequence, but it will be very helpful for you to watch the Introduction video first.
CZT Molly Hollibaugh recommends we watch Project Pack videos completely through once before beginning our tiles:
“You’re going to have a little more confidence, you’re going to be a little more aware of what’s happening next. Then you might try something different, you might explore it in a different way”.
QUICK LINKS TO DAILY SUMMARIES
Jump to:
Day 1 – Day 2 – Day 3 – Day 4 – Day 5 – Day 6 – Day 7 – Day 8 – Wrap Up
Introduction
In the introductory video (05:13) – Rick & Maria introduce this Project Pack developing the concept of Zentomology introduced in Project Pack 19. Project Pack 20 focuses on Blossoming Tangles.
Step 1: At 00:48 – After introducing themselves and this Project Pack, Maria says, “So blossoming tangles doesn’t necessarily mean it looks like a flower, but it acts like a flower … and what I found out is you can take a regular tangle and make it into a blossoming tangle.” Rick adds “and we’re actually going to do some of that in this project”.
Step 2: At 01:11 – We take a look at the supplies and tools contained in this Project Pack (see Supplies list at top of this page).
Step 3: At 03:01 – “What are some examples of blossoming tangles?” Showing a variety of tiles from around their house, Rick notes “a lot of times they will radiate out from the centers”.
Step 4: At 04:10 – “These just seem to float”, they don’t need a string such as for example Crescent Moon does.
Step 5: At 04:40 – They both explain: “We’re really getting back to basics, really understanding these difference strokes and simple strokes and to play with that little bit of accent of red. And appreciating the guest of honor in the middle.”
Day 1
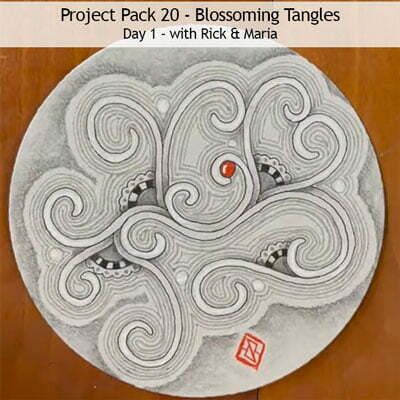
In Day 1’s video (20:51) – With Maria keeping him company, Rick tangles Hollis and Moon Pie on a Gray Zendala tile.
Step 1: At 00:30 – After a brief introduction, Rick begins to tangle Hollis on a Gray Zendala tile using the Black Micron 01 as he explains the inspiration behind this tangle and the reason for its name.
Step 2: At 02:18 – He explains that each one of the curves goes the opposite way of the one before it, “the one it’s attached to”.
Step 3: At 03:11 – Rick and Maria talk about how the ends of the curves can morph into anything you want, Mookas for example, “anything with a nature base”.
Step 4: At 04:15 – “You can see why this is a blossoming tangle because it just starts in the middle and it can grow basically in any direction you want”.
Step 5: At 04:34 – He picks one of the curved ends and puts an orb in it.
Step 6: At 04:58 – Changing to the Light Gray Micron 10, in a few places around the tile he adds Moon Pie to the angles where the stems meet. After he adds the Crescent Moon-inspired element, he changes back to the 01 and adds a row of Knightsbridge.
Step 7: At 06:23 – With the Gray 10, he adds a row of perfs then auras that with the Black 01.
Step 8: At 07:14 – With the Gray 10 he then adds a close aura all around the edges of the Hollis.
Step 9: At 08:51 – Next, using the Gray 05, he adds another aura around the previous one.
Step 10: At 09:22 – Maria says, “This is what I do when I can’t think of what to do next, so I just keep doing auras here and there until it comes to me what tangle I want to do next.”
Step 11: At 10:45 – He begins to add orbs, “finding a few places here that would like an orb”.
Step 12: At 12:05 – Now that the orbs have been added, he goes back in with the Gray 10 and adds another layer of auras, adding “a supportive texture”.
Step 13: At 13:18 – Switching to the Gray 05 he adds one more layer of thinner auras.
Step 14: At 13:50 – With the Red Gelly Roll, he adds ink to the inside of some of the orbs while noting “these pens work well when they’re vertical but they don’t photograph” (it’s a little difficult to see what he’s doing).
Step 15: At 14:42 – He adds shading with the graphite pencil to the Moon Pie and where the stems overlap.
Step 16: At 16:17 – With the General’s White Charcoal pencil, he adds contrast on the Hollis including inside “the extra orbs”.
Step 17: At 17:31 – He goes back into the “nooks” where the Hollis meets and adds some graphite for emphasis.
Step 18: At 18:18 – As Rick adds a highlight of White Gelly Roll on the Red orb Maria says, “I love that you took a tangle that’s not considered a blossoming tangle and made it blossom by starting in the middle and then heading out.”
Step 19: At 18:49 – For contrast he decides to add an angular chop instead of his usual one with the Red Gelly Roll.
Step 20: At 19:11 – He decides he wants to add a little bit more and adds a graphite aura like a drop shadow around the perimeter. He then softens and blends the graphite frame into the background with the tortillion.
Day 2
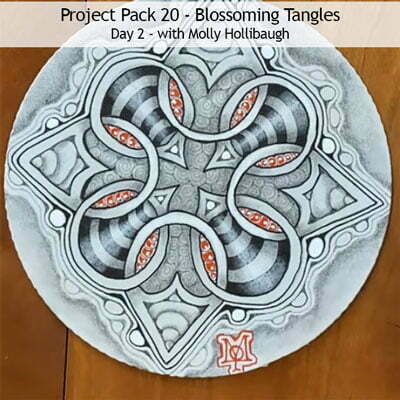
In Day 2’s video (54:53) – In today’s video Molly creates a large Waybop then fills it with Striping and Printemps on a Gray Zendala tile.
Step 1: At 05:25 – After introducing herself, talking briefly about the tools in this Project Pack, about blossoming tangles and guiding us through the first step of the Zentangle Method™ — gratitude — Molly explains we’re going to be tangling Waybop on our gray Zendala tile.
Step 2: At 05:40 – She notes that Waybop does not start with pencil but “I like to put a string in for me to work from”, she begins with making a large graphite orb in the middle of the tile.
Step 3: At 06:16 – Using the Gray 05 Micron she adds eight seed shapes around the circumference of the orb.
Step 4: At 09:01 – She adds “some take off and land strokes” connecting the pairs of seeds on the inside of the orb.
Step 5: At 10:03 – She adds similar strokes around the outside, connecting the opposite pairs of seeds.
Step 6: At 11:21 – She adds auras to the curves she’s just added around the outside.
Step 7: At 12:11 – She adds similar auras to the curves on the inside.
Step 8: At 12:51 – She extends the outside rings by adding slightly pointed shapes to each.
Step 9: At 14:38 – She connects the inside rings by aligning the inside curve, then adding a small triangular connecting stroke to the outside.
Step 10: At 16:12 – Switching to the Dark Gray 01 Micron, she fills in the original seeds with “peas in a pod”.
Step 11: At 18:30 – With the Black Micron 01 she adds the drama tangle Striping to one of the open spaces.
Step 12: At 23:02 – Switching to the Gray 05 again she adds the texture tangle Printemps to another of the spaces.
Step 13: At 26:48 – With the Dark Gray 01 Micron, she adds an inner aura to the large spaces left then fills their spaces with large “peas in a pod” orbs and filling in the spaces (“interstices”).
Step 14: At 29:57 – She repeats this in the four inner spaces remaining, adding an orb to their centers.
Step 15: At 31:00 – She adds graphite shading, beginning around the edges of the Printemps spaces then blending it with the tortillion. She repeats this in the spaces filled in Step 13.
Step 16: At 34:50 – “I’m going to start to add more layers of pen,” she goes over some of her original Waybop strokes with the darker Gray pen “to darken them up … adding love.”
Step 17: At 36:53 – She adds graphite shading to the Striping.
Step 18: At 39:10 – She adds shading to the “over-under” areas of Waybop.
Step 19: At 41:05 – She adds General’s White Charcoal pencil highlights and smooths it with the second tortillion (reserved for white charcoal).
Step 20: At 42:16 – Back to the Black Micron 01, she goes over the original Waybop strokes.
Step 21: At 44:39 – Now it’s time to “play with the Red”, Molly uses the Red Gelly Roll pen to add ink inside the small orbs created in Step 10 but leaving a small halo, not filling each completely.
Step 22: At 47:15 – With the White Gelly Roll, Molly colors in the inner orbs created in Step 14.
Step 23: At 47:48 – Using the white charcoal pencil, she adds a highlight stripe down the center of the Striping areas and softens it with the second tortillion.
Step 24: At 50:12 – Using the Black Micron 01 she cleans up any areas that have “lost their edge” from the white charcoal.
Step 25: At 50:39 – Making sure the red ink is dry, Molly adds a dot of White Gelly Roll highlight on each.
Step 26: At 54:05 – After adding her chop in Red, Molly shows us her finished tile after she’s “played around with it for a while”.
Day 3
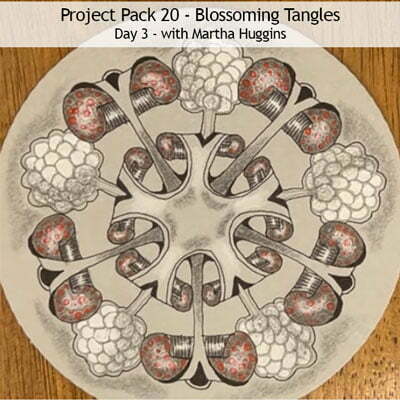
In Day 3’s video (42:39) – Martha introduces Wyfore, a Zentangle-original named for her son Wyatt, and she tangles it on a Gray Zendala tile along with Bronx Cheer.
Step 1: At 00:43 – After introducing herself and explaining she’s going to demonstrate a new tangle — “cleverly named in honor of one of my kids, is called Wyfore, for my son Wyatt” — Martha demonstrates the basic elements of Wyfore on a Bijou tile.
Step 2: At 03:40 – Selecting a Gray Zendala tile and the black Micron 01, Martha begins by creating some “anchor” lines by placing the tip of her index finger in the center of the tile and drawing a stroke that mirrors the tip of her finger, creating a U shape. “I’m going to do this five times around the center of our tile.”
Step 3: At 05:33 – She begins adding the first strokes of Wyfore using the base of the U shapes and growing them out of that space. She then completes the scrolls of the first one and adds the remaining four around the tile.
Step 4: At 08:18 – Moving back to the original U strokes, she adds an inward curve to each line such that it touches the long stem of the Wyfore.
Step 5: At 09:50 – Now she connects the small scrolls that link up each larger stem, adding “a little divot” to the top cap.
Step 6: At 11:37 – Next she adds “some embellishing lines, we’re just going to start to bring this to life”, as she adds auras to the Wyfore.
Step 7: At 12:25 – She adds “accentuating marks” at the top of each of the original large Wyfore including some line weighting, sparkle, and auras.
Step 8: At 15:33 – “I’m going to do something similar to this inner ring of Wyfore,” as she adds auras and sparkle to each.
Step 9: At 16:33 – Martha changes to the Light Gray 05 pen to add Bronx Cheer with stems growing out of the “divots” she created on the small inner Wyfore.
Step 10: At 19:39 – She switches to the White Sakura Gelly Roll 10 to fill in the berries, “not quite all the way to the edge”, leaving the original line untouched.
Step 11: At 22:19 – Next she uses the Dark Gray Micron 10 “to add some texturing backgrounds”, adding Tipple orbs to the both the large and small Wyfore.
Step 12: At 27:07 – With the Black Micron 01 Martha adds rounding at the base of the Wyfore stems, emphasizes the “divots” with a filled in aura, and adds an aura around the Bronx Cheer berries.
Step 13: At 30:20 – Martha adds color to the Tipple orbs with the Red Sakura Gelly Roll 08.
Step 14: At 33:31 – Making sure the Gelly Roll ink is completely dry, Martha adds shading with the graphite pencil and highlights with the General’s Charcoal Pencil. She uses the tortillions to smooth them out and adds her chop.
Day 4
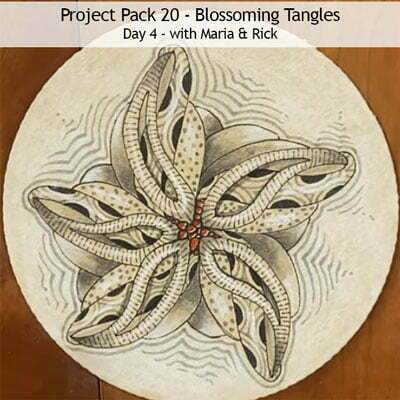
In Day 4’s video (26:27) – With Rick keeping her company, Maria tangles Ellish with Crescent Moon and Doodah on a Renaissance Tan Zendala tile.
Step 1: At 00:53 – Maria chooses a Renaissance Tan Zendala tile and begins to tangle Ellish using the Black Micron 01. She starts by placing a reference dot “so that I could focus”.
Step 2: At 01:40 – She creates five “fish shapes” spaced around the tile using the S stroke and a C stroke.
Step 3: At 02:10 – She adds a thick inner aura inside each shape.
Step 4: At 03:10 – She adds another shape behind the first “fish/paisley” shapes on all five.
Step 5: At 05:00 – She adds another curved take-off-and-land stroke on the left side of each.
Step 6: At 06:01 – She goes back to the right side of each and adds another curve.
Step 7: At 06:46 – She connects the elements together with a curved stroke between each.
Step 8: At 07:40 – She switches to the Gray Micron 01 and adds Doodah inside the Ellish elements.
Step 9: At 11:00 – She switches back to the Black Micron 01 to add the “ladybugs” of Crescent Moon inside the next elements, then switches back to the Gray Micron 10 to add the auras. She repeats this inside all five similar spaces.
Step 10: At 13:58 – With the Gray Micron 10, she adds texture with perfs inside the next space.
Step 11: At 14:42 – With the Black Micron 01, she adds larger orbs in the space in the center of the tile.
Step 12: At 15:28 – With the Red Sakura Gelly Roll, she fills in one side of the orbs she just added.
Step 13: At 16:06 – Maria begins to add graphite shading to the tile and smooths it out with a tortillion.
Step 14: At 18:37 – She adds highlights with the General’s White Charcoal pencil and blends it out with another tortillion.
Step 15: At 19:58 – She adds a layer of White Charcoal around the outside of the Ellish blossom to the edge of the tile.
Step 16: At 20:54 – With the light Gray Micron 10, she adds an aura around the entire blossom, then adds partial auras outside of that.
Step 17: At 23:04 – She uses the Gray 10 to touch up some lines and add a bit of shading.
Step 18: At 24:08 – Maria adds her chop.
Step 19: At 25:30 – They show us some other tiles from when they were designing their tiles before the Project Pack.
Day 5
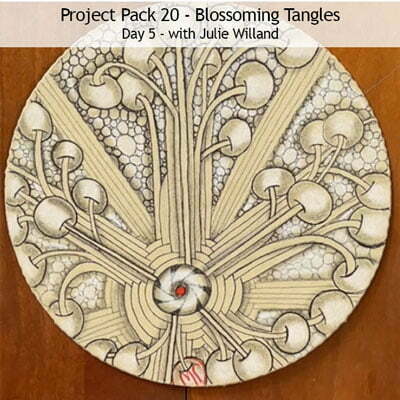
In Day 5’s video (38:29) – Julie tangles Rumpus, Pokeroot, Arukas and Tipple on a a Renaissance Tan Zendala tile.
Step 1: At 01:39 – After introducing herself and the tools in this Project Pack, Julie selects a Renaissance Tan Zendala tile and the Black Micron 01 to begin the tangle Rumpus.
Step 2: At 02:30 – She adds an off-center orb “about the size of a nickel”, “and if you want to watch me first because this is a little combination of two different tangles”. She adds a radiating stroke coming out from the orb, adds an aura to that and tops them with Pokeroot.
Step 3: At 03:57 – “I’m going to repeat this, I’m going to be working with five spokes going all the way around.”
Step 4: At 05:29 – “I’m going to go back to the center orb and I’m going to aura the orb, drawing behind each of the spokes and them I’m going to build off of my Pokeroot.”
Step 5: At 08:40 – “Then once you’ve gone all the way around your tile, you’re going to aura that center orb again and then we’re going to add some more Pokeroot.”
Step 6: At 10:34 – Julie changes to the Gray Micron 05, adds another pair of lines growing out of the middle of the orb’s auras, then continues with Arukas, alternating auras between the orb and the straight lines.
Step 7: At 13:19 – She switches back to the Black Micron 05 to add texture with Tipple in the largest open spaces at the “top” of her tile.
Step 8: At 14:36 – She changes to the Gray Micron 01 to add Tipple in the next section.
Step 9: At 17:00 – Changing to the Gray Micron 05, she continues adding Tipple in the next section.
Step 10: At 19:21 – She chooses the Red Sakura Gelly Roll to add a red orb in the center of the original orb, then with the Light Gray 01 she adds a peppering fragment taking off from the red orb.
Step 11: At 20:28 – “Now we’re going to shade our tile” as she adds graphite to the Pokeroot then softens it with a tortillion.
Step 12: At 25:03 – She adds white highlights with the General’s White Charcoal Pencil and softens it with another tortillion.
Step 13: At 26:51 – She adds graphite at the base of her original Rumpus stems and anywhere the stems overlap, along the edges of the Tipple areas, around the outside auras around the center orb, just inside the edge of the center orb, and around the red orb in the middle.
Step 14: At 29:45 – With the tortillion she softens all the graphite she’s just added.
Step 15: At 31:31 – She adds a highlight on the center orb using the General’s White Charcoal Pencil and softens it with the tortillion. She does the same with the areas of Tipple and shares some personal reflections about Zentangle memories and her first and current pregnancies while she works on the tile.
Step 16: At 35:04 – With the Black Micron 01, Julie restates some of the original strokes that have become lighter with the shading/highlighting.
Step 17: At 36:37 – She adds her chop with the Red Gelly Roll.
Day 6
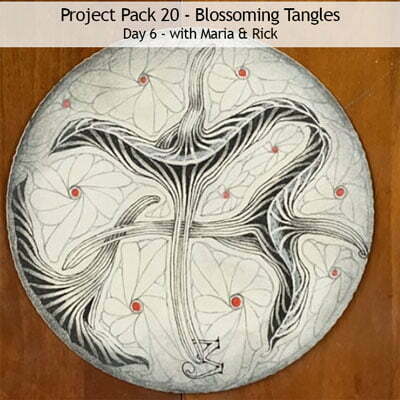
In Day 6’s video (32:13) – With Rick keeping her company, Maria tangles Mysealiam and a Well-type fragment on a white Zendala tile.
Step 1: At – After introducing themselves, Maria explains she’s going to take us on a Mysealiam journey and that it was “named after or inspired by one of our grandchildren, this one is for Liam who is all about the sea”.
Step 2: At 01:11 – She demonstrates on a Renaissance Tan tile the type of curve Mysealiam begins with.
Step 3: At 01:52 – She uses the Black Micron 01 to begin creating Mysealiam on the White Zendala tile.
Step 4: At 02:15 – “Using the technique for the tangle Scena, we’re going to weight the end”.
Step 5: At 02:35 – “We’re going to aura this line all the way up and then we’re going to weight it again.” She repeats this, alternating sides of the original line.
Step 6: At 04:52 – She moves further down the outside line to add shorter similar auras with weighted ends until she reaches the end of the “smirk” and then she repeats that sequence on the other side.
Step 7: At 07:15 – She turns the tile to work on the other side of the “smirk”.
Step 8: At 07:24 – “We’re going to do a similar type thing, except we’re not going to go all the way to the smile.”
Step 9: At 10:40 – With both sides now completed, Maria turns the tile and adds another “smile” almost touching the first one.
Step 10: At 10:55 – “We’re going to do the same thing but we’re going to go behind here.” Maria repeats the same sequence on this second Mysealiam.
Step 11: At 14:17 – She begins to add another Mysealiam right along the edge of the tile.
Step 12: At 16:00 – Maria changes to the Gray Micron 05 and auras around the spaces.
Step 13: At 17:06 – In each one of the spaces just created she adds “a good-sized orb”.
Step 14: At 18:34 – Using the take-off-and-land technique, “I’m going to swing some lines off of those orbs in 9-shape”, similar in fashion to the tangle Well.
Step 15: At 20:48 – “We’re going to add more to it, we’re going to swing some curves off of those lines we just put in”, filling all the spaces in with petal shaped curves.
Step 16: At 23:13 – Maria adds an aura inside the orbs.
Step 17: At 23:36 – With the Red Sakura Gelly Roll, she fills in the middle of the orbs.
Step 18: At 23:55 – With the graphite pencil Maria adds shading to the Mysealiam, softening the graphite with a tortillion.
Step 19: At 27:15 – Maria adds white over the background with a General’s White Charcoal Pencil, “so the Mysealiam pops out even a little more”.
Step 20: At 28:23 – She edges the tile with graphite and softens it with the tortillion.
Step 21: At 29:40 – Maria adds her chop.
Step 22: At 20:41 – She decides to add some White Charcoal Pencil on the opposite side of the Mysealiam to where where had placed the graphite shading.
Step 23: At 31:35 – Maria shows us her original prototype tile for this lesson.
Day 7
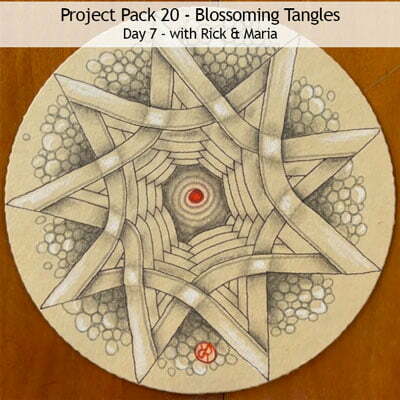
In Day 7’s video (19:34) – With Maria keeping him company, Rick tangles Auraknot on a Renaissance Tan Zendala tile.
Step 1: At 00:22 – Rick explains he’s going to tangle Auraknot on a Renaissance Tan Zendala tile, “And this is a great example of a blossoming tangle that just build on itself.” He begins with the Black Micron 01.
Step 2: At 00:37 – He puts his finger in the middle of the tile to use “as an orientation and I’m going to make these little pyramids off to the edge right above my finger”. He rotates the tile and keeps adding “pyramids” creating a zigzag line around the perimeter of the tile, “until I run out of space”.
Step 3: At -1:38 – “With Auraknot it doesn’t matter if you have an even or odd number, you just have these shapes.” He connects two adjacent points for a curve that connects the pyramids on either side of the center one. “As soon as you do that, you’re going to aura it,” as he uses the width of his pen as a reference for the width of the aura.
Step 4: At 02:29 – From the original pyramid, he draws behind and connects it to the adjacent pyramid.
Step 5: At 02:35 – “And then just like the first one, we’re going to aura it and when we come to one that already exists, we’re going to draw behind it.”
Step 6: At 02:53 – “And this is like a rinse and repeat,” as he continues connecting the pyramids and aura-ing the connecting line around the tile.
Step 7: At 03:29 – “On the final one you’re going to go behind two.”
Step 8: At 03:52 – Next we “find the first one, you can tell what the first one was because there’s nothing over it,” Maria point out “it’s one continuous line”. “And now we’re going to aura that,” as he adds slightly narrower auras all the way around.
Step 9: At 04:52 – We repeat the sequence around the tile, again making the auras slightly narrower than the ones before.
Step 10: At 05:39 – He explains how this tangle was named Auraknot.
Step 11: At 06:48 – Rick changes to the Gray Micron 10 and adds a close aura around the edge of the first round of curves.
Step 12: At 07:56 – With the Red Sakura Gelly Roll 08, he adds a large orb in the middle of the tile using lots of ink. Then he immediately switches back to the Gary Micron 10 and outlines the edge of the still-wet red orb then spirals off into a Printemps and the red and gray ink blend together then the red gradually fades.
Step 13: At 09:21 – He changes to the Light Gray 05 pen and adds Tipple orbs around all the outside sections although he calls them perfs and explains how they got that name.
Step 14: At 11:19 – “It’s time for some graphite” … and a tortillion.
Step 15: At 13:01 – “Maria taught me this cool technique,” says Rick and Maria responds, “So you find where a line or a ribbon goes behind something and you just put a line of graphite right to the edge … and then you go in with your tortillion and you pull the graphite away from the middle.”
Step 16: At 14:02 – Rick goes back in and adds more graphite as well as using the tortillion to add light shading.
Step 17: At 15:26 – “Now I want to lift the Auraknot off the paper, to do that I’m going to lay down a really heavy bunch of graphite right up next to it on the inside.”
Step 18: At 16:07 – After he’s finished the center, he moves to the outside “corners” and repeats adding heavy graphite and softening it out with the tortillion.
Step 19: At 17:04 – He adds highlights with a General’s White Charcoal Pencil.
Step 20: At 18:22 – With the Red Gelly Roll he adds his chop in one of the Tipple orbs.
Step 21: At 18:49 – He decides to add “a little bit of sparkle on those inner ones,” adding more White Charcoal on the inner portions of Auraknot.
Day 8
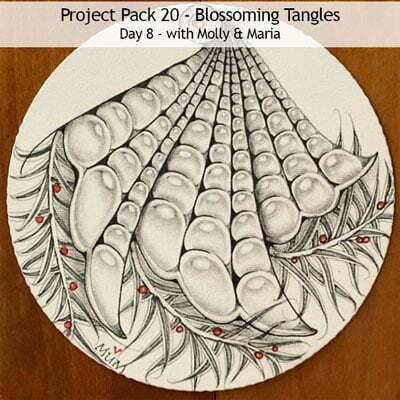
In Day 8’s video (25:53) – Maria and Molly “tag team” with Molly beginning today’s White Zendala tile with Drawings and Maria coming in later to add Verdigogh.
Step 1: At 00:44 – Molly uses the Gray Micron 05 on a White Zendala tile and begins the tangle Drawings starting with some nested orbs to create “a little medallion for us to anchor our Drawings”.
Step 2: At 01:50 – She adds four long take-off-and-land S-shape strokes fanning out down the tile.
Step 3: At 02:22 – Starting about the middle of an S-stroke, she adds “waves” connecting it to the end of the next one. Each one has three scallops in it “but you could do more”.
Step 4: At 03:10 – She connects the points of each wave back to the orb medallion.
Step 5: At 03:50 – She “smushes some orbs” into each section.
Step 6: At 05:10 – Still using the Gray 05, Molly fills in the interstices between the orbs.
Step 7: At 06:15 – She adds an aura around the edge of the scallops.
Step 8: At 06:48 – With the graphite pencil Molly adds some shading.
Step 9: At 09:26 – After she softens the shading with a tortillion, Molly uses the graphite pencil again to add “some dramatic darkness here and there” on the edges of the highlights on each orb.
Step 10: At 09:39 – With the Black Micron 01, Molly goes back over some of the lines “to create drama”. She fills in some of the interstices too.
Step 11: At 11:31 – With the Red Sakura Gelly Roll Molly adds “a little red inside that medallion” and then a touch of White Sakura Gelly Roll on top.
Step 12: At 11:56 – Molly goes back with the graphite pencil to “really really exaggerate how dark it is”.
Step 13: At 12:44 – She adds some highlights with the White Sakura Gelly Roll and continues to add small touches of graphite shading.
Step 14: At 13:33 – Maria comes in and begins to add “a form of Verdigogh that I probably haven’t taught yet” using the Gray 05 Micron. At the edge of the first section of Drawings, she adds the spine then several “needles” coming off it on each side and fills them in.
Step 15: At 15:19 – She adds an aura on both sides of each needle.
Step 16: At 16:15 – She adds the next layer of Verdigogh, “we going to draw behind the ones that we first drew”, then she adds the auras to each of the new needles.
Step 17: At 16:47 – She adds a third layer behind the second.
Step 18: At 17:30 – Maria changes to the Black Micron 01 and redefines the first two strokes on each needle.
Step 19: At 18:53 – She redefines the edges of the original spine.
Step 20: At 19:09 – At the edge of the second section Maria adds more Verdigogh following the same procedure as the first.
Step 21: At 20:15 – At the edge of the third section she adds more Verdigogh.
Step 22: At 22:13 – Maria adds shading to her Verdigogh with the graphite pencil and softens it with a tortillion.
Step 23: At 23:05 – She adds “my little bits of red”, leaving small highlights in the “berries”.
Step 24: At 23:59 – She outlines the berries with the Black Micron 01 then adds her “mum” chop.
Step 25: At 25:29 – They show us one of their prototypes for this tile.
Wrap Up
In the final video in the Project Pack 20 Series (06:25) – Rick & Maria review all of the tiles we’ve done in this Project Pack and show us some prototype tiles made to prepare for the Project.
Step 1: At 00:54 – After introducing themselves Rick and Maria begin to review all of the tiles we’ve done in this Project Pack beginning with Rick’s Hollis tile from Day 1.
Step 2: At 01:08 – Molly’s Waybop tile from Day 2 and another example.
Step 3: At 01:56 – Martha’s Wyfore tile from Day 3 and further examples.
Step 4: At 02:26 – Maria’s Ellish tile from Day 4 and further examples.
Step 5: At 03:25 – Julie’s Rumpus/Arukas tile from Day 5.
Step 6: At 04:02 – Maria’s Mysealiam tile from Day 6 and her original prototype.
Step 7: At 04:33 – Rick’s Auraknot from Day 7 and his original prototype as well as a variation.
Step 8: At 05:23 – Molly and Maria’s Drawings/Verdigogh collaboration from today (Day 8), “and some of the exploratory ones that Molly worked on”.
This recap of Zentangle’s Project Pack #20 will make it easy for you to find all the related videos and any parts of them you may wish to refer to again.
Remember the images above are linked to their YouTube video, simply click the image to go to the video. Or, you can view the complete video on the corresponding tangle’s page on TanglePatterns, they make a fascinating “historical” record of Zentangle videos on each tangle.
For a complete list of Zentangle’s Project Packs click the PROJECT PACKS link in the pink alphabetic tangle menu bar.
|
.oOo. |
|
Enhance your Zentangle experience while supporting TanglePatterns: |
|
BRAND NEW! TanglePatterns.com TANGLE GUIDE, 2026 Edition |
|
 |
The 15th Edition of the TanglePatterns.com TANGLE GUIDE is an instant-download 123-page interactive digital eBook/PDF containing over 2,300 tangles on the site from May 2010 through December 31, 2025. It's a great resource and a must-have digital tool for using the site. Visit the STORE > E-BOOKS page and help keep TanglePatterns.com going by getting your copy now! |
|
"Linda, Thank you! I was relying on too few and getting stuck after 3 years of daily working with Zentangle. This has inspired me to ‘begin again’ with renewed excitement." ~ Barbara R. |
|
| See the BOOK REVIEWS page for more details on its features and view a sample page. Note: this is a digital product to download immediately when ordering, nothing will be physically mailed to you. | |
| If you're new to Zentangle® and tangling, my TanglePatterns.com BEGINNER'S GUIDE TO ZENTANGLE is just what you need to get started. Also available en Français and en Español. | |
|
|
|
 |
This is the only Zentangle book you'll ever need: the fabulous Zentangle PRIMER Vol 1. It's your CZT-in-a-book by the founders of Zentangle®. For more about the content and to read the rave reviews, visit the BOOK REVIEWS tab. |
| Available in KINDLE format for $9.99. Spanish Edition here. Japanese Edition here. | |
| "Absolutely the best Zentangle Book yet! As an accomplished artist I used to think I did not need instruction on this art form. How wrong I was! My tangling improved by leaps and bounds after reading this book. If you think you have Zentangle down then you need this book more than ever!" ~ Kris H | |
|
|
|
|
.oOo. |
|








What an AMAZING summary of Project 20 Linda!! I so enjoyed reading through it and remembering my reactions to each section. I really enjoyed this Project 20……but being able to read “the highlights” of it all, thanks to you has made it even more special…..THANK YOU!!
Many thanks Sue, it’s really helpful/encouraging to me to know it’s useful and worth doing. Cheers!
What an amazing job you do, Linda! I am so grateful for the time and effort you put into sharing the project packs with us. I don’t always do them when they’re released and your site is where I go to find the videos. The detail you put into explaining each one is wonderful and I am soooo grateful!
Thanks so much Laurel, your kind words are sincerely appreciated!
As I sit down to work some more on the newest project pack, I am once again so very grateful for your hard work in putting this page together, Linda!! The sheer amount of time and energy devoted to this page, and the dedication to adding in the notes and related times, is truly epic. It really helps when I am taking my time to do a video over a few days in particular! And thanks for making note of the pens they are using, since it’s not always clear in the videos haha
Thank you for these recaps, Linda. They’re really helpful when I decide which previous project packs I want to do.