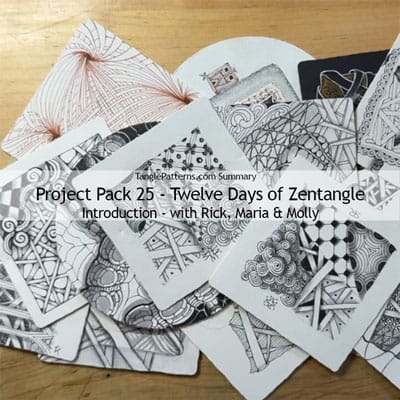
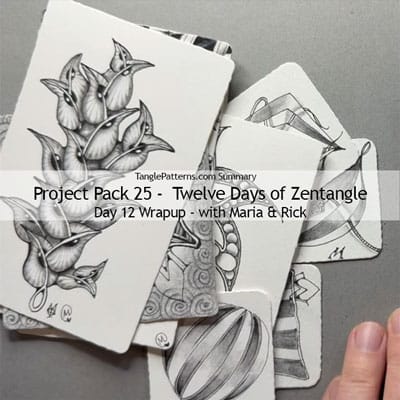
 Each year our community looks forward to Zentangle’s December holiday tradition of their Twelve Days of Zentangle Project Pack series. We wrap up 2024’s Zentangle 20th Anniversary celebrations with this year’s edition.
In this special series co-founders Rick Roberts and Maria Thomas and the HQ crew lead us through twelve consecutive days of tangling together based on a theme. For a list of all of the previous holiday editions, visit this link.
This is Project Pack #25’s introduction from the Zentangle Newsletter:
In our practice of drawing with the Zentangle Method™, we build composition using patterns we call tangles. In the beginning we learn more basic tangles and then we progress by learning new techniques, more complex tangles and variations to basic tangles.
In the previous project pack, Project Pack No. 24, we paid homage to the technique of “Aura”. In Project Pack No. 25, we will take a deep dive into another technique that plays an integral role in how we teach many of our tangles. We will guide you through a journey of depth and dimension. We will adventure to the darkest shadows and traverse our tangled compositions exploring illuminated highlights. Join us on this multi-dimensional tangled adventure!
SUPPLIES: This Project Pack is available here ($39.95) in the zentangle.com store and it’s a convenient way to get all the supplies for the project. However you might discover you have suitable alternatives in your own Zentangle supplies, check the list below. “If you do not have the project pack materials, we encourage you to follow along with whatever you have available.”
- One Zentangle Canvas Tool Pouch containing:
- One Sakura Micron 01 pen, Black
- One Sakura Micron 08 pen, Black
- One Sakura Micron 05 pen, Cool Gray
- One General’s Watercolor pencil: 715 Black
- One Sakura Gelly Roll 10 pen: White
- One unmarked Watercolor Brush: #7 Round
- One Zentangle General’s 555 – soft, dark graphite half pencil
- One Zentangle General’s white charcoal half pencil
- One Zentangle General’s HB graphite half pencil
- Two tortillions
- Zentangle tiles:
- 7 Bijou Tiles, White
- 7 Original 3.5″ Square Tiles, White
- 7 Phi Tiles, White
The following chronology is a summary of the videos for this Project Pack with links to the individual videos. Either click the Day #’s title link or the image itself to view the full video on YouTube.
It isn’t necessary to watch the videos in sequence, but it will be very helpful for you to watch the Introduction video first.
CZT Molly Hollibaugh recommends we watch Project Pack videos completely through once before beginning our tiles:
“You’re going to have a little more confidence, you’re going to be a little more aware of what’s happening next. Then you might try something different, you might explore it in a different way”.
QUICK LINKS TO DAILY SUMMARIES
Jump to:
Day 1 – Julie tangles Umble and Doodah
Day 2 – Rick tangles Fengle
Day 3 – Molly and Martha tangle Verdigogh, Meer, Snail, Tripoli, Zenith and Vega
Day 4 – Maria tangles Gourdgeous
Day 5 – Martha and Molly tangle Foundabout
Day 6 – Maria tangles an exercise in drawing behind
Day 7 – Molly and Martha tangle a Tripoli variation
Day 8 – Julie tangles Marasu and Hollibaugh
Day 9 – Rick tangles Flux
Day 10 – Rick tangles Mi2, Maria adds a Pokeleaf variation
Day 11 – Maria tangles Ellish with versions of Scena and Three & Three
Day 12 – Maria tangles Hollibaugh, Purk, Quib and Vega
Wrap Up – Rick and Maria review each lesson’s tile
Introduction
In the introductory video (11:54) – Rick, Maria and Molly introduce the focus technique of this Project Pack: Drawing Behind, and the supplies included in the pack.
Step 1: At 00:00 – The three introduce themselves and review the concept of drawing behind by showing a variety of completed Zentangle tiles.
Step 2: At 04:40 – They emphasize this concept mainly through showing examples of the foundational tangle Hollibaugh and talking about how the technique produces layers and depth in the tiles.
Step 3: At 05:47 – Molly points out how this technique can be used with organic tangles like Pokeleaf and Pokeroot.
Step 4: At 07:30 – Molly explains in returning to Zentangle’s roots, this Project Pack is going to be “one day, one tile, one lesson“.
Step 5: At 07:40 – She displays this Project Pack’s packaging and reviews the contents, reminding us because this Project Pack goes back to Zentangle’s roots we’ll be using only black, white and shades of grey.
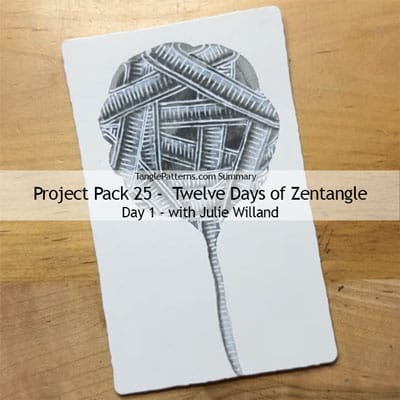
Day 1
In Day 1’s video (20:19) – Julie Willand tangles Umble and Doodah on a Phi tile in the first lesson Project Pack with the theme of drawing behind.
Step 1: At 00:00 – As she introduces herself and this Project Pack Julie explains, “we look at the drawing behind technique which most of us have learned through the tangle Hollibaugh, and really just take a deep dive into drawing behind and shading and adding lots of depth and dimension to our Zentangle art.”
Step 2: At 01:08 – She selects a white Phi tile and reviews the tools she’ll be using from the pack, in addition to which she has a small container of water and piece of paper towel handy, and suggests we might want some scrap pieces of paper too.
Step 3: At 02:24 – She invites us to take a moment for a deep breath and for gratitude and appreciation.
Step 4: At 03:01 – On the Phi tile and using the side of the black watercolor pencil, Julie adds a dark patch (“a blob“) of watercolor pencil towards the top of the tile.
Step 5: At 04:10 – “So now that I have this black cloud of watercolor down, I’m going to grab my water and my paintbrush and add some water to the pencil.” Julie uses the damp brush in a circular motion to spread the watercolor out, not in a perfect circle but a larger more squarish shape.
Step 6: At 05:27 – “At the bottom I’m going to drag some of this watercolor down and make a stem.“
Step 7: At 06:00 – Allow this to dry completely before we begin tangling on it.
Step 8: At 06:29 – “Warm up” the White #10 Gelly Roll on a scrap piece of paper or back of the tile to get the ink going.
Step 9: At 07:09 – Julie says we’re going to draw the tangle Umble today, a “very Hollibaugh-esque” tangle, but a more organized one.
Step 10: At – Julie adds wide aura-ed bands around the perimeter of the watercolor shape, drawing the additional bands behind the one before it.
Step 11: At 11:07 – After she has added Umble bands around the perimeter, she begins to add them through the middle, always drawing behind as she adds each one.
Step 12: At 12:25 – When the center is full, she looks for a band that appears to go down the stem and extends its ends at the top of the stem.
Step 13: At 12:42 – She adds Doodah to fill each of the bands.
Step 14: At 15:28 – When all of the bands are filled with Doodah, she begins to add shading using the General’s 555 layout pencil. She adds “quite a bit” and then smooths it with a tortillion.
Step 15: At 16:52 – She uses the white charcoal pencil to add a highlight on the opposite side of the band.
Step 16: At 17:29 – “Pay special attention to where the Umbles overlap each other,” and add 555 pencil shading there for depth and dimension.
Step 17: At 18:50 – Julie has all the Umble bands finished and show how she decorated the stem. Lastly Julie adds her chop to the finished tile.
Day 2
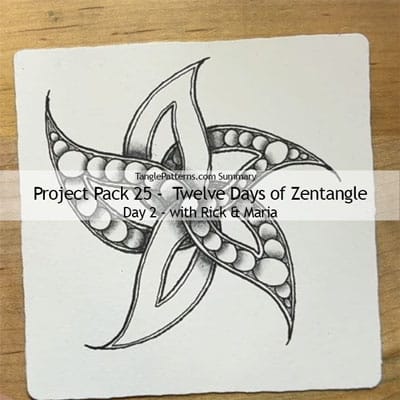
In Day 2’s video (15:40) – With Maria keeping him company, Rick tangles Fengle in the second lesson.
Step 1: At 00:20 – Rick says he’ll be tangling Fengle on one of the original square white Zentangle tiles.
Step 2: At 00:34 – Beginning with the black Micron 08 he adds a center orb, noting Fengle is composed of an orb and an S shape.
Step 3: At 01:03 – He adds the S shape using the take-off-and-land technique, turning his tile as he adds each.
Step 4: At 01:44 – With the first S strokes in place, he goes back and adds a C-shape curve connecting the endpoint to about the midway point on the original strokes.
Step 5: At 02:39 – After explaining how Fengle got its name (“looks like fangs” – Fengle), he adds “a really thick aura in the middle of it“.
Step 6: At 03:13 – “In the spirit of drawing behind, let’s continue that as if those inner auras opened up a window“.
Step 7: At 04:00 – Rick switches to the black Micron 01, “still my favorite, my go-to pen“, and adds thin auras inside each “fang”.
Step 8: At 05:18 – Inside three of the bands he adds large orbs, “so one is drawn behind the other, instead of squishing them up again each other“,leaving two of them unfilled.
Step 9: At 07:55 – Rick switches to the Cool Grey Micron 05 and fills in the spaces (interstices) around the orbs.
Step 10: At 09:31 – With the regular graphite pencil he adds shading where the orbs overlap “goes under”, and smooths it out with the tortillion.
Step 11: At 11:41 – With the new 555 graphite pencil, he adds darker shading where the “leaves” overlap and softens it with the tortillion.
Step 12: At 14:25 – He adds his chop using the Micron 01.
Step 13: At 15:21 – As the video ends, he displays other explorations of the Fengle tile.
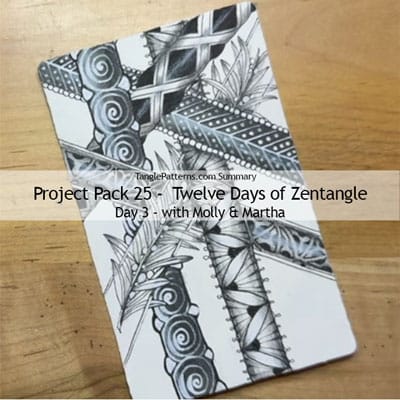
Day 3
In Day 3’s video (58:28) – Martha and Molly tangle Verdigogh, Meer, Snail, Tripoli, Zenith and Vega on a Phi tile.
Step 1: At 02:20 – After talking a little bit about the theme of this Project Pack, Martha begins by reviewing the additional supplies she has handy: “a few scraps of paper and a small pot of water and some napkins“.
Step 2: At 02:35 – Molly takes a moment for gratitude.
Step 3: At 03:42 – Martha selects a Phi tile and working with the regular graphite pencil she adds a “highly focused” string on the tile. She begins with a hexagon shape and extends each side of it to the edges of the tile. She then adds a wide aura to the right of each.
Step 4: At 07:59 – She extends each line Hollibaugh-style so they go under. Martha notes the key is to keep turning the tile in the same direction as you add the extension of each band.
Step 5: At 10:29 – Martha switches to the black General’s Watercolor pencil and selecting one of the ribbons she lightly fills it with watercolor pencil, using the side of the lead.
Step 6: At 11:54 – She chooses one more ribbon and repeats the filling in process.
Step 7: At 12:15 – Changing to the brush and using her cup of water, Martha dampens the brush and activates the watercolor she has laid down. Allow the damp ribbons to dry before moving on.
Step 8: At 15:10 – With the black Micron 01 Martha adds Verdigogh in one of the unpainted bands. She adds the stem and the first layer of needles.
Step 9: At 18:05 – Before she continues filling in the Verdigogh, Martha inks over the string line, going behind the Verdigogh needles as needed.
Step 10: At 18:44 – She adds a very fine aura to the outlines she just added.
Step 11: At 19:16 – She adds another layer of needles, going under the aura lines where they intersect.
Step 12: At 20:37 – She adds orbs in the larger spaces between the Verdigogh needles.
Step 13: At 21:25 – Molly takes over and with the white Gelly Roll, she adds a variation of Meer in one of the black bands Martha filled earlier. She starts by adding a line down the middle then adds angular strokes meeting at the midline, creating V shapes.
Step 14: At 23:37 – She adds a line of small white dots to fill each space. They note we always need to be careful about smudging the Gelly Roll ink. Be sure to allow this to dry before moving on.
Step 15: At 14:44 – With the black Micron 01 Molly adds an edge of “smooshed” orbs on each edge of the Meer ribbon.
Step 16: At 25:24 – She goes back with the white Gelly Roll and fills in the centers of the orbs that were drawn over the Verdigogh, noting they can all be filled if we so choose.
Step 17: At 26:41 – With the black Micron 01, she adds a thin black stroke on one side of each of the V shapes to make the “white whiter”.
Step 18: At 27:30 – Molly adds a tangleation of Printemps called Snail in the other black ribbon. She weights some of the strokes. She notes that holding the Gelly Roll upright at 90° to the paper sometimes makes the ink flow more smoothly.
Step 19: At 31:08 – Molly adds an aura in the spaces between the Snails, she starts with the Micron 01 but switches to the 08. She also adds a Crescent Moon-shape curve on each, creating a scalloped border along the band. She fills in the scallops with white Gelly Roll.
Step 20: At 33:12 – Martha chooses the black Micron 01 and in another ribbon she begins by tracing over the string lines defining its edges, then adding a thin aura inside those lines.
Step 21: At 34:40 – She changes to the black Micron 08 and adds Tripoli inside the ribbon, then in each she adds a Crescent Moon shape on each side of each triangle.
Step 22: At 37:00 – Continuing with the 08, Martha traces over the string lines of another ribbon. She fills it with Zenith.
Step 23: At 38:43 – She switches to the black 01 and adds radiating lines from each and weights the bottom using the peppering technique.
Step 24: At 40:31 – After adding light enthatching strokes on each rice shape, she adds a lacy edge detail along the outer edges of the ribbon.
Step 25: At 41:27 – Molly takes over the fill the last ribbon with Vega. She adds auras inside the shapes and inks them in using the black 08.
Step 26: At 45:18 – Molly adds shading and highlights to her Meer, Snail and Vega bands, she also touches up areas where needed with the black Micron.
Step 27: At 51:00 – Martha adds shading and highlights on her Zenith, Tripoli and Verdigogh bands. She finishes by adding white Gelly Roll in the Verdigogh orbs and along the auras.
Step 28: At 55:25 – They share two lovely Zentangles Maria had done early in Zentangle’s history as well as ones they had worked on before including filling the spaces between the ribbons using the Gray Micron 05 from the Project Pack.
Day 4
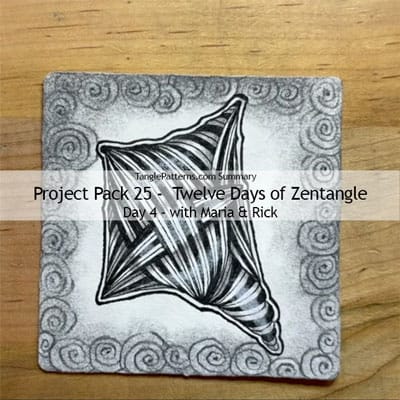
In Day 4’s video (27:40) – With Rick keeping her company, Maria tangles Gourdgeous with Printemps ghost tangles on a square white Zentangle tile.
Step 1: At 01:14 – After their introductions, with the Zentangle graphite pencil Maria draws a squarish border in the middle of the tile. She then selects the black Micron 01 pen to begin.
Step 2: At 02:03 – Maria “throws a couple of arcs” from the top right point to the midline on the left side and fills in the space between.
Step 3: At 02:42 – She adds a third tethered aura arc stating at the same point in the corner and landing on the same point as the first two on the left side. She then adds a fourth arc and fifth arc and fills in the space between those two. “So what I’ll end up with is a heavy line, a skinny line, and then a heavy line.“
Step 4: At 03:32 – She repeats that “one, two three, skip” rhythm, always with the ends tethered at the same points.
Step 5: At 04:11 – She turns her tile and repeats the sequence once on the other side of her first arc.
Step 6: At 04:49 – She turns the tile again and “here comes the going behind“. She adds an arc from what was the top left corner (now positioned at the bottom left) going under what she has already done and ending at the middle of the bottom border. She repeats the same process but this time each arc goes behind. She notes that the “1-2-3” count like a waltz beat is helpful to keep track while adding the arcs.
Step 7: At 06:13 – She turns the tile back to the first set of arcs and continues adding the 1-2-3 arcs and fill, but this time going under the second set.
Step 8: At 07:30 – She turns the tile and adds the 1-2-3 sets on the other side, going under the existing arcs. Maria notes we can use the 08 to fill in if we prefer.
Step 9: At 08:33 – From one of the two remaining free corners, Maria adds a new arc, meeting the side line towards the last free corner and repeats the sets, going under as needed when reaching the existing ones.
Step 10: At 09:24 – She moves around the tile “using the same principle” and adds sets going behind until the space is filled and curving the final lines to appear wrapped around her original border.
Step 11: At 14:38 – After spending a little time cleaning up lines, sculpting them and “adding love“, Maria changes to the black Micron 08 “to do a little aura-ing“, and adds a strong aura around the edges of the drawing, alternating pressure to create thick and thin lines.
Step 12: At 16:30 – Using the graphite pencil, Maria begins to add shading to create the illusion of dimension where one part goes over the other, an effect named tucker. She then adds graphite for the “obvious shading” where there are “over-unders”.
Step 13: At 20:59 – With the white charcoal pencil, Maria adds highlights.
Step 14: At 22:09 – With the new 555 layout pencil, Maria adds Printemps ghost tangles around the edges of the tile, changing pressures to create texture.
Step 15: At 24:17 – She uses the side of a tortillion to really smudge out the ghost Printemps, “buffing all of that towards the Gourdgeous“. She goes over it again to make it more subtle and uses the side of her hand to push the graphite off the edge of the tile and away from the middle. Rick notes that Maria is still working on recovering the full function of her hand since she injured it badly in a fall in the summer of 2023.
Step 16: At 25:40 – Maria adds her chop.
Day 5
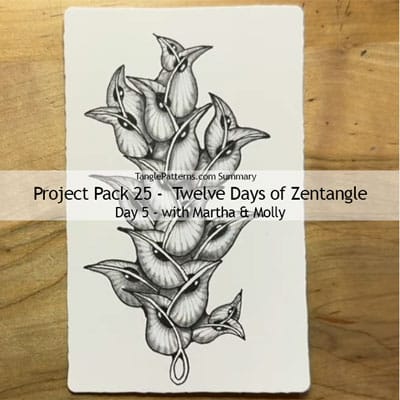
In Day 5’s video (32:03) – Martha and Molly tangle a Foundabout monotangle on a white Phi tile.
Step 1: At 03:49 – After introductions, reviewing the materials we’ll be using today and a pause for gratitude, Martha begins with the black Micron 08 pen and explains we’ll be tangling a Foundabout monotangle.
Step 2: At 04:16 – An organic tangle, Foundabout starts with “almost a ladder of spines“.
Step 3: At 06:18 – Martha adds the first half of the “blossoms”, alternating on each spine as she works up the ladder.
Step 4: At 07:41 – She adds the other half of each blossom, drawing behind where necessary.
Step 5: At 09:06 – She finishes the bottom of the stem with an aura-ed loop.
Step 6: At 09:25 – She adds a Crescent Moon-shaped half circle on the spine of the first blossom and inks it in, then adds the same mirrored shape on the other side of the spine. She repeats this up the spine to add to each blossom.
Step 7: At 11:22 – Molly steps in and adds texture using the cool gray Micron 05, “it’s the same color as pencil“. Beginning at the center she adds radiating lines coming out from the Crescent Moon shape and adds weighting at the ends using the peppering technique.
Step 8: At 13:23 – She repeats this on the other half of the blossom.
Step 9: At 13:57 – She repeats this on the remaining ones.
Step 10: At 15:15 – Martha steps in, “we’re going to go back to where we started” and with the black Micron 08 she adds more spines and blossoms coming out from behind the first layer of blossoms, “building depth“.
Step 11: At 17:08 – She adds a spine off of a spine, branching out the design.
Step 12: At 18:02 – She adds rounding where the blossoms meet.
Step 13: At 18:27 – She adds the Crescent Moon-shape half circles in the new layer of blossoms.
Step 14: At 19:31 – Molly adds the radiating weighted lines on the new blossoms.
Step 15: At 20:45 – With the regular graphite pencil, Molly adds shading. While Molly works, Martha talks about reticula and fragments.
Step 16: At 27:10 – When she’s finished her first layer of shading, Molly uses the 555 layout pencil to add the deeper black to some of the places that are “going behind”.
Step 17: At 29:10 – She adds highlights with the white charcoal pencil.
Step 18: At 29:32 – With the black Micron 01, she touches up some of the earlier lines that have become dull with graphite, “redefining and sculpting“.
Step 19: At 30:37 – She adds a “sparkle” of white Gelly Roll on the black semicircles. They both add their chops to finish the tile.
Day 6
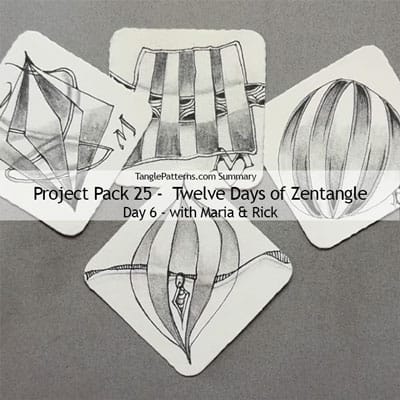
In Day 6’s video (31:38) – With Rick keeping her company, Maria tangles “an exercise on shading and drawing behind” on four Bijou tiles.
Step 1: At 00:19 – Maria says we’ll be working on four Bijou tiles and starting with a black Micron 01, a regular Zentangle graphite pencil and the new 555 graphite pencil.
Step 2: At 01:00 – This lesson is an exercise to work on shading and drawing behind. FIRST Bilou tile: She adds a large seed shape centered from corner to corner in a Bijou tile. She then adds two tethered auras on each side of the original strokes, “almost like an onion shape“.
Step 3: At 01:46 – She turns the tile so the onion shape is horizontal and draws a thin ribbon weaving in and out through the onion shape strokes.
Step 4: At 02:32 – In order to disguise where the new strokes cross over, she adds hatch strokes inside the ribbon.
Step 5: At 03:22 – She adds shading in alternating sections using the regular graphite pencil, cautioning us not to jump ahead!
Step 6: At 04:10 – She turns the tile and adds shading in the sections that aren’t shaded at the top.
Step 7: At 04:54 – She adds shading where the ribbon appears to go under each section.
Step 8: At 05:57 – She softens the graphite and “feathers it out” with a tortillion, and again Maria says “don’t jump ahead“, watch what she’s doing first.
Step 9: At 07:38 – She adds darker shading where the ribbon goes under the main sections.
Step 10: At 07:49 – With the 555 graphite pencil, Maria adds darker shading on the tips of the onion shape sections.
Step 11: At 08:30 – She adds a “bobble hanging from the bobble“, a diamond-shaped dangle.
Step 12: At 09:56 – She adds a loop at the top.
Step 13: At 10:53 – SECOND Bijou tile: “We’re going to approach this similarly, but with a different shape,” as she adds a square shape using the Micron 01.
Step 14: At 11:04 – She adds a diamond shape within the square and auras it.
Step 15: At 11:44 – This is exactly the same as the tile before, but with straight lines instead of curves.
Step 16: At 12:10 – She adds a curved ribbon weaving behind and in front of the lines.
Step 17: At 14:12 – She adds shading following the same concepts as the first tile.
Step 18: At 17:00 – THIRD Bijou tile: Maria draws a trapezoid shape then adds three sets of parallel strokes within it.
Step 19: At 17:55 – She adds a wide ribbon weaving across the middle of the tile.
Step 20: At 18:39 – She adds some Crescent Moon shapes within the band, drawing behind where necessary then adding their auras.
Step 21: At 21:07 – Maria adds auras along the Crescent Moon band and around the outside edge of the whole shape.
Step 22: At 22:46 – She adds shading with the regular graphite pencil, alternating bands the same as previous tiles and adding the tucker element where the ribbons “go under” and adding darker shading to emphasize the dimension.
Step 23: At 26:40 – FOURTH Bijou tile: Maria draws a circular shape and adds the pairs of arcs inside it, creating an onion shape similar to the first tile. She adds shading.
Step 24: At 28:43 – She adds some detail inside the shaded bands, “aura-ing the top and sort of feathering out as it gets to the middle.” She adds enthatching at the tips of the new auras and then uses the tortillion to blend out the shading towards the middle of the orb.
Day 7
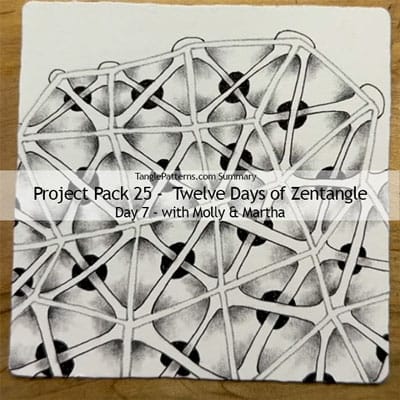
In Day 7’s video (23:41) – Molly and Martha tangle a tangleation of Tripoli Molly calls Polypoli on a regular white Zentangle tile.
Step 1: At 03:47 – After their introductions, review of the drawing behind theme, the tools we’ll be using today and a pause for gratitude, Molly begins today’s lesson by selecting the gray Micron 05 pen. Both sisters agree they like how this particular pen mimics the color of the graphite pencil.
Step 2: At 04:07 – She explains she’s going to be tangling a version of Tripoli she’s called Polypoli (polygon) because instead of Tripoli‘s triangles we’re going to be using four-sided shapes. She adds one in the center of the tile, “I encourage you not to draw these squares too small because we’re going to be working within.“
Step 3: At 05:55 – She adds the next polygon by aura-ing one side of the first shape then adding its remaining three sides. She continues adding polygons in the same way as she turns the tile and maintaining the same aura space between each. She continues off the edges of the tile noting it’s more interesting if you use wonky shapes rather than rigid square shapes.
Step 4: At 08:42 – She adds an aura around the total shape, maintaining the same size aura spacing.
Step 5: At 09:20 – Martha takes over and uses the black Micron 01 to put “a filler” in each space.
Step 6: At 10:00 – She chooses one of the spaces and adds a band of slightly flared diagonal parallel lines from corner to corner.
Step 7: At 10:37 – She adds a second set of bands going behind the first set from the other corner, creating an X shape.
Step 8: At 11:14 – She draws another set of bands in an adjacent space, aligning it “as if the first band went underneath the aura and came out the other side“. She continues around the tile adding the crossed bands in all the spaces, aligning with the aura band from the adjacent space, turning the tile and adapting to the shape of the space.
Step 9: At 14:19 – She “caps off” some of the ends.
Step 10: At 14:58 – Where the bands cross in the middle of each space, she draws a curved aura behind and fills in the space.
Step 11: At 17:47 – Molly adds graphite shading.
Step 12: At 20:27 – After the first layer of graphite is added and blended with a tortillion, Molly changes to the 555 graphite pencil, “to add a little bit of drama in a couple places“. She adds a darker layer over the corners of her first layer of graphite.
Step 13: At 21:38 – She uses the tortillion to add shading where the bands go under each other.
Step 14: At 22:32 – She adds a bit of rounding around the edges and they both add their chop.
Day 8
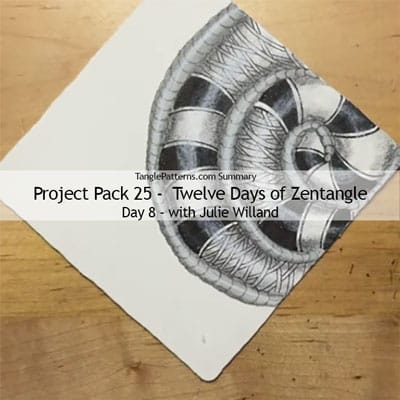
In Day 8’s video (22:16) – Julie tangles (surprise!) Marasu and Hollibaugh on a regular white Zentangle tile.
Step 1: At 01:16 – Julie talks about this year’s 20th Anniversary celebrations and the drawing behind theme of this project pack. She then reviews the materials from the tool pack she’s using for this lesson.
Step 2: At 02:36 – After a moment for gratitude and appreciation, Julie suggests we have a cup of water, a piece of paper towel and a scrap piece of paper handy and she begins with the watercolor pencil and brush.
Step 3: At 03:19 – She explains we’re going to be drawing a “string of sorts” with watercolor and instead of drawing directly on the tile, she makes a patch with the watercolor pencil on the scrap of paper.
Step 4: At 03:41 – She uses her damp watercolor brush to activate the watercolor on the scrap paper then uses the paint she’s picked up on her brush to add “a spiral that takes up maybe 2/3 of the tile“.
Step 5: At 04:42 – After starting from a corner to add the spiral, she goes back and widens the “string” bands with more paint. She allows the tile to dry completely before proceeding.
Step 6: At 05:50 – Julie uses the black Micron 08 and “if you couldn’t guess from our spiral, we are going to tangle Marasu“.
Step 7: At 06:56 – She asks us not to jump ahead so we can see what she’s going to be doing. She starts in the center of the spiral and adds two curved strokes from one watercolor band to the next (but not over them) and fills in the resulting triangular band shape with black ink.
Step 8: At 07:30 – She adds an aura on each side of the band.
Step 9: At 08:00 – She repeats this, moving along the inside of the watercolor string lines. “As we go along, our bands might get a little bigger“.
Step 10: At 09:17 – Once she has a few of these bands down, she leaves a bit of space before adding the next one.
Step 11: At 09:47 – She continues around the spiral adding bands and leaving a similar space between them.
Step 12: At 10:47 – Julie switches to the black Micron 01 and explains we’re going to add Hollibaugh in the large spaces we left inside the spiral, “but it’s going to be a little more deliberate than just randomly putting down our bands“.
Step 13: At 13:21 – After she’s filled the large spaces with Hollibaugh Julie add shading, “every time we do Marasu, the magic is in the shading”.
Step 14: At 13:59 – She explains she’s going to add lots of layers of shading and begins with the regular graphite pencil.
Step 15: At 15:29 – She changes to the 555 layout pencil and adds another layer over the graphite.
Step 16: At 16:12 – She uses the white charcoal pencil to add highlights.
Step 17: At 17:00 – She changes to the gray Micron 05 and begins adding orbs on the watercolor string, starting at the center of the spiral. As she adds the orbs she cautions us to be careful of smudging the graphite from the shading which might be picked up on our hands.
Step 18: At 19:06 – With the 555 layout pencil Julie adds shading along the outer edges of the orb sections.
Step 19: At 20:00 – She adds a white charcoal highlight around the orb sections.
Step 20: At 20:29 – She goes back with graphite, “you can decide if there’s anywhere you want to add some more“. She finishes by adding her chop.
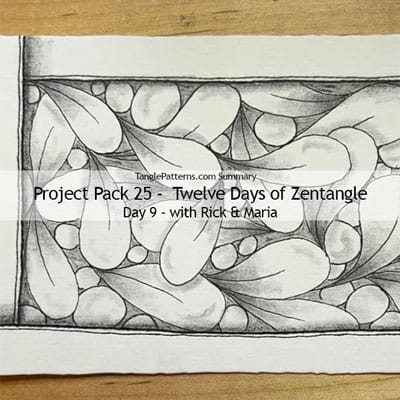
Day 9
In Day 9’s video (16:11) – With Maria keeping him company, in this lesson Rick tangles Flux on a Phi tile.
Step 1: At 00:33 – After brief introductions, Rick begins today’s lesson on a Phi tile using the graphite pencil to add the corner dots and connect them creating a border.
Step 2: At 01:26 – With the black Micron 08, he retraces the string border lines and extends one end of each to the side of the tile, noting “we’re already starting out with this hint of drawing behind“.
Step 3: At 02:27 – He switches to the black Micron 01 and adds a thin aura outside each of the border lines.
Step 4: At 03:30 – He then begins to fill the inside rectangle with Flux, drawing some of the leaves behind the others. They can take off in whatever direction you want, but the consistent thing is that you are touching another previous shape. “Each one arcs off very very smoothly from an existing one.“
Step 5: At 06:12 – Inside the Flux leaf he adds “a little detail” of a vein, starting towards the top of each and changing pressure to vary the stroke as he connects it to the base.
Step 6: At 07:09 – He adds orbs in the same, “and normally we would fit the orbs into the space that’s available, but since we’re doing drawing behind, well why not draw the orbs behind as well“.
Step 7: At 08:41 – He changes to the gray Micron 05 and inks in the background spaces around the orbs and Flux.
Step 8: At 10:30 – Rick adds graphite shading at the base of the Flux stems and blends it out with a tortillion, as he moves around the tile he also adds shading on the orbs and the tips of the leaves using the graphite on the tortillion.
Step 9: At 12:59 – With the 555 layout pencil he adds graphite where the border edges “go under” and blends it out, being careful not to put his hands on the graphite in place. He also adds this darker graphite around the inside of the border/frame, protecting the center with a piece of paper under his hand. He finishes the tile by adding his chop.
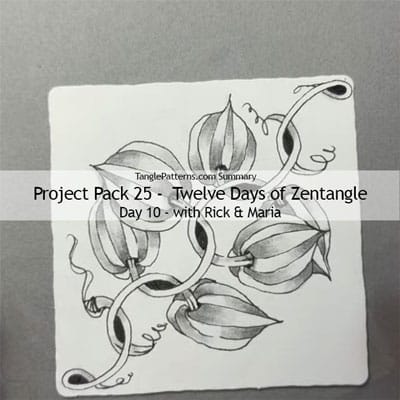
Day 10
In Day 10’s video (15:30) – On a regular white Zentangle tile, Rick tangles Mi2 and Maria adds a Pokeleaf variation.
Step 1: At 00:13 – Rick says he’s “going to do one of my favorite tangles“, Mi2 by CZT Mimi Lempart. With the black Micron 01 he adds a small pen dot approximately in the middle of the tile and then adds one in the corner of the tile and two evenly spaced between those two. He repeats this on from the opposite corner, creating a line from corner to corner of evenly spaced dots.
Step 2: At 01:03 – Using them as guides, he places an open parenthesis-shaped curve starting around the top dot and going down and ending by the second dot. He repeats this adding an overlapping closed parenthesis-shaped curve from the second to third dots. Then repeats this down the tile.
Step 3: At 01:48 – He connects the curves creating seed shapes and fills them in.
Step 4: At 03:12 – Maria takes over, “I’m using this because I need something to put my tangles on.”
Step 5: At 03:36 – Still using the black Micron 01, Maria adds auras around the curves Rick just finished.
Step 6: At 04:55 – She then slightly extends the lines that appear to be going under, “and use the basic concept of Pokeleaf“, adding the stem and adds a narrow shape on it. She then adds tethered aura on each side creating a “Chinese/Japanese Lantern” shape.
Step 7: At 06:07 – She adds one final line right up the middle of the narrow shape.
Step 8: At 06:20 – She repeats this on the adjacent “going under” line, and draws it going behind the first one. She adds s third one on the same side.
Step 9: At 07:43 – At the ends of the lines in the corner of the tile, “It wasn’t a lot of room so we’ll just make some sort of tendril.”
Step 10: At 08:11 – She adds “a little accent” where each stem comes out of the pod shape.
Step 11: At 08:20 – Maria turns the tile and repeat this on the other side, adding the pod shapes and drawing them behind.
Step 12: At 10:06 – With the regular graphite pencil Maria adds shading. She uses the same technique from Day 6 (named convergent shading or bidirectional shading and introduced by CZT Lynn Mead) where each band is shaded at one end, alternating with each band.
Step 13: At 11:14 – She extends the graphite with the tortillion “to the middle-ish“. She also uses the graphite on the tortillion to shade the over-unders on the original Mi2.
Step 14: At 14:19 – Maria adds her chop and at the end of the video they show another tile done using the same Mi2 concept.
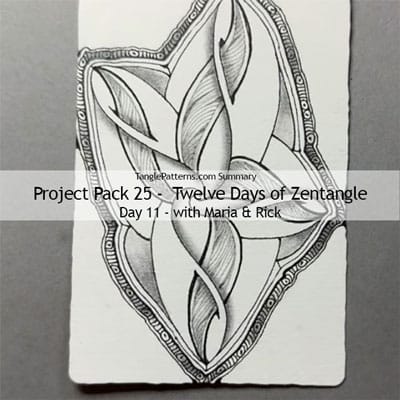
Day 11
In Day 11’s video (22:28) – With Rick keeping her company, Maria tangles Ellish (“without the el“) with versions of Scena and Three & Three on a Phi tile.
Step 1: At 00:50 – After showing us the tools we’ll be using today, Maria says we’re going to be doing the tangle Ellish and she begins with the black Micron 08 on a Phi tile.
Step 2: At 01:05 – She places a small dot roughly in the middle of the tile then adds an S stroke going towards the bottom of the tile, “we’re going to repeat the tangle Ellish a number of times and create a blossom of some sort“.
Step 3: At 01:30 – Explaining this tangle is all composed of S-shapes, she adds three more S strokes radiating from the center for a total of four.
Step 4: At 01:40 – “This is the magical stroke in Ellish,” as she adds a short thin aura near the top of one of the spines, then another arc from the end of the stroke that “goes behind” the aura. She then extends that arc creating a reverse S-shape that goes behind and connects to the adjacent spine.
Step 5: At 02:05 – She adds another reverse S stroke from the tip of the spine to the short aura, drawing behind and connecting with the same spine.
Step 6: At 02:26 – She repeats this on the other spines noting that “this one is worth learning by heart“.
Step 7: At 03:30 – With all four spines completed, she adds a curved stroke on the right side of each blossom connecting the tip to the blossom beside it, “from the top, to the right, and down to the center“.
Step 8: At 04:13 – Now going from the tip down to the left, Maria adds a similar curve going “from the tip, to the left, and down to the center“.
Step 9: At 04:50 – She adds a few more lines around the outside edge, “just to bring it together“.
Step 10: At 05:24 – Changing to the black Micron 01, maria adds a small curve on each end of the original short auras, as Rick notes “this is where it really reinforces the over and under“.
Step 11: At 06:06 – She inks in the small spaces just created.
Step 12: At 06:29 – Maria changes to the gray Micron 05, “and we’re going to work on the ribbon that’s going through“, she adds an aura inside each side of that center ribbon.
Step 13: At 07:41 – “We’re going to fill those little gray sections with a tangle called Scena, or a version of Scena.” She adds curved strokes, some with weighting (peppering) from the top to half way down the ribbon, then turns the tile and repeat this coming from the other end of the ribbon and meeting in the middle.
Step 14: At 11:16 – Changing back to the black Micron 01, “to do some aura-ing and bordering“. She adds a thin aura around the outside of the whole shape., adding a bit of coffering at some of the corners.
Step 15: At 12:10 – Now with the black Micron 08, she adds a thicker line aura “with a heavy hand” around the thinner aura of the previous step.
Step 16: At 12:42 – She changes back to the black Micron 01 to add yet another “intentionally wider” aura around outside edge of the shape.
Step 17: At 13:22 – She adds a border pattern inside this band: an orb, a little dot in it, then four lines” (a version of Three & Three).
Step 18: At 14:24 – She adds another thin aura outside the border.
Step 19: At 15:14 – Maria adds graphite shading.
Step 20: At 19:09 – She changes to the black Micron 08 and restates some of the original “spine” strokes.
Step 21: At 19:50 – She adds her chop.
Step 22: At 21:04 – They show quite a few samples of other versions Maria did before filming this version.
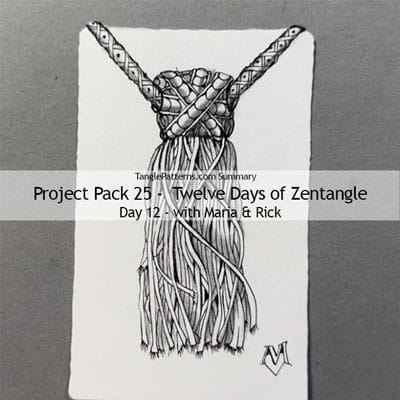
Day 12
In Day 12’s video (19:46) – With Rick keeping her company, Maria tangles Hollibaugh, Purk, Quib and Vega on a Phi Tile.
Step 1: At 01:00 – With the graphite pencil Maria adds four dots in the shape of a small trapezoid toward the top of the tile, then connects them with a light border. She then adds a very light string centered towards the bottom of the tile a little wider than the width of the trapezoid above.
Step 2: At 01:38 – She explains that she went through a lot of tangles to see which ones “really spoke to me about drawing behind” and she came up with Hollibaugh, Purk, Quib and Vega for today’s tile.
Step 3: At 02:08 – With the black Micron 01, she adds “little curved lines” on the outside of the trapezoid border. She then connects those to the top corners of the tile with diagonal lines.
Step 4: At 02:57 – She “throws in some Hollibaugh” adding crossing “fat bands” about the width of her pen inside the trapezoid shape. She fits more bands behind the first two.
Step 5: At 03:57 – She adds curves around the ends, “just makes it look like they actually are wrapped around that shape,” notes Rick.
Step 6: At 04:30 – “We’re going to do some Purk,” as she adds an inner aura on the top band and then fills the space with orbs that are drawn behind. She repeats this on the other bands.
Step 7: At 06:06 – Next she adds Quib, adding a long curved stroke from the bottom left corner of the trapezoid shape and ending near the string line. She dds an aura beside that stroke and connects them at the bottom.
Step 8: At 06:52 – As she adds bands, she explains to “draw the bands you want in front first … the ones that are going to stand out and have some character“. She continues to add many curved bands to “this tassel-like creation” filling in all the spaces available.
Step 9: At 09:52 – “Now I’m looking at adding some drama and I want to put a little bit of black back where there seems to be spaces,” and restating lines for the ones in front making them a little darker.
Step 10: At 10:56 – She adds short strokes coming from the ends of the tassel bands, creating a fringed look while sharing a story about her family background and a fabric store. As she’s talking she’s finding spaces in the background to ink in for more drama and depth.
Step 11: At 11:51 – “Here comes Vega“. In the top bands supporting the Hollibaugh–Purk design, she adds “almost candy cane stripes” curving around the edges of the band from top to bottom. She then adds them behind, creating X shapes of ribbons.
Step 12: At 13:05 – She inks in small spaces along the edges of Vega, then adds a small dot in the middle of each space. Vega is also added in the remaining side band.
Step 13: At 13:30 – Maria picks up the tile and where she can see the lines through the tile, “and we’re going to literally raw behind this whole image by going on the back of the tile and continuing our composition.” She draws ribbons and a button on the back “so that it doesn’t fall down“. She fills the back’s ribbons with more Vega.
Step 14: At 15:16 – Maria adds graphite shading on all her tangles and softens it with a tortillion.
Step 15: At 17:04 – She adds shading on the back of the tile, including a drop shadow using the tortillion.
Step 16: At 17:27 – “I just couldn’t leave this alone,” as she “adds love” with her Micron.
Step 17: At 17:43 – With a small pair of scissors she trims away a very small slice from the top of the tile between the Vega to give it more dimension. She adds her chop and signs the tile to finish it, and this series.
Wrap Up
In the final video in the Project Pack 25 Series (09:20) – Rick and Maria review some of the beautiful things created with simple tools in the lessons during this Project Pack about drawing behind.
Step 1: At 00:41 – Rick reviews the tools we used in this project pack then proceeds to show us each of the tiles from all twelve days of Zentangle.
Step 2: At 01:13 – We take a look at the first day’s tile by Julie with Umble and Doodah.
Step 3: At 01:40 – Day 2: Rick’s Fengle.
Step 4: At 01:59 – Day 3: Martha and Molly’s Hollibaugh tile.
Step 5: At 02:34 – Day 4: Maria’s Gourdgeous tile.
Step 6: At 02:45 – Day 5: Martha and Molly’s Foundabout tile.
Step 7: At 03:21 – Day 6: Maria’s lesson on drawing behind, “an exploration with Bijous”.
Step 8: At 04:23 – Day 7: Molly and Martha explore a Tripoli variation.
Step 9: At 05:10 – Day 8: Julie’s de rigeur Marasu tile.
Step 10: At 05:55 – Day 9: Rick’s Flux Tile.
Step 11: At 06:37 – Day 10: Rick and Maria’s Mi2 and Pokeleaf variation tile.
Step 12: At 07:26 – Day 11: Maria’s Ellish (Ellish-ish) tile with versions of Scena and Three & Three
Step 13: At 08:18 – Day 12: Maria’s tile with Hollibaugh, Purk, Quib and Vega
Step 14: At 08:52 – “We had a blast“, as they wrap up the series with their final wishes.
This recap of Zentangle’s Project Pack #25 will make it easy for you to find all the related videos and any parts of them you may wish to refer to again.
Remember the images above are linked to their YouTube video, simply click the image to go to the video. Or, you can view the complete video on the corresponding tangle’s page on TanglePatterns, they make a fascinating “historical” record of Zentangle videos on each tangle.
For a complete list of Zentangle’s Project Packs click the PROJECT PACKS link in the pink alphabetic tangle menu bar.
|
.oOo. |
|
Enhance your Zentangle experience while supporting TanglePatterns: |
|
BRAND NEW! TanglePatterns.com TANGLE GUIDE, 2026 Edition |
|
 |
The 15th Edition of the TanglePatterns.com TANGLE GUIDE is an instant-download 123-page interactive digital eBook/PDF containing over 2,300 tangles on the site from May 2010 through December 31, 2025. It's a great resource and a must-have digital tool for using the site. Visit the STORE > E-BOOKS page and help keep TanglePatterns.com going by getting your copy now! |
|
"Linda, Thank you! I was relying on too few and getting stuck after 3 years of daily working with Zentangle. This has inspired me to ‘begin again’ with renewed excitement." ~ Barbara R. |
|
| See the BOOK REVIEWS page for more details on its features and view a sample page. Note: this is a digital product to download immediately when ordering, nothing will be physically mailed to you. | |
| If you're new to Zentangle® and tangling, my TanglePatterns.com BEGINNER'S GUIDE TO ZENTANGLE is just what you need to get started. Also available en Français and en Español. | |
|
|
|
 |
This is the only Zentangle book you'll ever need: the fabulous Zentangle PRIMER Vol 1. It's your CZT-in-a-book by the founders of Zentangle®. For more about the content and to read the rave reviews, visit the BOOK REVIEWS tab. |
| Available in KINDLE format for $9.99. Spanish Edition here. Japanese Edition here. | |
| "Absolutely the best Zentangle Book yet! As an accomplished artist I used to think I did not need instruction on this art form. How wrong I was! My tangling improved by leaps and bounds after reading this book. If you think you have Zentangle down then you need this book more than ever!" ~ Kris H | |
|
|
|
|
.oOo. |
|





As I sit here organizing my Project Pack 25 tiles and figuring out what I have left to do, and where I am with WIP tiles, I give massive thanks to you Linda for this Project Pack summary! Having all the videos on one page, with your extremely detailed notes and timing on each video, makes my life so much easier! I can quickly sort out which videos I’d finished, and where I am on the others. I know this takes a ton of time and energy on your end, so please know this (and your other PP summaries) are much loved by me <3
Thanks so much for your thanks and your kind feedback, Jenn. It IS “a ton of time and energy” so it’s very helpful knowing my investment is a worthwhile endeavor. MUCH appreciated 🙂