 From Zentangle’s Newsletter introduction:
This year, 2024, will mark twenty years since the first official public Zentangle class was given. In honor of this monumental milestone, we thought it appropriate to spend the whole year celebrating! Project Pack No. 24 will join the celebration in honoring one of the Zentangle Method’s most famous tangles. This tangle is often one that people learn at the very beginning of their tangling journey and one that they inevitably carry with them as their practice grows and changes.
This tangle’s primary strokes teach an important tangling technique that we use in so many other tangles and tangle enhancers. In Project Pack 24, we will take a deep dive into the tangle, the techniques, and the philosophies that it inspires. We have an extra special custom item we will be using for this fun tangling exploration. Join us for a series that takes us back to the beginning and launches us into space on this almost cosmic tangling adventure into our artistic future.
SUPPLIES: This Project Pack is available here ($39.95) in the zentangle.com store and it’s a convenient way to get all the supplies for the project. However, the introductory video reviews the items in the Project Pack and you might discover you have suitable alternatives in your own Zentangle supplies. “If you do not have the project pack materials, we encourage you to follow along with whatever you have available.”
- Zentangle Canvas Drawstring Tool Pouch containing:
- One Sakura Micron 01 pen, Black
- One Sakura Micron 05 pen, Black
- One Sakura Micron 03 pen, Red
- One General’s Pastel Chalk pencil, Blue (Indigo Blue or another blue)
- One Sakura Gelly Roll Gold Shadow – Black pen
- One Zentangle graphite pencil
- One Zentangle General’s white charcoal pencil
- Three tortillions
- Custom Printed Zentangle Booklet ©2024: 5.5″ square (about 14 cm), gray die-cut cover with stitched signature of 6 preprinted sheets (24 pages) cardstock.
The following chronology is a summary of the videos for this Project Pack with links to the individual videos. Either click the Day #’s title link or the image itself to view the full video on YouTube.
It isn’t necessary to watch the videos in sequence, but it will be very helpful for you to watch the Introduction video first.
CZT Molly Hollibaugh recommends we watch Project Pack videos completely through once before beginning our tiles:
“You’re going to have a little more confidence, you’re going to be a little more aware of what’s happening next. Then you might try something different, you might explore it in a different way”.
QUICK LINKS TO DAILY SUMMARIES
Jump to:
Day 1 – Martha & Molly tangle variations of Crescent Moon
Day 2 – Rick tangles Betweed, Flux
Day 3 – Maria tangles different versions of Well
Day 4 – Julie tangles Shattuck, Moon Pie
Day 5 – Martha & Molly tangle embedded letters
Day 6 – Rick tangles Molygon, Crescent Moon, Flux
Day 7 – Martha & Molly add auras, Crescent Moon, Knightsbridge
Day 8 – Maria adds Crescent Moon, Bronx Cheer, Hurry and Doodah
Wrap Up – Rick and Maria introduce Lady Aura
Introduction
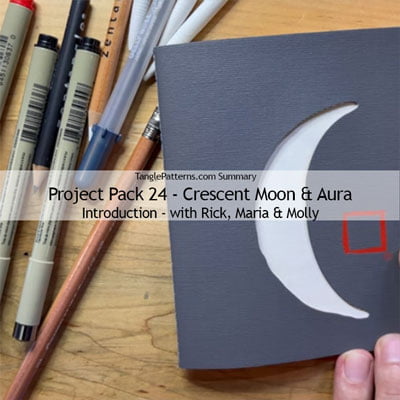
In the introductory video (10:52) – Rick, Maria and Molly introduce this Project Pack and review the materials.
Step 1: At – Rick, Maria and Molly introduce themselves and talk about the origins of Crescent Moon as it began in the early days of Zentangle.
Step 2: At 01:57 – They explain that the term ladybug to describe Crescent Moon related to both its shape and its relative size on the original 3 1/2″ white tiles.
Step 3: At 02:53 – The reason we focus on Crescent Moon is “because it’s an excellent demonstration of a fundamental tangling technique of aura.“
Step 4: At 04:20 – They discuss how auras “take what’s already been done but starts a new path. You’re working off your history but also exploring new territory,” and it can become something different.
Step 5: At 04:55 – Molly explains what she likes about aura is “I like to keep moving, I don’t want to stop and say ‘okay, what am I doing next’ because then you can get stuck. But if I just look at what I’ve got and I’ll just add an aura, I’ll just add this line and then aura around that line, eventually I’ll know what to do next and that brings me peace.”
Step 6: At 06:04 – “Let’s take a look at this beautiful Project Pack.”
Step 7: At 07:07 – First Rick reviews the tools contained in the pouch.
Step 8: At 08:53 – They introduce the custom booklet and review its contents.
Step : At 10:25 – “We did mention in our newsletter that we’re looking forward to the end of this project pack because we do have a very special guest we’re going to be introducing to you.“
Day 1
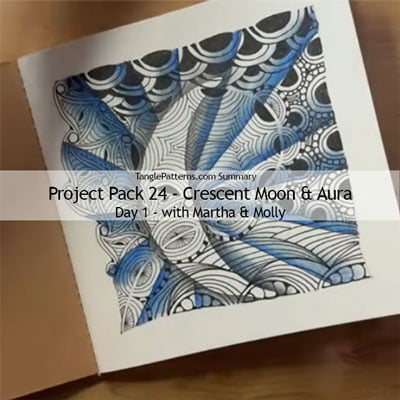
In Day 1’s video (1:07:49) – Martha and Molly tangle several versions of Crescent Moon on the page 1 of the custom booklet. (Linda’s note: the booklet does not have printed page numbers but for page reference convenience in this Summary, I lightly penciled page numbers throughout my booklet.)
Step 1: At 01:23 – After their introduction Martha reviews the material contained in the Project Pack.
Step 2: At 03:46 – Martha then takes us through the first steps of the Zentangle Method™. First she takes a moment for gratitude and appreciation.
Step 3: At 03:53 – She opens the booklet and explains we’re going to start off working on the first blank page inside the cover.
Step 4: At 04:18 – She uses the graphite pencil and creates corner dots and connects them with a border.
Step 5: At 05:39 – She creates a string within the space and encourages us not to copy her exactly but to make our own. “Don’t get caught up on how many spaces get left because you know you can always add another space and you can ignore a line to create a larger space.“
Step 6: At 06:45 – Molly takes over explaining that not only are we using the technique of aura but we’re honoring Crescent Moon. “It’s a learning tangle, it’s a tangle that can be done in so many different ways with very different variations … so this book is really dedicated to Crescent Moon and all it has to offer.”
Step 7: At 08:26 – With the Micron 05, Molly adds Crescent Moon in the center space on the page, turning the booklet as shes goes, then she inks in each one, taking her time and enjoying the process. She recommends we pause the video at any point and go at our own pace.
Step 8: At 10:55 – Molly changes to the 01 but notes we can continue with the 05 if that works for us. “I’m going to play with different line weights.“
Step 9: At 11:38 – With very deliberate strokes, she adds her first aura around the shape of the Crescent Moon.
Step 10: At 12:02 – She reminds us of the importance of maintaining “similar aura spaces … visually similar aura spaces, it doesn’t have to be exact“, as she continues around the space adding a deliberate aura around each ladybug shape.
Step 11: At 12:57 – Having finished adding an aura to each shape, Molly adds a second one around each using the same kind of spacing. Martha talks about turning the booklet to keep your hand in the same comfortable position for each.
Step 12: At 13:52 – Molly points out the lines are now getting closer together and explains several different ways you can respond when your lines get closer. She continues to aura the shapes until they meet up.
Step 13: At 16:02 – When the original half moon shapes are no longer available to aura, she continues to add inner aura lines until the center space is filled.
Step 14: At 17:44 – “Martha and I are going to continue to guide you through variations of Crescent Moon, filling our spaces as we go.”
Step 15: At 18:02 – Martha takes over and chooses another of the spaces, noting “I encourage you to choose an edge that’s more of a straight line“. Choosing the Micron 05, “we’re going to work a little bigger and a little bit bolder“. She adds large ladybug shapes along the border.
Step 16: At 20:46 – Martha adds an aura to her first Crescent Moon and then adds a second one immediately, instead of doing every one.
Step 17: At 21:08 – She adds weighting at the base of one side of each aura.
Step 18: At 21:35 – She repeats this sequence – aura 1, aura 2, line weight – on each ladybug shape.
Step 19: At 22:04 – When she finishes all 4, “I’m going to draw another layer of these weighted moons” as she adds ladybug shapes in the v spaces where the previous auras meet creating a staggered effect. “You can keep going or you can leave white space.“
Step 20: At 23:37 – Martha adds a small detail around the border, curving the base of her original ladybug shapes.
Step 21: At 24:08 – Next, using the Micron 01, Molly uses the string line between two sections to add the third version of Crescent Moon.
Step 22: At 25:50 – After she’s added the ladybug shape on one side of the string line, leaving a space between, she adds an aura forming the base of a mirrored ladybug shape opposite each of her original shapes.
Step 23: At 27:25 – “We wanted to play around with a different way to fill your Crescent Moon shapes.” Molly adds rays”like an orange slice“, adding texture to the piece.
Step 24: At 28:20 – She adds consecutive auras on one side, then adds auras on the opposite site taking care they end opposite the other side.
Step 25: At 30:06 – She adds a continuous aura around one outside edge “that encapsulates it all“. Then she adds “a little striping” (Knightsbridge?) in the aura band she just created.
Step 26: At 32:02 – With the Micron 05, Martha creates “an interesting reticula to put some Crescent Moon inside. We’re going to work with Crescent Moon as a fragment.” Martha adds some Cadent orbs and S-shapes to create the reticula, “my goal is to create triangular shapes“.
Step 27: At 35:29 – Martha changes to the Micron 01 to add an aura inside each of the spaces in the reticula she just created, then she adds a Crescent Moon variation inside each. Finally she adds an aura around the outside edge of the whole space.
Step 28: At 40:20 – Using the Micron 05, Molly adds another Crescent Moon variation in one of the spaces. She adds larger ladybug shapes and fills each one with orbs. She adds auras around each one, extending each with the take-off and land technique.
Step 29: At 43:26 – Molly adds a second layer of auras on the other side of the original ones.
Step 30: At 44:56 – Martha adds one more Crescent Moon variation in the last space, drawing more “gumdrop” shapes and adding two auras around each. She then adds a wider aura around each and fills those bands with orbs. “A Moon Pie” version.
Step 31: At 51:12 – Molly explains that instead of the tradition shading, we’re going to do something a little different and do the tranzending technique. Closing the booklet and working from the front, Molly uses an 01 Micron to trace around the cutout shape on the cover.
Step 32: At 52:19 – She turns back to the front page and using the graphite pencil she adds a heavy layer of graphite around the outside edge of the Moon shape she just added. Then she blends it outwards using a tortillion.
Step 33: At 53:22 – Molly explains what she plans next, adding evenly spaced radiating lines from the center, right over the top everything and going to the edges of the tangling as if they’re coming out from underneath the moon shape and using an orb as the imaginary center point.
Step 44: At 56:06 – Using the Blue General’s Chalk Pencil she adds color on one side of a radiating line. She blows the excess chalk dust off and then smooths it with a tortillion. She repeats this on all the radiating lines.
Step 35: At 1:00:21 – Molly adds a white charcoal pencil highlight along the opposite edge of each ray.
Step 36: At 1:02:24 – She adds some graphite shading to the moon “to pull it all together“.
Step 37: At 1:06:05 – After adding a little more graphite inside, Martha adds Gelly Roll Gold Shadow ink inside some of the orbs.
Day 2
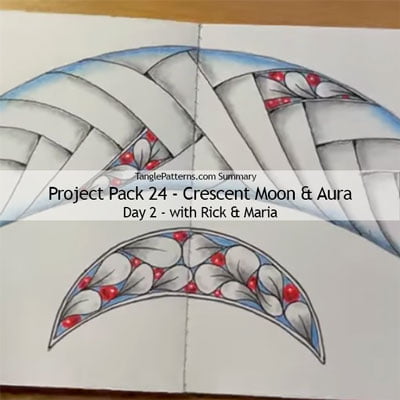
In Day 2’s video (20:25) – With Maria keeping him company, Rick tangles Betweed and Flux on pages 14-15 (the preprinted page after the center spread) of the Project Pack booklet.
Step 1: At 00:49 – After Rick and Maria’s introductions, Rick opens the booklet to pages 14-15 (follows the center spread) and selects the Micron 05 to work with.
Step 2: At 00:54 – Using the take off and land technique, and working in the large crescent space at the top of the page Rick adds a large reverse curve and while adding it he points out we can pause the videos as much as we need while we’re working.
Step 3: At 01:24 – He explains he’s working on the tangle Betweed and as he adds the alternating auras they explain how Betweed was named because of a typo.
Step 4: At 03:08 – After he finishes the left side of the shape, he turns the booklet to add to the right side.
Step 5: At 04:15 – He adds a thin aura inside one of the shapes and then adds Flux within the resulting space.
Step 6: At 06:25 – With the Red Micron 01, he adds orbs with highlights (“red berries”).
Step 7: At 07:47 – Moving to the smaller crescent shape at the bottom of the page he first restates the printed line then adds an aura within it.
Step 8: At 08:20 – He adds Flux inside that shape.
Step 9: At 09:42 – He adds the red berries in the spaces around the Flux.
Step 10: At 10:22 – He adds color with the Indigo Blue General’s Chalk Pastel Pencil in the spaces (interstices) around the berries and Flux and smooths it with a tortillion.
Step 11: At 11:57 – He adds graphite shading to the base of the leaf shapes and smooths it with a tortillion. He also adds a touch of graphite from the tortillion on the berries.
Step 12: At 13:18 – With the Micron 05 Rick adds rounding where the Betweed strokes meet.
Step 13: At 14:17 – He adds shading on the Betweed and softens it with a tortillion.
Step 14: At 16:14 – He adds “framing” with the chalk pencil around the inside edges of the large crescent shape. Maria notices he picked up the black tortillion to smooth it out and says that can add a sophisticated dimension to the blue shading.
Step 15: At 17:49 – He then adds graphite over the edge of the blue along the bottom and blends it in.
Step 16: At 18:44 – He goes back into the Betweed to add more shading.
Day 3
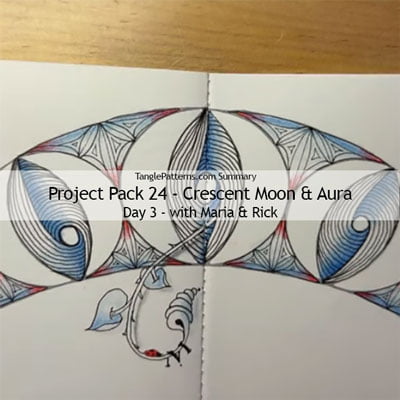
In Day 3’s video (23:49) – With Rick keeping her company, Maria tangles Well with cameo appearances from Mooka, Pokeleaf, Springkle and Bales on the page 18-19 spread in the booklet.
Step 1: At 00:58 – After their introductions, Maria explains that after analyzing the page Molly asked her to do, she’s decided she’s “going to do everything but the moons“.
Step 2: At 01:20 – Maria explains we’re going to do the tangle Well in each, but do it differently in each one. With the black Micron 05 she adds an orb in one of the spaces on the right side of the spread and then adds tethered auras by taking off from the circle and landing in the corner. She repeat this until the first space is filled.
Step 3: At 03:35 – She moves to the same shape on the left page and adds an off-center orb. She then adds the tethered auras to fill the space.
Step 4: At 05:13 – She moves back to the right side of the spread and this time she adds two orbs in it before adding one tethered aura to each and then an S stroke connecting the orbs. From there she adds more tethered auras to fill the space.
Step 5: At 07:00 – She switches to the left page and adds a diamond shape instead of an orb and then fills the space with tethered auras as before.
Step 6: At 08:11 – Now working in the space that spans the center she adds a large orb and then an aura “escaping” … “like a garlic scape” with a Mooka frond. She fills the spaces as before with the tethered auras but making sure they go behind the escaped Mooka frond.
Step 7: At 10:29 – She adds a sprout off the Mooka frond with “a bit of Pokeleaf“.
Step 8: At 11:29 – She embellishes the Mooka frond with a Springkle top.
Step 9: At 12:02 – Changing to the black Micron 01, Maria adds an orb in the last space on the right side then connects the tethered orbs to the side of the space instead of the points.
Step 10: At 13:02 – She changes to the left page and adds an aura to the last space on that side then adds “question mark” tethered auras to fill its spaces.
Step 11: At 14:00 – Maria adds a stroke to divide the space between each pair of Well-filled crescent moon shapes.
Step 12: At 14:34 – She adds “a version of Bales“, adding rice shapes on either side of the lines and moves along adding Bales to the rest as well as aura-ing inside the larger spaces.
Step 13: At 16:02 – In the largest sections at the middle of the book Maria divides the spaces further to create smaller triangles.
Step 14: At 17:34 – With the Red Micron 03 she softly adds enthatching to the corners of the Bales spaces.
Step 15: At 18:43 – With the Blue Pastel Chalk Pencil, Maria adds shading on the Well over-unders and blends it out with a tortillion. Using the blue chalk left on the tortillion she adds a touch of color to the Springkle and Pokeleaf.
Step 16: At 21:03 – She adds Blue Pastel Chalk Pencil along the inside edges of the overall shape.
Step 17: At 21:32 – Maria adds a red ladybug on the edge of her “escapee” frond then adds her chop. Lastly she adds a small shadow along the edge of the frond.
Day 4
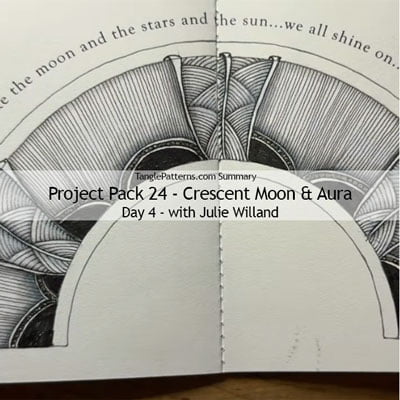
In Day 4’s video (32:54) – Julie tangles Shattuck and Moon Pie on the spread on pages 16-17 on the booklet.
Step 1: At 02:48 – After introducing herself and the contents of the Project Pack, Julie opens the booklet to page 16-17 and chooses the Black Micron 05 pen to add the tangle Shattuck.
Step 2: At 03:38 – Working just to the left of the center/gutter, she adds a slightly curved line and then adds an aura with it getting a little wider towards the top. She adds a “lip” at the top connecting the two and making it appear the lines are curling over the top.
Step 3: At 04:42 – She repeats this on the right side of the page adjacent to the gutter. Then repeats it another time on this side.
Step 4: At 05:32 – Julie adds Shattuck in the space she has created on the right of the gutter.
Step 5: At 08:03 – She adds Shattuck in the space she created to the left of the gutter.
Step 6: At 08:41 – Julie explains she’s now going to divide the remaining arcs in half and in each half, using the same spacing as before, she’ll add the same motif she created in the center.
Step 7: At 09:59 – She adds Shattuck to the spaces just created and when she’s finished she has three different sections of Shattuck.
Step 8: At 10:23 – She’s going to add the variation of Crescent Moon called Moon Pie along the bottom string, still using the Black Micron 05. She adds a ladybug shape and plans to add the rest using the drawing behind technique when she comes to the Shattuck divisions. She auras the first shape after filling it in, and adds small orbs along the aura and then adds an aura along their tops, and then another aura outside of it.
Step 9: At 13:25 – She adds the Moon Pie shapes along the rest of the string.
Step 10: At 14:25 – Julie switches to the Black Micron 01 and fills in the rest of the arc with vertical auras.
Step 11: At 18:08 – Julie now moves to shading and explains she’s going to be shading in layers beginning with graphite. She adds shading to the Shattuck first, then the edges of the Moon Pie and their sections.
Step 12: At 23:47 – After she’s added all her graphite Julie uses the tortillion to soften it all.
Step 13: At 26:21 – She switches to the Blue Pastel Chalk Pencil and adds it over the graphite along the Moon Pie edges and along one edge of the Shattuck sections.
Step 14: At 28:24 – Changing to the White Charcoal Pencil, Julie adds highlights on the Shattuck and over the middle of the entire arc.
Step 15: At 29:52 – With the Black Micron 01 she restates some of her original strokes for Shattuck.
Step 16: At 30:53 – Using the Gelly Roll Black Gold Shadow pen, Julie adds a dot of ink to each of the Moon Pie orbs.
Day 5
In Day 5’s video (29:15) – Molly and Martha explore the embedded letters technique on the spread on pages 4-5 preprinted with letters drawn by Maria spelling out AURA.
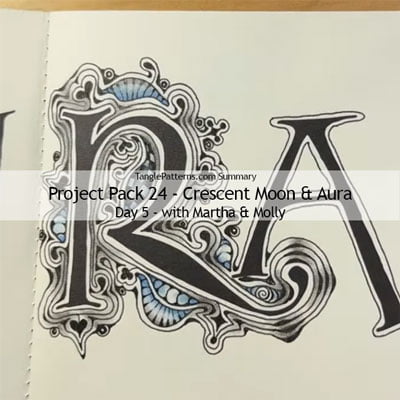
Step 1: At 04:04 – After their introductions and a pause for gratitude, Martha uses the Micron 05 and draws an aura around the letter R.
Step 2: At 07:37 – “We’re going to add interest to these lines that we’ve put down,” she adds some Fescu shapes around the perimeter of the aura.
Step 3: At 09:17 – “We thought it might be fun to playfully add some other things that you might find on a deck of cards,” as she adds tiny spade, club and diamond shape coming off the aura and more Fescu fronds.
Step 4: At 10:48 – She adds rounding in the corners.
Step 5: At 11:35 – She adds another aura around the letter and the shapes she’s just added then sculpts it with a little more rounding.
Step 6: At 13:53 – “Now’s our chance to add a few more whimsical elements,” Martha adds a stroke inside the top space of the R, then adds Knightsbridge inside the space she created.
Step 7: At 15:50 – She adds strokes creating more spaces to fill with tangles, while also adding another Fescu frond. She fills two of the spaces with Purk orbs and the third with a weighted Printemps spiral.
Step 8: At 17:18 – She adds another spade shape, then adds an aura around the entire shape again. She finishes with more rounding wherever it calls for it.
Step 9: At 21:37 – Molly steps in to demonstrate some tips and techniques on how to shade this, pointing out that we can either continue adding auras and shapes around the rest of the letters or even just leave it with only the R done. Lots of options.
Step 10: At 22:14 – Molly explains that she and Martha decided to use the Blue Pastel Chalk Pencil for shading but just doing black and white is another option.
Step 11: At 22:54 – After she adds a touch of color in a space Molly uses the tortillion to smooth it right away, “because I don’t want the dust to get all over my other work“. She continues adding Blue Chalk and smoothing it out around the art Martha has done.
Step 12: At 22:32 – “And now I’m going to go in with my graphite … Another thing when I’m doing embedded letters that I try to do is never touch the inside of that original aura.“
Step 13: At 26:48 – Molly adds highlights with the White Charcoal Pencil.
Step 14: At 27:51 – They show a gorgeous example where Martha did the entire page of embedded letters.
Day 6
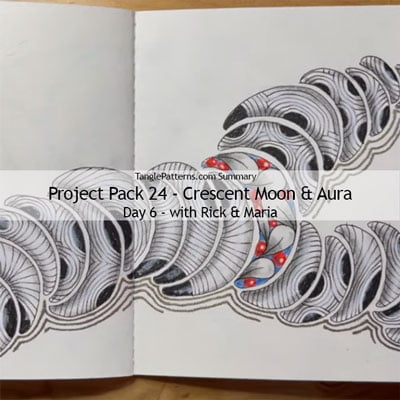
In Day 6’s video (16:34) – With Maria keeping him company, Rick tangles Molygon on the spread on pages 20-21 and fills them with Crescent Moon and Flux.
Step 1: At 00:42 – After introductions and a pause for appreciation, Rick uses the Black Micron 01 to add Molygon. He duplicates the crescent on the bottom of the left side of the spread by aura-ing the outer part of the shape. He continues to add Molygon shapes, extending a row of them outwards across the center of the spread to the other side.
Step 2: At 03:18 – He adds more Molygon shapes extending from one side, “since I had room”.
Step 3: At 03:57 – He tells the story about how Molygon got its name as he restates the lines of the original crescent shape.
Step 4: At 04:26 – He adds a Crescent Moon ladybug shape with auras inside the first Molygon shape, explaining the he plans to add these to the rest but “to do it a little bit different each time”.
Step 5: At 07:11 – He skips the shape in the middle, leaving it blank for the moment, and continues adding the Crescent Moons to the Molygon shapes.
Step 6: At 07:45 – After Rick finishes filling the rest of Molygon on that side, he returns to the center one he left blank and adds Flux to fill it.
Step 7: At 08:38 – He switches to the Red Micron 03 and fills the spaces around the Flux with red orbs with highlights.
Step 8: At 09:04 – He adds graphite shading around the inside edges of the Molygon shapes.
Step 9: At 10:10 – He uses the Blue Pastel Chalk Pencil to add color to the interstices in the Flux-filled Molygon and then adds graphite shading to there.
Step 10: At 11:18 – With the Sakura Gold Shadow Gelly Roll, he adds an aura around some edges of the overall shape. He then adds another aura to some parts.
Step 11: At 14:10 – He adds White Charcoal Pencil highlights across the piece.
Step 12: At 14:59 – Next Rick uses something that’s not in our supplies – he adds a layer of Mod Podge over the Flux section to give it some shine. Allowing it to dry between, he adds two more layers to add the shine. As an alternative, Maria suggests we can use clear nail polish if you don’t have Mod Podge.
Day 7
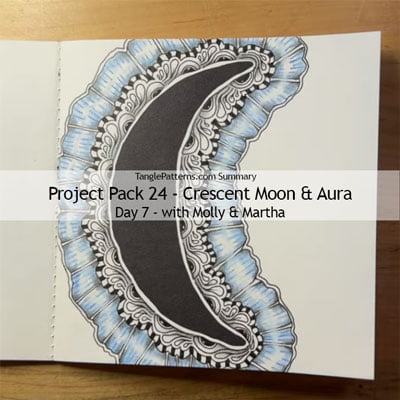
In Day 7’s video (28:18) – Martha and Molly add auras and bits of Crescent Moon and Knightsbridge around the crescent moon shape printed page 7 of the spread on pages 6-7 in the booklet.
Step 1: At 03:47: – After their introductions, reviewing the contents of the Project Pack, and taking a moment for gratitude and to get ready for tangling, Martha selects the Black Micron 05 to begin today. She adds a thin aura beside the crescent shape printed on the page and then turns it into a Flux or “teardrop with a flat side” shape by bringing it back on itself.
Step 2: At 04:51 – Moving along the crescent shape, she repeats this adding another teardrop shape creating a row of them along the edge.
Step 3: At 06:52 – “We’re building essentially kind of radiating borders out.” She goes back to the starting point and adds graduating smaller shapes in the space between the teardrops. She repeats this around the entire crescent shape.
Step 4: At 08:35 – Inside each of the original shapes, Martha adds a tiny Crescent Moon with a highlight and an aura.
Step 5: At 09:55 – She adds a flicked “vein” inside each of the “Flux” shapes.
Step 6: At 10:15 – She adds an aura around the whole shape.
Step 7: At 11:37 – “Shall we do it again?” Giving it “a little bit more space” she adds a second aura around the whole shape.
Step 8: At 12:45 – “Around this edge I’m going to further dramatize this, and add some Knightsbridge.”
Step 9: At 14:10 – Molly takes over for the next steps but notes that if we’re happy with it at this stage, “just leave it!” She recommends we watch first to see if we want to continue to add the next steps to ours.
Step 10: At 14:56 – Molly explains that so far we’ve done very close auras so next we’re going to make the aura come out a lot further.
Step 11: At 17:38 – She adds radiating double lines that connect the two auras and divide the space into smaller sections.
Step 12: At 19:14 – “To tie them together” Molly adds another fine aura.
Step 13: At 19:46 – Before we begin shading, Molly adds color with the Blue Pastel Chalk Pencil and instead of shading she adds some “textured lines” in each section, pressing and releasing pressure on the nib, creating a sparkle effect in the middle of each.
Step 14: At 23:28 – She uses a tortillion to very lightly soften the blue chalk along the edges in each section, making sure not got go over the highlight in the middle.
Step 15: At 24:47 – “Now I’m going to add a little graphite.” She tucks a small amount of graphite in each corner and blends it out.
Step 16: At 26:29 – She adds a white charcoal highlight all the way around the center highlight.
Step 17: At 27:11 – Molly finishes by adding a little touch of graphite along the edge of the very first aura Martha added, and softening it with a tortillion.
Day 8
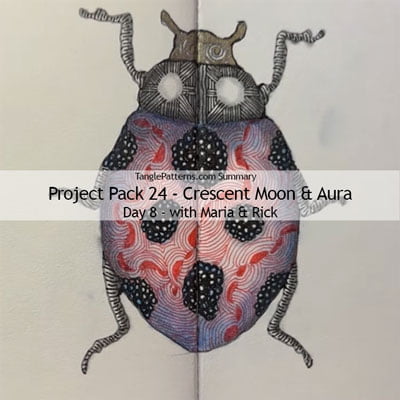
In Day 8’s video (21:43) – With Rick keeping her company, Maria works on the spread on pages 22-23 and fills the ladybug shape with Crescent Moon, Bronx Cheer, Hurry and Doodah.
Step 1: At 00:49 – After their introductions, Maria uses the graphite pencil to add roundish strings inside the body and along its edge. “What I discovered was there are over 5,000 different kinds of ladybugs,” so we don’t need to make ours look exactly like hers.
Step 2: At 01:28 – “Now I”m putting a wiggly line going around the spots, and that’s going to be the basis for our background pattern.” Using the Red Micron 03, Maria adds Crescent Moon on the line, “to serve as a texture tangle“. She adds ladybug shapes sitting on the line.
Step 3: At 03:31 – She adds a single wiggly aura along each ladybug, “I find that sets us up for where the next ones goes“. She then adds successive auras in the same manner, one on each shape, then repeating to fill in the space between the lines.
Step 4: At 05:12 – Maria adds ladybug shapes to the other side of the string line and between the existing ladybug shapes. She then repeats the aura-ing process to fill the remaining space. “The wiggliness is actually part of the composition.“
Step 5: At 07:11 – Changing to the Black Micron 05, Maria adds Bronx Cheer inside the string “spots” she added in the first step.
Step 6: At 08:56 – Continuing with the Black 05, she adds “straightish” lines inside the thorax creating the tangle Hurry and explaining the origin of its name.
Step 7: At 10:02 – “After you put down the first four lines of each segment, you go in and aura them.”
Step 8: At 11:41 – “On the legs here, we’re doing a simple version of Doodah.“
Step 9: At 12:58 – With the Sakura Shadow Gelly Roll pen, Maria adds Printemps spirals in the head section of the ladybug and fills in the antennas with the metallic ink.
Step 10: At 14:45 – “We’re going to do some intense shading here,” after the metallic ink dries.
Step 11: At 15:04 – Using the blue General’s Pastel Chalk Pencil on it’s side, Maria adds a lot of blue chalk along the inside edge of the body and softens it with a tortillion.
Step 12: At 15:50 – She adds blue chalk to edges of the Bronx Cheer areas and softens it with a tortillion.
Step 13: At 16:49 – She adds a layer of graphite shading and softening along the edges to emphasize the curvature of the shape.
Step 14: At 17:27 – She adds graphite and softening to the Hurry area.
Step 15: At 17:59 – She adds graphite shading on the legs.
Step 16: At 18:30 – Using the graphite on her tortillion she adds shading in the white spaces in the middle of the Hurry areas.
Step 17: At 19:04 – Using the Black Micron 01 Maria “cleans up” around some of the edges and adds bits of rounding to the lines and shapes.
Step 18: At 21:10 – She shows us the first version she did and used clear nail polish on it.
Wrap Up
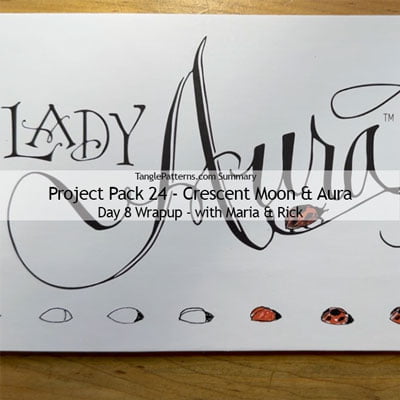
In the final video in the Project Pack 24 Series (12:26) – Rick and Maria review the Zentangle concept of the tangle enhancer called aura, how Crescent Moon teaches the concept and while paging through the completed pages of the Project Pack booklet, they introduce the ladybug-shaped character they’re calling Lady Aura.
Step 1: At 00:44 – Rick and Maria introduce themselves and note that this Project Pack was all about the aura tangle enhancer and they always teach Crescent Moon first in a beginning class because it teaches about aura-ing. They discuss how they’ve always used the “ladybug” to describe the size and shape for tangling Crescent Moon. They continue to discuss ladybugs, aura and Crescent Moon.
Step 2: At 04:22 – Rick displays the steps for Crescent Moon.
Step 3: At 05:02 – They introduce “Lady Aura” the ladybug and Maria reads “her bio“. You can read more about her here and see steps for drawing the ladybug aka Lady Aura.
Step 4: At 08:04 – They go through some of the completed pages in the Project Pack booklet and point out where Lady Aura is “camouflaged” in each design.
Step 5: At 09:08 – Rick shows an illustration by Maria of a variety of ways of filling the shapes from Day 3’s lesson.
Step 6: At 10:17 – Rick displays another illustration by Maria where she experimented with a few different ways to tangle Crescent Moon.
This recap of Zentangle’s Project Pack #24 will make it easy for you to find all the related videos and any parts of them you may wish to refer to again.
Remember the images above are linked to their YouTube video, simply click the image to go to the video. Or, you can view the complete video on the corresponding tangle’s page on TanglePatterns, they make a fascinating “historical” record of Zentangle videos on each tangle.
For a complete list of Zentangle’s Project Packs click the PROJECT PACKS link in the pink alphabetic tangle menu bar.
|
.oOo. |
|
Enhance your Zentangle experience while supporting TanglePatterns: |
|
BRAND NEW! TanglePatterns.com TANGLE GUIDE, 2026 Edition |
|
 |
The 15th Edition of the TanglePatterns.com TANGLE GUIDE is an instant-download 123-page interactive digital eBook/PDF containing over 2,300 tangles on the site from May 2010 through December 31, 2025. It's a great resource and a must-have digital tool for using the site. Visit the STORE > E-BOOKS page and help keep TanglePatterns.com going by getting your copy now! |
|
"Linda, Thank you! I was relying on too few and getting stuck after 3 years of daily working with Zentangle. This has inspired me to ‘begin again’ with renewed excitement." ~ Barbara R. |
|
| See the BOOK REVIEWS page for more details on its features and view a sample page. Note: this is a digital product to download immediately when ordering, nothing will be physically mailed to you. | |
| If you're new to Zentangle® and tangling, my TanglePatterns.com BEGINNER'S GUIDE TO ZENTANGLE is just what you need to get started. Also available en Français and en Español. | |
|
|
|
 |
This is the only Zentangle book you'll ever need: the fabulous Zentangle PRIMER Vol 1. It's your CZT-in-a-book by the founders of Zentangle®. For more about the content and to read the rave reviews, visit the BOOK REVIEWS tab. |
| Available in KINDLE format for $9.99. Spanish Edition here. Japanese Edition here. | |
| "Absolutely the best Zentangle Book yet! As an accomplished artist I used to think I did not need instruction on this art form. How wrong I was! My tangling improved by leaps and bounds after reading this book. If you think you have Zentangle down then you need this book more than ever!" ~ Kris H | |
|
|
|
|
.oOo. |
|







Linda, thank you for being the truly amazing and fantastic person that you are with doing these project pack summaries! Having everything I need on one page is perfection for my needs when I sit with my project packs. All the videos are here, and then those detailed notes with each step helps me remember where I was and where I am going. Otherwise I’d be lost trying to pick up again from where I left off! I was traveling and watching the videos and starting each day but not finishing – coming home with a half filled booked was a bit overwhelming haha
So thank you for all the time, energy and commitment you put into this website <3 This is a lot of work!!
Thanks so much, Jenn. Your thoughtfulness is most appreciated and I’m gratified you find these “treatises” useful. It’s helpful for me to know! 🙂