


 Each year our Zentangle® community looks forward to Zentangle’s December holiday tradition of their Twelve Days of Zentangle Project Pack series.
In this special series co-founders Rick Roberts and Maria Thomas and the HQ crew lead us through twelve consecutive days of tangling together based on a theme. For a list of all of the previous holiday editions, visit this link.
From the Zentangle newsletter introducing Project Pack #22:
Bijou has had a very busy year here at Zentangle HQ. Let’s just say his creative juices were flowing and he was ready to share some of his ideas for Zentangle products and content. He was very eager to contribute to our product development team and his persistence was hard to ignore, so we decided to give a couple of his ideas a try.
One idea we loved, and we thought it would be the perfect theme for Zentangle Project Pack No. 22 and our 2023 Twelve Days of Zentangle. We will deliver twelve consecutive days of tangling tutorials, curated materials, and festive content all around the same theme.
As so many of you tangle enthusiasts know … The Zentangle Method is an easy-to-learn, relaxing, and fun way to create beautiful images by drawing structured patterns that we call tangles. You create tangles with combinations of dots, lines, simple curves, S-curves, and orbs. There are a few tangles in the history of the Zentangle Method that are known more and used more often and manipulated more than others. Their forms are basic, resilient, familiar and they have the potential to be so much more in so many ways.
This project pack will take a deep dive into one particular tangle and all that it stands for. As usual, we are taking a very creative outside the box approach to this fun theme.
That particular tangle is Printemps.
And before you jump headlong into this Project Pack, Molly has some special words of encouragement to take to heart:
We are very excited about the content we have for this Project Pack, but we also realize that we have packed a lot in to the twelve days. So, we wanted you all to know that it is OK to take it all in at whatever pace you need to. Enjoy it… we sure did.
SUPPLIES: This Project Pack is available here ($39.95) in the zentangle.com store and it’s a convenient way to get all the supplies for the project. However, the introductory video reviews the items in the Project Pack and you might discover you have suitable alternatives in your own Zentangle supplies. “If you do not have the project pack materials, we encourage you to follow along with whatever you have available.”:
- One Zentangle drawstring canvas tool bag containing:
- One Sakura Micron 01 pen, Black
- One Sakura Micron 05 pen, Brown
- One Sakura Micron 08 pen, Black
- Two Sakura Pastel Moonlight Gelly Roll 10 pens: #405P Pastel Orange + #426 Pastel Green
- Two General’s Pastel Chalk pencils: 4471 Yellow Ochre + 4451 Van Dyke Brown
- One Zentangle graphite pencil
- One Zentangle General’s white charcoal pencil
- Four tortillions
- Four double-sided prestrung white Zentangle Phi tiles
- Eight double-sided prestrung white Zentangle 5xPhive “5by5″ (5″ x 5”) tiles
The following chronology is a summary of the videos for this Project Pack with links to the individual videos. Either click the Day #’s title link or the image itself to view the full video on YouTube.
It isn’t necessary to watch the videos in sequence, but it will be very helpful for you to watch the Introduction video first.
CZT Molly Hollibaugh recommends we watch Project Pack videos completely through once before beginning our tiles:
“You’re going to have a little more confidence, you’re going to be a little more aware of what’s happening next. Then you might try something different, you might explore it in a different way”.
QUICK LINKS TO DAILY SUMMARIES
Jump to:
Day 1 – Rick Roberts & Maria Thomas
Day 2 – Molly Hollibaugh & Martha Huggins
Day 3 – Julie Willand
Day 4 – Molly & Martha
Day 5 – Rick & Maria
Day 6 – Julie
Day 7 – Molly & Martha
Day 8 – Molly & Martha
Day 9 – Molly
Day 10 – Martha (Part 1), Molly (Part 2)
Day 11 – Rick & Maria
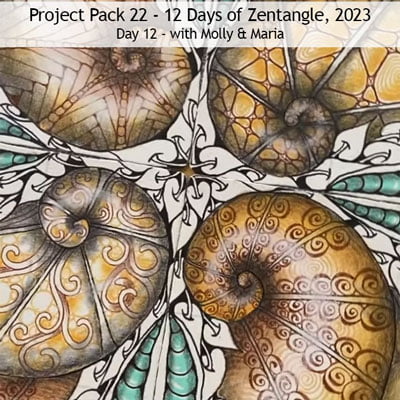
Day 12 – Rick & Maria (Part 1), Molly & Maria (Part 2)
Wrap Up – Rick & Maria
Introduction
In the introductory video (16:25) – Rick, Maria and Molly introduce this special Project Pack, reviewing the contents and giving us background on their inspiration for the project: Printemps and the spiral. They also share several book titles used in their research for us to check out at our local libraries.

Step 1: At 02:12 – After introducing themselves and reviewing the contents of the canvas drawstring tool bag – including Sakura’s new line of Pastel Moonlight Gelly Roll pens – Molly introduces the new tiles we’ll be using. The first is an updated and prestrung version of their Phi tile with mirror image strings preprinted on the back.
Step 2: At 03:06 – Molly introduces the brand new 5xPhive (5-inch by 5-inch) tiles which are also prestrung on both sides. She notes the size matches the long side of the original Phi tiles, “so they work really well together”.
Step 3: At 03:45 – Rick explains that this project pack is all about spirals, “we’re really diving in to spirals” and Molly notes, quoting the title of CZT Michele Beauchamp’s original tutorial, “It’s Spiralicious“. (Historical note: Way back then in 2012 I named Michele, “Queen of the Spirals“.)
Step 4: At 04:23 – Molly spins a whimsical Bijou tale about the origins of this project’s idea being based on Printemps and the spiral.
Step 5: At 05:19 – She describes how based on their research of spirals and their inspirations, “we came up with a series of templates … that not only honor the spiral but really dig into it in a Zentangle way”.
Step 6: At 06:01 – Rick explains how this project pack is really packed with ideas and reminds us we don’t need to get everything done right away, “think of this as our present to you to really, really enjoy and take your time and take the inspiration from what you see. And then take it where you are going on your own schedule.”
Step 7: At 06:33 – Molly agrees with Rick, noting these tiles are very big. (See Molly’s blog post on this subject here.) As Molly talks, Rick shows a variety of natural and man-made spiral objects.
Step 8: At 07:25 – “One of the big things we’re into is etymology which is the origin of words, or where words come from. So the obvious research would be what’s the origin of a spiral. So here we go … ” He goes on to explain.
Step 9: At 09:32 – He recommends the book Curves: Flowers, Foliates & Flourishes in the Formal Decorative Arts by Lisa DeLong from the Wooden Book series.
Step 10: At 11:01 – Molly introduces “a bunch of other books we used to do our research” for the kinds of designs they wanted to use in these lessons and she encourages us to check out our local libraries for these titles if we’re interested:
-
- The Golden Ratio by Mario Livo
- Celtic Design: Spiral Patterns by Aiden Meehan
- The Curves of Life by Theodore Andrea Cook
- The Power of Limits by Gyorgy Doczi
- Sacred Geometry for Artists, Dreamers, and Philosophers by John Oscar Lieben
Step 11: At 12:08 – In doing her research, Molly learned “that in Native American cultures the spiral is a symbol of the life’s journey and I encourage all of you to embrace your Zentangle life’s journal and take this project pack at your own pace. Play around with it however it works for you. You don’t have to get it all done in one day. And that whole concept of spiral as a life journey.”
Step 12: At 13:35 – Rick brings the discussion back “to some of the history or manifestations of spirals in Zentangle art”. As they wrap up the discussion they review a whole range of beautiful Zentangle tiles from around their house that feature Printemps and the spiral.
Day 1
In Day 1’s video (28:09) – With Maria keeping him company, Rick tangles our first tile in the series “using everything” in our provided supplies. He tangles Flux and Shattuck on the prestrung Phi tile.

Step 1: At 01:09 – After a brief introduction Rick selects one of the prestrung Phi tiles for today’s lesson and before tangling he begins with appreciation. He selects the Black 08 Micron pen and begins to restate some of the prestrung lines on the tile.
Step 2: At 02:20 – He switches to the Brown 05 Micron and restates the opposite side of the Flux line.
Step 3: At 03:11 – Still using the Brown pen he adds an orb on the inside of the Flux shapes, “building on this unique background spiraling string”.
Step 4: At 03:44 – He switches to the Pastel Green (“turquoise”) Moonlight Gelly Roll and after a few test strokes on the back of the tile to make sure the ink is flowing, in one of the orbs he creates “this little window here to make a little highlight” and fills in the orb with ink. He fills in every other shape: orb then Flux so there’s an unfilled space between each.
Step 5: At 04:41 – He reminds us that “at any point you can pause these because we jump ahead a lot and we are also putting down a lot of ink” so you want to allow the ink to dry well to minimize the chance of smudging your tile.
Step 6: At 04:47 – He switches to the Pastel Orange Gelly Roll and fills in the remaining spaces on the Flux “chain”.
Step 7: At 05:57 – With the Brown Micron he goes over some one the remaining strings to restate it and then fills the shape created with Flux and fills the spaces between it with orbs and inking in the interstices.
Step 8: At 07:55 – He repeats Step 7 in another area of the prestrung string: restating the string then filling it with Flux, orbs and ink. He reminds us to turn our tile as we tangle.
Step 9: At 12:11 – He repeats Step 8 in another section of the string, “skipping a stripe”, and then fills the last “stripe” on that side in the same way.
Step 10: At 14:31 – He moves to the smaller side of the Flux chain and repeats the Flux/orb fills on that side.
Step 11: At 15:00 – “As a contrast we’ll go with the 08 Black” to fill the remaining spaces with some Shattuck/Crescent Moon “drama”.
Step 12: At 17:36 – Maria notes “we called it Shattuck to do a shout to Molly, that’s her middle name. It was her great-grandmother’s name”.
Step 13: At 19:01 – With the Brown 05, he goes back over the Orange-filled Flux and adds a stroke at the base in the center and adds a similar stroke over the Pastel Green Flux using the Black 08.
Step 14: At 19:47 – “And now, it’s frosting time,” he says as he adds shading to the piece and then blends and softens it with a tortillion.
Step 15: At 21:54 – With the Van Dyke Brown Pastel Chalk pencil, Rick adds shading to the orange Flux shapes and orbs, “he uses it almost like a graphite pencil” observes Maria, then Rick softens it with another tortillion. He switches to the Yellow Ochre Pastel Chalk pencil to add similar shading to the Pastel Green Flux shapes and orbs.
Step 16: At 23:16 – He adds similar shading using the Van Dyke Brown Pastel Chalk pencil on the still-unfilled Flux. Again he changes to the Yellow Ochre Pastel Chalk pencil to add color to the tips of the Flux shapes. He blends all the shading with a tortillion.
Step 17: At 26:19 – With the White Charcoal Pencil he adds highlights on the Shattuck sections.
Step 18: At 27:03 – As Rick adds his chop Maria reminds us, “Don’t forget we add shading and highlights not according to where the light is most of the time, but according to the pattern.”
Day 2
In Day 2’s video (1:15:04) – Molly and Martha tangle Crescent Moon, Tripoli, Purk, Cadent and Jonqal on their 5xPhive prestrung tile.

Step 1: At 01:44 – After a brief introduction and noting this Project Pack “pays homage” to the spiral and the tangle Printemps, Molly and Martha take a pause for gratitude before they begin.
Step 2: At 03:05 – Martha reveals the 5xPhive tile with five spirals we’ll be using today and she’ll be starting with the Brown 05 Micron, “it’s a little bit of a thicker nib and this is helpful when we’re working on a larger surface”.
Step 3: At 04:38 – Focusing on one of the spirals at the bottom, Martha says she’s going to work with a Crescent Moon variation and adds those shapes along the perimeter of the string leaving space for the auras and for now leaving the Crescent Moons unfilled. Next she adds their auras, adding one to each shape then continues adding auras until there’s no space.
Step 4: At 08:50 – She adds Crescent Moon shapes (“layered Crescent Moon”) in the spaces between the first row. Then she adds auras to that row and repeats this process until the entire spiral space is filled.
Step 5: At 11:30 – With the Orange Gelly Roll, she fills in the “lady bug” Crescent Moon shapes, methodically filling in each row in the same order she adding them. Time is allowed for the ink to dry.
Step 6: At 13:29 – Molly takes over and skipping a spiral section, she uses the Brown 05 to add Tripoli to fill that spiral, starting with their bases along the spiral’s string.
Step 7: At 18:50 – She adds arcs and and an orb inside as many of the the Tripoli triangles as will fit, then she fills in the orbs with the Pastel Green Gelly Roll pen.
Step 8: At 20:51 – After the Gelly Roll ink has dried, Molly uses the Black 01 to fill in the spaces between the arcs and orbs.
Step 9: At 22:28 – With the Brown 05, Martha adds Purk to the spiral between the two already filled ones.
Step 10: At 28:02 – With the Purk orbs in place she goes back with the Brown pen to ink in the spaces between the orbs and also the “rays” between them.
Step 11: At 33:03 – Martha adds ink inside the Purk orbs with the Pastel Green Gelly Roll, not going all the way to the edges to leave a little white space.
Step 12: At 34:58 – After the ink dries, Molly adds Cadent to the spiral string next to the Crescent Moon section, starting by adding orbs along the edge of the string with the Brown 05. She then connects the orbs using the S stroke, creating sections around the spiral.
Step 13: At 39:36 – She creates stripes inside each section. She adds rounding around the outside edge of the spiral string then uses the Pastel Green Gelly Roll to add color to the orbs.
Step 14: At 41:29 – With the Brown 05, Martha adds Jonqal to the fifth and last spiral, giving tips on how best to set up this tangle based on parallel lines within the spiral shape.
Step 15: At 46:12 – With the Black 08, Martha fills in the alternating Jonqal spaces, similar to Knightsbridge, being somewhat careful not to go over the original brown ink structure.
Step 16: At 51:10 – She fills in the white spaces left using the Orange Gelly Roll.
Step 17: At 53:11 – Next comes the shading and highlights phase. Molly begins by adding graphite to the edge of the original string in her Tripoli section and softening it with a tortillion.
Step 18: At 55:15 – With the Yellow Ochre Pastel Chalk pencil, she adds a layer over the top of everything, going around the edge and then blending/spreading it out with a tortillion. She goes back with the graphite pencil to add shading along the inner edge of the spiral. at 57:21 she adds white charcoal pencil highlights.
Step 19: At 58:16 – She moves on to her Cadent section. With the Yellow Ochre Pastel Chalk pencil she adds a little color to the top and the bottom of a “column”, then she skips the next one and repeats, going around the spiral. She spreads it out with a tortillion, leaving a white highlight in the middle. Then she switches to the Van Dyke Brown Pastel Chalk pencil and repeats this in the remaining spaces. She adds graphite shading and highlights to finish it off.
Step 20: At 1:02:46 – Martha moves to her Crescent Moon section. She adds Yellow Ochre Pastel Chalk pencil around the perimeter of the section and blends in it, then adds graphite shading to emphasize the edge of the string. She adds white charcoal pencil highlights.
Step 21: At 1:05:24 – Martha moves to her Purk section and begins with the graphite pencil to add shading to each side of the columns, then a white highlight in the middle of each with the white charcoal pencil.
Step 22: At 1:07:59 – Martha works on her Jonqal section, adding shading and highlights beginning with graphite, then the white charcoal.
Step 23: At 1:10:45 – With all five sections now shaded and highlighted, for the final stage they “add love” with the Black 01, redefining some of the edges and adding rounding. To wrap up, they each add their chop.
Day 3
In Day 3’s video (21:47) – Julie tangles an ‘Nzeppel-filled Hollibaugh, and her favorite! Marasu on a prestrung Phi tile.

Step 1: At 01:12 – After introducing herself and the Project Pack materials, Julie shows us the pre-strung Phi tile we’ll be working with today as well as the tools contained in the canvas bag for this pack.
Step 2: At 01:50 – First pausing for a moment of gratitude and appreciation, Julie selects the Black 05 Micron to add her ‘Nzeppel–Hollibaugh to one of the bottom sections of her tile. She starts by dividing the space by adding random Hollibaugh sections.
Step 3: At 04:29 – When the section is full, Julie goes back and “caps” the top and bottom of the Hollibaugh bars. She then adds the ‘Nzeppel “ball” shapes inside each space by redefining the line and rounding the corners.
Step 4: At 06:17 – She skips the section above that and repeats what she’s done in the first section – filling it with Hollibaugh bars, capping them and filling the spaces with ‘Nzeppel “balls”.
Step 5: At 08:09 – Changing to the Brown Micron 05, she fills the remaining spaces with “what what we would use to fill traditional Marasu” while she chats and notes that she’s gradually getting back to work after having her second son this summer. And this Project Pack “has my name written all over it”.
Step 6: At 13:28 – Julie switches to the Pastel Orange Gelly Roll pen and uses it to aura each side of the Marasu bands.
Step 7: At 14:59 – Julie begins the shading phase, using the Van Dyke Brown Chalk Pastel pencil to add color to the ‘Nzeppel areas, “just ever so lightly on the inside of each of the orb shapes” then softening it out with a tortillion.
Step 8: At 16:34 – She then adds graphite to the top and bottom of the Marasu spaces and softens it with a tortillion. She then adds a highlight in the center with the white charcoal pencil.
Step 9: At 19:24 – She adds more graphite to the Marasu “ever so softly” along the string lines and softens it with a tortillion. To wrap up, she adds her chop.
Day 4
In Day 4’s video (55:42) – Molly and Martha use auras and add the tangles Crescent Moon and Betweed on their prestrung Phi tile.

Step 1: At 01:50 – After their preamble, Martha shows us the prestrung Phi tile selected for today’s lesson and we’re going to get started with the Black 01 Micron.
Step 2: At 02:32 – First pausing for gratitude, Martha begins to emphasize the curved outline of the string shape by retracing the line in each section and then creating a seed shape with a curved stroke on the outside, turning the tile as she goes and creating a scalloped edge.
Step 3: At 04:46 – She goes back to where she started and adds an aura (“a tethered aura”) around the outside edge of both strokes.
Step 4: At 06:33 – Molly takes over and starting with the largest stroke in the string, she adds a line over the string and then an aura on either side. She repeats this for all of the remaining string lines.
Step 5: At 09:37 – She then goes back to add another aura with equal spacing on each side of the previous strokes but using the alternating strokes of Betweed to fill each space.
Step 6: At 14:00 – Martha goes around the outside edge and adds a Crescent Moon shape between each scallop. She fills these in and adds an aura.
Step 7: At 16:69 – She auras the Crescent Moon “all around the perimeter until they meet”.
Step 8: At 19:57 – She then adds an orb between each of the Crescent Moon.
Step 9: At 20:33 – She uses the Pastel Green Gelly Roll to color in the orbs she just added.
Step 10: At 22:04 – She adds orbs in the original long seed shapes that Molly created, leaving a space between each and graduating them in size to fit. They remind us to take our time and allow the ink to dry.
Step 11: At 26:28 – After the green ink has dried, Martha uses the Pastel Orange Gelly Roll to add orbs in all the spaces left.
Step 12: At 29:53 – She continues with the Orange Gelly Roll and adds orbs around the outside edges of the original seed shapes.
Step 13: At 31:46 – She adds the Pastel Green Gelly Roll to the center.
Step 14: At 33:34 – They allow time for the Gelly Roll ink to dry then Molly suggests we watch what she’s doing first and then do our own tiles. She uses the Yellow Ochre Chalk Pastel pencil to add color around the inside perimeter of the spiral and some in the center where the “rays” all meet. She then blends and softens the color with a tortillion.
Step 15: At 38:40 – Next she adds Van Dyke Brown Chalk Pastel to the triangular area of the Betweed sections and blends it with a tortillion.
Step 16: At 39:39 – She adds more Yellow Ochre in the same areas.
Step 17: At 40:42 – Molly adds graphite shading around the inside edge of the large spiral and at the center where the ribs meet and blends it all with a tortillion.
Step 18: At 42:46 – She adds graphite and blending in the Betweed areas.
Step 19: At 43:20 – She adds white charcoal pencil highlights over the as-yet unshaded center of the spiral.
Step 20: At 44:09 – She begins work on the outside edge where we began this tile with seed shapes and Crescent Moon, adding Yellow Ochre pencil to the ends of the seeds and at the base of the Crescent Moon and blending it.
Step 21: At 46:54 – She adds graphite to those areas and blends it out.
Step 22: At 49:22 – She adds white charcoal pencil highlights in the center of those shapes.
Step 23: At 50:40 – Martha uses the Black 01 Micron to redefine edges and emphasize strokes that have become blurred with the pencils and blending. To wrap up, they both add their chop.
Day 5
In Day 5’s video (36:44) – With Maria keeping him company and adding her commentary and observations, Rick tangles Well and Printemps on another prestrung Phi tile.

Step 1: At 01:03 – After a brief introduction to this series, Rick uses the Black 08 Micron to begin restating the string line printed on the tile, pointing out how he turns the tile to accommodate the position of his hand.
Step 2: At 01:56 – He creates “more spaces in which to tangle” but adding an aura line taking off from one of the spirals and aiming for the corner of the tile. He reminds us we can pause and rewind any video as needed.
Step 3: At 02:10 – He turns the tile and adds a similar aura from the remaining spiral into the opposite corner.
Step 4: At 02:24 – He adds a stroke taking off from the original string line and more or less parallel to the strokes he just added, then repeats that on the other side. Maria observes that the shape looks like a script X.
Step 5: At 03:28 – Changing to the Black 01 he adds strokes that divide the largest middle sections into “squares” to accommodate the fragments he plans to add. He repeats this in the remaining large section.
Step 6: At 05:24 – Creating the tangle Well, he adds an orb in the middle of one square and adds the take-off-and-land strokes in a counterclockwise direction from the orb to each corner of that square.
Step 7: At 06:07 – He adds orbs in the rest of the squares on that side and finishes each with the take-off-and-land strokes.
Step 8: At 08:41 – He repeats this, adding the Well fragments on the other side but this time he alternates adding the take-off-and-land strokes clockwise and counterclockwise, mirroring each square. He points out how two different meta shapes are formed by this change in stroke direction.
Step 9: At 12:47 – Next he adds rounding in each of the fragments.
Step 10: At 15:10 – He uses the Pastel Green Gelly Roll to fill in the orbs on one side, being careful he doesn’t go over the black strokes.
Step 11: At 15:59 – He uses the Pastel Orange to fill in the orbs on the other side, being careful not to smudge the Green ones.
Step 12: At 16:44 – He turns the tile and continues with the Orange pen, filling in two adjacent shapes near the Green orbs, creating an Orange hourglass shape.
Step 13: At 18:23 – Switching back to the Pastel Green pen, he fills in every other fan (“Ginko”) shape on the other side.
Step 14: At 20:49 – Still with the Pastel Green pen, he fills in the large bottom triangle shape on the side with the Orange metapatterns.
Step 15: At 21:25 – He switches back to the Orange pen and fills in the large triangle on the other side.
Step 16: At 22:15 – Making sure the Gelly Roll ink is dry (Rick left his overnight), Rick uses the Yellow Ochre Pastel Chalk pencil to add shading on the ends of the Orange metapattern.
Step 17: At 23:28 – He switches to the Van Dyke Brown Pastel Chalk pencil and adds a touch of that over the Yellow Ochre. He smooths them in with a tortillion.
Step 18: At 24:30 – Rick adds graphite shading, “I want to make these look rounded, so I’m going to put graphite on the edges of the band.” He softens it with a tortillion, then goes back with the graphite pencil to darken the edges.
Step 19: At 26:45 – Working on the fan-shape side, Rick adds a curve of graphite in each fan.
Step 20: At 27:03 – He uses the Van Dyke Brown Pastel Chalk pencil to add similar shading along the edges of the band with the fans and blends it towards the middle of the band.
Step 21: At 29:06 – With the white charcoal pencil Rick adds highlights on the fan shapes.
Step 22: At 29:31 – With the Brown 05 Micron, Rick fills the large Orange Gelly Roll triangle section with Printemps. Maria gives a tip about starting Printemps in the middle of a section.
Step 23: At 31:08 – He changes to the Black 08 and also fills in the Green triangle section with Printemps.
Step 24: At 32:05 – He uses the Van Dyke Brown pencil to shade the Orange triangle section, and the graphite pencil to add shading to the Green section.
Step 25: At 33:19 – He adds Yellow Ochre pencil randomly around the spiral shapes on the remaining white areas of the tile and softens it. He finishes by adding his chop.
Day 6
In Day 6’s video (30:29) – Julie Willand tangles Karry Heun’s Sand Swirl together with Pokeroot, Printemps and fragment T5 (page 115, Zentangle Primer Vol. 1) on a prestrung 5xPhive tile.

Step 1: At 01:27 – After her introduction to this Project Pack, Julie selects one of the prestrung 5xPhive tiles for today.
Step 2: At 02:42 – After her pause for gratitude and appreciation, Julie starts with the Black 01 Micron and “one of my favorite spiraling tangles, Sand Swirl“. She adds it to one of the outside sections in the string.
Step 3: At 06:25 – Julie changes to the Brown 05 Micron and skipping the section next to the Sand Swirl, she adds Pokeroot.
Step 4: At 08:35 – She switches to the Black 01 again and skipping the next section, she adds more Sand Swirl to the next one.
Step 5: At 09:57 – For contrast, next Julie adds a fragment with the Pale Green Gelly Roll pen, starting by adding sets of parallel stroke to divide the space she plans to use. She repeats this in another section of the string.
Step 6: At 12:51 – Reminding us to allow the ink to dry, Julie uses the Brown 05 Micron to add the fragment to the squares she just created, mirroring each square from the previous one.
Step 7: At 16:32 – She moves on to work in the remaining white spaces. Using the Yellow Ochre Pastel Chalk pencil, she fills those sections with a weighted version of Printemps.
Step 8: At 18:22 – Julie moves on to the shading phase and beginning with the Van Dyke Brown Pastel Chalk pencil she adds shading to the Sand Swirl then softens it with a tortillion. Then she uses the Yellow Ochre pencil to fill in the remaining parts of the Sand Swirl.
Step 9: At 20:55 – She moves on to the Pokeroot section and adds Van Dyke Brown to the “berries” and softens it with a tortillion.
Step 10: At 22:29 – She adds Van Dyke Brown pencil to the fragment sections, softens it with a tortillion and then adds Yellow Ochre highlights.
Step 11: At 23:44 – Using the tortillion with Yellow Ochre Pastel Chalk on it, she adds depth to the Printemps by softening their outer edges and being careful not to smudge them too much.
Step 12: At 24:14 – Switching to the graphite pencil, Julie adds depth and dimension in various sections around the tile and then softens and blends it all out.
Step 13: At 27:48 – With the white charcoal pencil she adds highlights.
Step 14: At 28:38 – She uses the Black Micron 01 and the Brown 05 Micron to restate some of the original strokes to help redefine them. Lastly she adds her chop.
Day 7
In Day 7’s video (31:30) – Molly and Martha tangle Mooka, Knightsbridge and Tipple on a prestrung 5xPhive tile.

Step 1: At 01:15 – Martha shows us the prestrung 5xPhive tile we’ll be working on today and starts with the Brown 05 Micron.
Step 2: At 02:11 – She points out that this tile is a simple string composed of just three lines coming off the center orb and notes we’ll be working primarily with a variation of Mooka today.
Step 3: At 02:52 – She adds the first Mooka along the string line, using a “nice long stem … and a bit of a shaky line”.
Step 4: At 03:31 – The next Mooka she adds faces in the opposite direction.
Step 5: At 03:56 – “I’m now going to layer smaller Mookas underneath.”
Step 6: At 05:10 – “This is our basic setup and we’re going to repeat this” while we follow the same string line until we reach the end of that section. (Martha calls this “stacked Mookas“, see Project Pack 13, Day 6 where Maria introduces this Mooka variation, she calls “a spray of Mookas“.)
Step 7: At 09:00 – Martha repeats Steps 3-Step 6 on another string.
Step 8: At 10:31 – On the last string line Martha repeats this but works in the opposite direction, from the inside of the tile out to the outer edge.
Step 9: At 14:30 – When she’s finished adding the Mookas, Martha goes back with the Brown 05 pen to “reemphasize some things that were happening organically,” she adds “texturing drama, very much like Diva Dance“, as well as rounding and filling in the spaces between the Mookas.
Step 10: At 18:40 – Molly takes over and with the Black 01 Micron, on half the tile she adds Knightsbridge in the spaces between the Mookas.
Step 11: At 23:04 – She adds Tipple in the spaces on the other half of the tile.
Step 12: At 24:54 – Molly adds graphite “in the background to make the Mookas pop forward”, adding shading to the Tipple and Knightsbridge sections. She softens the graphite with a tortillion.
Step 13: At 27:02 – With the Yellow Ochre Pastel Chalk pencil, Martha adds shading and a touch of graphite on the bases of each Mooka section.
Step 14: At 29:28 – With the Black 01 Micron, Martha adds “a kind of crowning element … for one final detail and that is to draw a very fine aura around the perimeter of the tile.” They both add their chops to finish the tile.
Day 8
In Day 8’s video (56:14) – Molly and Martha tangle using peppering, auras and Jonqal on a prestrung 5xPhive tile.

Step 1: At 01:30 – After their introduction to this Project Pack, Martha selects one of the prestrung 5byPhive tiles and pauses to honor the first step of the Zentangle Method™: gratitude and appreciation.
Step 2: At 02:28 – Molly chooses the Brown 05 Micron and “we’re going to start in the middle with a variation or hybrid of Pepper and Spoken.”
Step 3: At 03:38 – She adds a small orb in the middle circle string on the tile, then “thinking of the number 9” she takes off from that orb and lands on the string. She then weights the base of that stroke. She repeats this, working her way round the orb she placed until she fills up the center circular string.
Step 4: At 05:17 – Using the center string as a starting point, she adds the take-off-and-land, then weighted strokes to fill the next string circle.
Step 5: At 06:36 – She moves on to the next section and repeats these strokes to fill it, noting “I like to start in the middle because I think it is easier”.
Step 6: At 07:31 – She moves out to the next section (fourth) and fills it in the same way.
Step 7: At 08:19 – She fills the fifth section in the same way but because it is a much larger section she does it in “chunks” which she demonstrates.
Step 8: At 11:02 – Martha takes over and with the Black 01 Micron she creates a border around the area Molly created. She starts with adding a stroke along the edge, going along the string.
Step 9: At 12:10 – She adds an aura around the shape, about the width of her pen.
Step 10: At 13:31 – She divides the auraed space created in half by adding a stroke midway between the two.
Step 11: At 13:50 – She adds lines to create Jonqal for the border.
Step 12: At 15:32 – “Now we’re going to fill in every other space on each side, alternating like a checkerboard.”
Step 13: At 17:05 – She adds a thin aura around the Jonqal edge.
Step 14: At 18:02 – Now focusing on the “gorgeous moon-shaped space left, we’re going to divide that into sections we can fill later”. She uses the Black 01 to add pairs of narrow bands in that section, giving them the same spacing as the narrow aura around the Jonqal.
Step 15: At 19:24 – Using the same spacing, Martha adds an aura around the Jonqal band, making sure to go behind each of the bands she just added.
Step 16: At 20:15 – She fills that new aura with small orbs.
Step 17: At 21:43 – Molly takes over to fill in the fragment spaces and she starts by adding a light string line to divide each fragment space in half.
Step 18: At 22:54 – Molly says she’s going to add a zigzag pattern that falls behind and adds a dot reference on every other pencil line she just added.
Step 19: At 22:38 – With the Brown 05 Micron she adds V-shape strokes connecting the dot in one square to the base of the pencil line in the next.
Step 20: At 25:48 – She auras the outside of the V-shapes she just added, then auras the inside of them.
Step 21: At 27:19 – Next she adds “texture” in the spaces she just created, adding weighted strokes from the triangle points to the aura baseline.
Step 22: At 28:40 – She adds a thicker aura, adding dots as guides for where to land her strokes. Then she adds a thin aura on those strokes.
Step 23: At 30:18 – Martha takes over to “add the next layer”, continuing with the Brown 05 and adding zigzag strokes between the band, starting from the aura Molly just created and aiming at the centerpoint of each section that has “a low point”.
Step 24: At 31:25 – She adds a very fine aura on the inside of the strokes she just added and then a wider-spaced one inside it. She then fills those triangles with weighted strokes from the triangle points to the aura baseline, (as Molly did in Step 21).
Step 25: At 33:24 – Moving on to the outer spaces left, Martha adds a stroke from the tip of the bands to the midway point of the triangle between them. She then repeats the auras and weighted strokes inside the triangles.
Step 26: At 36:10 – She adds orbs inside the outer band of auras.
Step 27: At 36:39 – With the Black 08 Micron she inks in the spaces remaining around the outer edges.
Step 28: At 38:48 – She uses the Pastel Green Gelly Roll to ink in all of the orbs.
Step 29: At 40:58 – After letting the ink dry, Molly takes over to add the shading, starting with a Yellow Ochre layer. Then “for depth,” she adds a layer of Van Dyke Brown “here and there” over the Yellow Ochre.
Step 30: At 44:25 – “Next is my graphite layer,” Molly works a section at a time adding graphite and blending “to see where I’m at”. She goes back with the Yellow Ochre “to bring that color back a little more”. She adds white charcoal highlights over the center of the spirals.
Step31: At 49:06 – She works on the Jonqal section.
Step32: At 49:57 – She moves outwards to the next section and adds Yellow Ochre at the base of all the triangle sections, then Van Dyke Brown at the tops of the triangle sections.
Step33: At 51:55 – She adds graphite to the pencil lines she added in Step 17, making them bolder.
Step34: At 54:37 – She adds graphite on each side of the original bands Martha added to divide the sections.
Day 9
In Day 9’s video (22:39) – Molly works on the beginning of a 5xPhive four-tile ensemble we’ll be creating in the last four days of this Project Pack. She tangles a version of CZT Carole Ohl’s Inapod together with Pokeleaf.

Step 1: At 01:02 – After her introduction, Molly explains she’ll be working on the beginning of a 5xPhive four-tile ensemble we’ll be creating in the last four days of this Project Pack.
Step 2: At 01:30 – She also explains we’ll want to have painter’s, or washi tape, or something similar handy to use a little later.
Step 3: At 03:07 – She’s using the last four identically-strung 5xPhive tiles and lays them out in one of their potential ensemble arrangements.
Step 4: At 03:51 – She takes our customary moments to pause for gratitude and appreciation before she begins.
Step 5: At 05:07 – “We are going to attempt to cover this set of beautiful four tiles in the next four days … you can do it at any pace you want .. any amount of time you need.”
Step 6: At 05:51 – “The reason we have the masking tape is that we’re going to tape multiple tiles together at a time to work on them.”
Step 7: At 06:08 – She directs us to take two of the tiles and tape them together by first putting them in the orientation she shows us., then flips them over together and lightly tape them together where their edges meet. Do not do this too hard because we’re going to take them apart later on but the tape is to keep them together temporarily while we work on them. Molly uses a piece of washi tape to join hers.
Step 8: At 07:41 – With pencil she lightly joins the outer circle string together across the two tiles. Then she extends one of the lines further down the left tile towards the inner edge.
Step 9: At 08:10 – With the Black 08 Micron, she begins to add the tangles “that became my connectors, that kind of seal these tiles together. And it’s going to be pretty much the only tangle that bridges over two tiles.” Beginning to add Inapod, Molly adds a very narrow “pod shape” along the center seam on both tiles.
Step 10: At 09:08 – She adds an aura on both lines, allowing a larger space between them. Then she adds a narrow “tethered aura” outside both of those.
Step 11: At 10:08 – She fills the larger space on both sides with orbs, “really smooshed in there” and inks in the interstices.
Step 12: At 12:01 – Moving to the bottom of the tiles, Molly adds Pokeleaf growing up from the bottom “to support my pod” going between and behind while avoiding the spiral strings. She inks in the spaces between the Pokeleaf and the string.
Step 13: At 16:07 – She says we’re going to be doing this on all four tiles. She puts those two tiles aside and repeats exactly the same sequence of lightly taping them together, and then Steps 8 through 12.
Step 14: At 18:18 – With the two sets of tiles done, she assembles all four together such that the outer string is one large circle and tapes the four together. She then repeats the entire sequence on both remaining seams.
Step 15: At 19:27 – We can leave all four connected together if we prefer but before Molly proceeds further she removes the tape such that the tiles are still connected in sets of two, for ease of continuing to working with them.
Step 16: At 19:55 – In the final step for today’s lesson Molly uses the Pale Green Gelly Roll to fill in the Inapod orbs on all four tiles, leaving a small moon-shaped “sparkle” area on each.
Day 10 – Part 1
In Day 10’s video (20:28) – On the second day of our four-tile ensemble, in the first part of today’s lesson Martha further develops the ensemble Molly worked on in Day 9, adding versions of Printemps in one of the spiral sections on one pair of tiles.

Step 1: At 00:44 – Martha points out the vary large spiral covering two of the tiles we’re going to be working on today.
Step 2: At 01:25 – She starts with the graphite pencil to “kind of map out where we’re going to be working so there isn’t any confusion later”. She adds a very small arc in the small square to mark where the beginning of the spiral is.
Step 3: At 02:02 – She adds a small X in each of the spaces we’re going to be working on.
Step 4: At 02:49 – With the Black 08 Micron, she divides the spiral into smaller sections by adding parallel bands from side to side around the spiral and going behind where necessary.
Step 5: At 07:59 – Changing to the Brown 05 Micron, Martha says “we’re going to be filling the spiral with lots of spirals.” Starting from the outside of the spiral string, she adds pairs of Printemps spirals nestling behind one another and decreasing in size along a band towards the center. She then adds weighting to each of the Printemps spirals. She repeats this on all of the bands.
Step 6: At 14:32 – She adds tiny orbs in any of the spaces left between the Printemps.
Step 7: At 16:34 – Martha changes to the Pastel Orange Gelly Roll and adds a large spiral in the center of the space between the Printemps rows and then adds auras radiating out to fill the remaining space in the section.
Step 8: At 18:22 – Moving the tile around so her hand doesn’t smudge the Gelly Roll ink, Martha fills in each of the remaining sections the same as she did in Step 7.
Day 10 – Part 2
In Day 10’s video (23:59) – In part two of today’s lesson on our four-tile ensemble, on the remaining pair of tiles Molly adds Betweed in the same spiral section Martha did on the other pair of tiles.

Step 1: At 02:22 – After her introduction, Molly takes the other pair of tiles and works in the same spiral shape that Martha did in Part 1 and we’ll mostly be working with the the Brown 05 Micron.
Step 2: At 04:40 – After guiding us through a moment for gratitude and appreciation, Molly marks the center of the the spiral with her graphite pencil then with the Brown 05 Micron she begins to divide the spiral into sections in the same way Martha did.
Step 3: At 09:00 – She adds Betweed and rounding on it to each of the sections created by the bands she added.
Step 4: At 18:41 – Molly fills each of the bands with orbs.
Step 5: At 20:06 – She inks in the bottom of the Betweed where there are small spaces along the string.
Step 6: At 21:51 – She uses the Pale Orange Gelly Roll to fill in the orbs, adding a sparkle space where they are large enough.
Day 11
In Day 11’s video (29:26) – With Maria keeping him company, Rick tangles Crazy ‘Nzeppel with Printemps on one and Hollis on the other of the remaining two spirals on our 4-tile ensemble.

Step 1: At 00:48 – After introducing themselves, Rick uses the graphite pencil to continue the center of the spiral as both Martha and Molly did with their sections yesterday.
Step 2: At 01:10 – With the Black 08 Micron (not the 01), Rick follow “the same theme that Molly and Martha did in dividing up the spiral into sections”.
Step 3: At 03:38 – He uses the Brown 05 Micron to add Crazy ‘Nzeppel, starting by lightly drawing random crossing lines in each section.
Step 4: At 04:45 – Using a little more pressure he adds the “smooshed balloon” inside each space created by the random lines.
Step 5: At 06:58 – Changing to the Pastel Orange Gelly Roll, he adds a combination of Printemps and aura inside the ‘Nzeppel by auraing the shape and then continuing to spiral inwards, “like Printemps backwards”. Maria notes that the Gelly Roll pens need to be held “almost vertical” for them to work properly.
Step 6: At 08:38 – He repeats this in every one of the sections he created in Step 2.
Step 7: At 15:31 – Having finished the first set of tiles, Rick moves on to the second set and repeats the process of completing the spiral with pencil, then using the Black 08 pen to divide it into sections.
Step 8: At 18:07 – With the Brown 08, Rick begins to add Hollis to a section of the spiral. Rick repeats their explanation of the “history” of Hollis. He continues adding Hollis to the remaining sections.
Step 9: At 24:10 – He changes to the Pale Orange Gelly Roll and fills all of the Hollis spaces with a texture of orbs. Their tip is to start with the largest space and put the biggest orb in it, then build the rest around it.
Step 10: At 28:48 – Rick says that we’ve now got all of the ink our our four quadrants and he assembles all four tiles together. On Day 12 we’ll be adding the finishing layers of shading and highlights to the entire ensemble.
Day 12 – Part 1
In Day 12’s video (17:06) – With Maria keeping him company, Rick adds dimension with shading, color and highlights on the tiles he worked on in Day 11.

Step 1: At 00:21 – After a brief introduction, with the Van Dyke Brown Chalk Pencil, Rick begins by adding color to the Hollis sections he did on his tiles yesterday. He then smooths it out with a tortillion.
Step 2: At 01:59 – He changes to the Yellow Ochre Pastel Chalk pencil and continues to add color to the Hollis sections, giving it “a golden glow”.
Step 3: At 04:31 – He changes to the graphite pencil and adds shading to emphasize the spiral string. He uses a spare sheet of paper for his hand to rest on to prevent smudging. He then softens the graphite with a tortillion.
Step 4: At 09:31 – He also adds graphite “in the parts where that pod and those Pokeleaves are” and softens it.
Step 5: At 09:15 – He adds graphite shading along the bands dividing the spiral into sections.
Step 6: At 10:05 – Moving on to the other two tiles, Rick uses the Yellow Ochre Pastel Pencil (he first says Brown) inside the Crazy ‘Nzeppel bubbles on one side, then softens it with a tortillion.
Step 7: At 12:35 – With the graphite pencil he emphasizes one side of the bands by adding shading and blending it out.
Step 8: At 13:55 – Again he emphasizes the spiral shape by adding graphite all along it and softening with a tortillion.
Step 9: At 15:44 – As he did on the first two tiles, he works around the Pokeleaf and pod with graphite.
Day 12 – Part 2
In Day 12’s video (27:16) – With Maria keeping her company, Molly adds dimension with shading, color and highlights on the tiles she worked on in Day 10.
Step 1: At 01:01 – After Molly and Maria introduce themselves, Molly takes the Van Dyke Brown Pastel Chalk pencil and begins by defining the spiral string on the Printemps section and softening it with a tortillion.
Step 2: At 02:04 – She changes to the Yellow Ochre Pastel Chalk pencil and adds a layer around the inside edges of the spiral. Molly also uses a scrap piece of paper to rest her hand on. She softens the chalk with a tortillion.
Step 3: At 05:01 – Molly goes over the Yellow Ochre along the string edge and between the Printemps spirals with the Van Dyke Brown Pastel Chalk pencil, then softens it with a tortillion.
Step 4: At 06:45 – With the graphite pencil goes back to reemphasize the original string both in the middle and around the edges.
Step 5: At 08:50 – Molly uses the white charcoal pencil to add highlights around the spiral.
Step 6: At 09:56 – Molly uses graphite to work around the white Pokeleaf, adding contrast to emphasize them.
Step 7: At 10:40 – She adds more graphite around the edges of the spiral to give it more contrast.
Step 8: At 11:09 – Molly moves on to the other two tiles to do similar work on her Betweed spiral.
Step 9: At 11:50 – She starts of with the Yellow Ochre Pastel Chalk pencil and adds color at the bases of the bands of the Betweed sections and softens it with a tortillion.
Step 10: At 13:49 – With the Van Dyke Brown Pastel Chalk pencil, Molly adds color around the spiral string and softens it with a tortillion.
Step 11: At 15:21 – She adds brown around the Pokeleaf to give it dimension.
Step 12: At 15:44 – She uses the graphite pencil to add more definition to the spiral string.
Step 13: At 18:10 – “I wanted to add some more warm tones”, Molly adds Yellow Ochre Pastel Chalk over some of the earlier layers. She reminds us to “step back” to look at our work to see where we might want to add finishing touches.
Step 14: At 19:47 – She goes over the area adding white charcoal pencil highlights.
Step 15: At 20:25 – Molly puts the four tile ensemble together to review the whole piece to see what she might want to add. She tapes the ensemble together again with washi tape.
Step 16: At 20:59 – She notes that Rick has given her permission to go back into his sections once she had it all together, so Molly adds finishing touches, starting with adding a white charcoal pencil highlight over his Hollis and ‘Nzeppel spirals.
Step 17: At 22:42 – She adds more graphite shading, including along the inside edge of the Inapod shapes.
Step 18: At 23:59 – With the Black 01 Micron, Molly redefines the outer edge of the spirals.
Step 19: At 25:51 – She adds some final touches of graphite
Wrap Up
In the final video in the Project Pack 19 Series (19:41) – Rick and Maria “go over a little of what we did and also show you some of the other things that we looked at”.

Step 1: At 00:01 – Rick and Maria introduce themselves and explain that in this video they will “go over a little of what we did and also show you some of the other things that we looked at”.
Step 2: At 00:34 – Rick shows us the blank Phi tile string that was used in Day 1, then he shows us what he did with it.
Step 3: At 01:52 – He shows us the blank prestrung 5xPhive tile used in Day 2, and shows how the 5xPhive and Phi tiles “play really well together”. He then shows us Molly and Martha’s completed tile, as well as one of the prototypes they had done.
Step 4: At 03:42 – He shows the blank prestrung 5xPhive tile Julie used in Day 3, and her completed tile. He also shows us one of Julie’s prototypes and how she used the same string in a different way. He then shows one that Molly did and another of Julie’s, all using the same string in a different way with a variety of different tangles.
Step 5: At 05:25 – Next we see the prestrung Phi tile used on Day 4 and the final tile Molly and Martha created using it.
Step 6: At 06:28 – Rick shows us the prestrung Phi tile her used on Day 5 and the tile he did with it. He also shows a prototype he did with it and then he shows three different ensembles he created in Photoshop (or use a tiling app, as Maria suggests) by mirroring and flipping the tiles and aligning them at different angles.
Step 7: At 10:42 – For Julie’s Day 6 tile we again look at the before and after, as well as two more prototype tiles.
Step 8: At 12:38 – For Molly and Martha’s Day 7, Rick shows us the blank prestrung 5xPhive tile used, and the tile they finished with it. He then shows us two prototype tiles done using this string.
Step 9: At 14:00 – Next we see Day 8‘s prestrung 5xPhive tile and Molly and Martha’s finished version. as well as “earlier studies”.
Step 10: At 15:08 – Lastly we arrive at the Day 9-10-11-12 prestrung 5xPhive tile ensemble, based on 4 identically-strung tiles using the Fibonacci proportion. Rick turns the tiles showing us various ways the tiles look together. He then shows us prototypes done earlier as they developed the Project Pack.
Step 11: At 19:03 – Rick shows us a frame they designed for the 4-tile ensemble which also fits the Opus tile (all available in the shop on zentangle.com).
This recap of Zentangle’s Project Pack #22 will make it easy for you to find all the related videos and any parts of them you may wish to refer to again.
Remember the images above are linked to their YouTube video, simply click the image to go to the video. Or, you can view the complete video on the corresponding tangle’s page on TanglePatterns, they make a fascinating “historical” record of Zentangle videos on each tangle.
For a complete list of Zentangle’s Project Packs click the PROJECT PACKS link in the pink alphabetic tangle menu bar.
A gentle reminder: It’s that time of year: Please help me keep TanglePatterns online for another year?
|
.oOo. |
|
Enhance your Zentangle experience while supporting TanglePatterns: |
|
BRAND NEW! TanglePatterns.com TANGLE GUIDE, 2026 Edition |
|
 |
The 15th Edition of the TanglePatterns.com TANGLE GUIDE is an instant-download 123-page interactive digital eBook/PDF containing over 2,300 tangles on the site from May 2010 through December 31, 2025. It's a great resource and a must-have digital tool for using the site. Visit the STORE > E-BOOKS page and help keep TanglePatterns.com going by getting your copy now! |
|
"Linda, Thank you! I was relying on too few and getting stuck after 3 years of daily working with Zentangle. This has inspired me to ‘begin again’ with renewed excitement." ~ Barbara R. |
|
| See the BOOK REVIEWS page for more details on its features and view a sample page. Note: this is a digital product downloaded immediately when ordering, nothing will be physically mailed to you. | |
| If you're new to Zentangle® and tangling, my TanglePatterns.com BEGINNER'S GUIDE TO ZENTANGLE is just what you need to get started. Also available en Français and en Español. | |
|
|
|
 |
This is the only Zentangle book you'll ever need: the fabulous Zentangle PRIMER Vol 1. It's your CZT-in-a-book by the founders of Zentangle®. For more about the content and to read the rave reviews, visit the BOOK REVIEWS tab. |
| Available in KINDLE format for $9.99. Spanish Edition here. Japanese Edition here. | |
| "Absolutely the best Zentangle Book yet! As an accomplished artist I used to think I did not need instruction on this art form. How wrong I was! My tangling improved by leaps and bounds after reading this book. If you think you have Zentangle down then you need this book more than ever!" ~ Kris H | |
|
|
|
|
.oOo. |
|


This was a wonderful pack!!! Many thanks for all those great video’s!
Thank you for the hard work and time involved to summarize each and every video and provide times and notations <3 I love being able to come here and have every video in one place – so much easier and convenient!