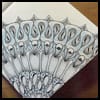
 Zentangle HQ recently launched another of their fabulous Project Packs. This one is the 27th in the series and it focuses on Reticula and Fragments.
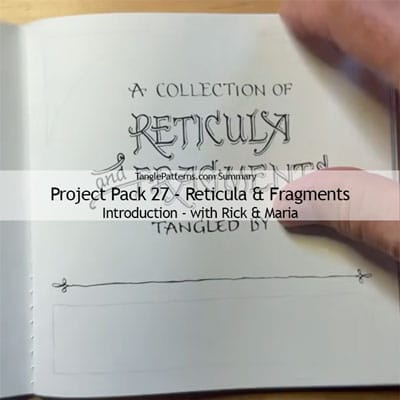
Project Pack #27’s seven-day series began August 8th and wrapped up earlier this week, today’s article is my customary detailed Summary of each day’s lesson. The article provides detailed notes with timestamps for each of the videos in this Zentangle Project Pack and makes it easy for you to find all the related videos and any parts of them you may wish to refer to again.
Here’s the introduction from the newsletter:
All patterns are created using a system of creating a design or image component and then repeating it in some sort of way to create a new image. The Zentangle Method studies types of patterns and breaks them down into simple steps that can be hand drawn. We call these patterns “tangles”. Within our world of tangles, we often separate them into categories. One of the more traditional categories that gets lots of attention is grid tangles. There are all sorts of grid tangles, and we often use them in very untraditional ways.
In this project pack, we dive into the world of grid tangles and take a closer look at the system we use within the Zentangle Method to create them. Join us as we put our Zentomological caps on, to collect and investigate grid tangles using a very special custom item made for this tangled mission.
SUPPLIES: This Project Pack is available here ($39.95) in the zentangle.com store and it’s a convenient way to get all the supplies for the project. However, the introductory video reviews the items in the Project Pack and you might discover you have suitable alternatives in your own Zentangle supplies. “If you do not have the project pack materials, we encourage you to follow along with whatever you have available.”
In addition to the supplies listed below, Project Pack #27 also contains a lovely custom-made booklet, A Collection of Reticula and Fragments, which forms the basis for the video lessons of the project. (The booklet is similar to the Legend booklet of Project Pack #10, and Tangled Musings of Project Pack #14.) The printed booklet is 5.5 inches (14 cm) wide by 5.5 inches (14 cm) tall. The spreads include some preprinted string pages as well as some blank pages. It’s made of a sewn-bound signature composed of 6 sheets of a smooth card stock (for a total of 24 pages). The booklet’s cover is a linen-textured heavyweight card with a 5/8″ diecut square like Zentangle’s logo forming a tiny window into the journal.
- One Zentangle canvas tool pouch containing:
- One Sakura Micron 01 pen, Black
- One Sakura Micron 10 pen, Black
- One Sakura Micron 10 pen, Gray
- One Zentangle graphite half-pencil
- One Zentangle General’s white charcoal half-pencil
- One Zentangle General’s blue chalk half-pencil
- Three tortillions
The following chronology is a summary of the videos for this Project Pack with links to the individual videos. Either click the Day #’s title link or the image itself to view the full video on YouTube.
It isn’t necessary to watch the videos in sequence, but it will be very helpful for you to watch the Introduction video first.
CZT Molly Hollibaugh recommends we watch Project Pack videos completely through once before beginning our tiles:
“You’re going to have a little more confidence, you’re going to be a little more aware of what’s happening next. Then you might try something different, you might explore it in a different way”.
QUICK LINKS TO DAILY SUMMARIES
Jump to:
Day 1 – Julie tangles fragments Y2, P2 (Purk), T3, Bunzo
Day 2 – Rick tangles fragment H5
Day 3 – Mazzy and Indy tangle fragments G7, D1, and A1
Day 4 – Molly tangles with orb fragments including C22, L25, C22
Day 5 – Maria tangles fragments T3, X7, two versions of A5, G2, F2, and E5
Day 6 – Martha explores teardrop-shaped fragments
Day 7 – Maria tangle the Pangea reticulum
Wrap Up
Introduction
In the introductory video (12:30) – Rick and Maria introduce the theme of this Project Pack and explain what reticula and fragments are. (Reticula = plural, Reticulum = single.) This series will be using familiar tangles and fragments from pages 114-115 (squares), 120 (triangles) and 121 (orbs) in the Zentangle PRIMER Vol 1.
Step 1: At 01:54 – After a brief introduction to fragments and reticula, Rick and Maria go over the contents of the Project Pack.
Step 2: At 03:44 – Rick takes a look at the booklet for this series.
Step 3: At 04:37 – Using Bijou tiles, Rick shows some examples of “how reticula work” using the fragments from pages 114-115 in the Zentangle PRIMER Vol 1. Using the F2 fragment he demonstrates how the same fragment can be used in different reticula for a variety of different results and different metapatterns.
Step 4: At 06:52 – He changes to the C2 fragment (Pokeroot) and shows how it can be used in different shaped reticula, “giving a hint of what might be possible”.
Step 5: At 07:20 – Using H4 (Printemps) fragment, he shows how skewing the shape of the reticula can change the pattern.
Step 6: At 07:37 – Using K2 (Well) fragment in a Florz grid/reticulum he shows the effect of mirroring the fragment, producing results that look like Cadent and Huggins.
Step 7: At 09:02 – Using the K4 (Dex) fragment he shows a tile with four different orientations of the fragment and the results this produces.
Step 8: At 09:38 – Using fragment M5 from the PRIMER, he displays tiles with a variety of fragment orientations.
Step 9: At 11:34 – They wrap up the Introductory video noting although the videos are edited so they aren’t too long, it did take them a good deal of time to complete each lesson’s tangling and for us to take our time and enjoy the process.
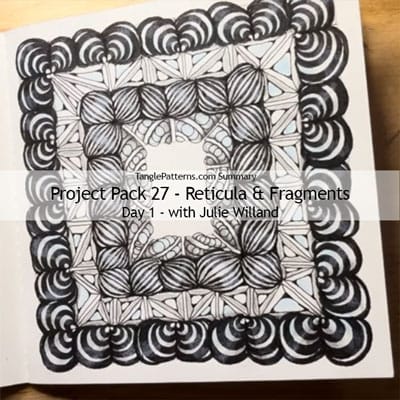
Day 1
In Day 1’s video (34:12) – Julie Willand tangles four different fragments on the spread on pages 6-7.
Linda’s Editorial Notes: the booklet is not numbered but for reference I’ve penciled page numbers in mine so we’re all on the same page, so to speak. Where the specific fragment is not named in the video, I’ve given my best guess at the ones used by referring to those pages in the PRIMER.
Step 1: At 01:51 – After introducing herself, the Project Pack’s theme and its contents, Julie pauses for the first step of the Zentangle Method™: Gratitude and Appreciation.
Step 2: At 02:16 – She opens the booklet to the spread on pages 6-7 and begins on the left side of the spread (opposite the page printed with a nested squares string).
Step 3: At 02:55 – On Page 6, using the Micron #01 Julie begins to add the four fragments we’ll be working with today, beginning with Y2, a coffered frament from pages 114-115 in the Zentangle PRIMER Vol 1.
Step 4: At 04:33 – She adds P2 (Purk).
Step 5: At 6:04 – Changing to the Black Micron #10, she adds T3 in the third square.
Step 6: At 07:52 – In the fourth and last square she adds Bunzo.
Step 7: At 09:00 – Moving to the right side of the spread and changing back to the Micron #01, Julie divides the outer band into squares.
Step 8: At 10:10 – Changing back to the Micron #10, Julie is going to add the Bunzo fragment in all the squares around the outer band. She adds the first one in the top left corner, then moves to the right adjacent square and mirrors Bunzo in it. In the third square she repeat the first one … and so on mirroring each square around the band. She reminds us to be mindful of the wet ink as we work around the border.
Step 9: At 14:07 – Switching back to the Micron #01, Julie skips the band next to Bunzo and begins by dividing the band into squares just as she did with the Bunzo border band.
Step 10: At 15:22 – Changing to the Micron #10 she fills the spaces with the T3 fragment, beginning in the top left corner and moving around the band to the right, mirroring the fragment as she did with Bunzo.
Step 11: At 18:03 – After finishing this band, Julie goes around the edges of the band and inks in “anywhere these fragments left a little bit of space near my string“.
Step 12: At 19:10 – Now that we’ve finished two drama tangles, “we’re going to add some finer lines, some texture to really balance this out.” Working in the band between the other two and with the Micron 01, Julie adds the coffered fragment Y2. First she adds grid lines dividing the band into spaces but she treats the corners differently and uses double lines for the dividers as well as making the spaces a little larger. She mirrors this fragment around the band and adds rounding in the corners of the triangles of the fragment.
Step 13: At 23:20 – In the next inner band and leaving the center space bare, she divides the band in the same way she did for the Y2 coffered fragment and adds the Purk fragment in the spaces, mirroring them around the band.
Step 14: At 26:26 – Time to add the shading and Julie suggests we might like a break before we begin this next part. On page 6 in the fragment examples, she demonstrates how she’s going to shade each fragment before she shades her work on Page 7.
Step 15: At 26:51 – On one side of the Bunzo she adds “a lot of graphite” and on the other side she adds Blue pastel, then uses the tortillion to blend and soften. Then she adds a white charcoal highlight down the center.
Step 16: At 27:43 – On the coffered Y2 fragment, she adds graphite to the outsides of the triangle on one side and softens it, then on the other triangle she adds Blue pastel inside the triangle.
Step 17: At 28:32 – On Purk, she adds Blue pastel inside each orb and softens it, then adds graphite to the top and bottom of the bands.
Step 18: At 29:22 – On the T3 fragment she adds “a lot of graphite where the auras meet at the top and bottom” and softens it. Then adds either a white or Blue highlight in the middle.
Step 19: At 30:18 – She adds the shading she’s demonstrated on the inked artwork created on page 7.
Step 20: At 32:12 – She shows all her fragments have been shaded and describes some finishing touches she added.
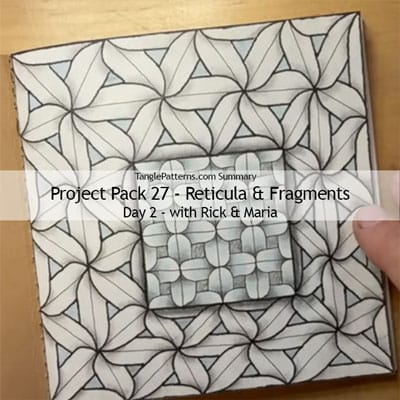
Day 2
In Day 2’s video (20:47) – With Maria keeping him company, Rick tangles the first page of the booklet using the fragment H5 from the Zentangle PRIMER Vol 1, page 114.
Step 1: At 00:28 – After their brief introductions, as he flips through the booklet and shows the cover with the little die-cut windows in it, Rick explains “we’re actually going to play with that window in this one.”
Step 2: At 01:17 – Using the Black Micron #01 and with the cover of the booklet closed and holding it down, Rick traces the edges of the die-cut square onto the first page of the booklet.
Step 3: At 01:29 – “We’re going to use this to form the reticula for the fragments”. Maria points out, “So you can see these lines that Rick’s putting down are approximately the same length as the box that he started with so it’s going to be a checkerboard-type reticula.”
Step 4: At 02:03 – Rick continues to create the checkboard of similar sized squares and Maria notes that doing the lines by hand makes the biggest difference, “it’s coming from the heart“. Rotate the booklet as it’s most comfortable for your work.
Step 5: At 03:18 – Rick makes a 4 x 4 grid of squares, noting “just really embrace this process even though it seems repetitive. … just do it with love and focus and appreciation, deliberation, deliberate strokes.“
Step 6: At 03:49 – “And now I’m going to make some triangles,” as he connects the corners of his checkboard with the corners of the page.
Step 7: At 04:04 – He divides those spaces with a horizontal stroke “right down the middle“.
Step 8: At 04:37 – He further divides those spaces into triangles.
Step 9: At 05:45 – He choses the fragment H5 from the Zentangle PRIMER Vol 1, page 114.
Step 10: At 06:02 – He adds that fragment into the original square first created, first drawing a small square in the middle then using take-off-and-land he adds a curve from the square into each corner.
Step 11: At 06:56 – “Before you jump ahead, just watch this next one because we’re going to do it a little bit differently.” He mirrors the first fragment in the square to the right, adjacent to it. He continues adding the mirrored fragments, “every one we’re going to mirror.“
Step 12: At 09:42 – Switching to the Black Micron #10, “I’m going to do the exact same concept in the triangles, which is to aura the larger triangle with the inner one.” Then he adds the take-off-and-land strokes and repeats that same ones (without mirroring) through all the triangular fragments around the tile. “These are going to all be the same, not like the ones you mirrored. You pick one way to do it and do it exactly the same on every one.“
Step 13: At 12:40 – When the patterns and meta-patterns are complete, Rick changes to the Gray Micron #10, “And for some contrast, I’m going to fill in those initial squares on the square reticula with our Gray #10.“
Step 14: At 13:23 – With the Black #10, Rick adds a black border along the edges of the page, “try to do it without falling off the edge of the paper“.
Step 15: At 14:15 – He restates the border of the 4×4 grid to give it emphasis.
Step 16: At 14:39 – With the Blue Chalk pencil, he adds color on parts of the inner fragments and blends it about 2/3rds of the way up, leaving the ends of the arched areas white. Then he goes back with the graphite pencil into “the very base where it goes under … and then bring the graphite out but don’t bring it all the way over the blue.” He repeats this around the 4×4 grid.
Step 17: At 17:09 – He similarly shades the triangles, adding Blue chalk in the small triangle, then adding graphite in the center of the “flower” shapes, emphasizing the “over and under”.
Step 18: At 19:06 – He adds graphite around the outer edge “of that centerpiece”.
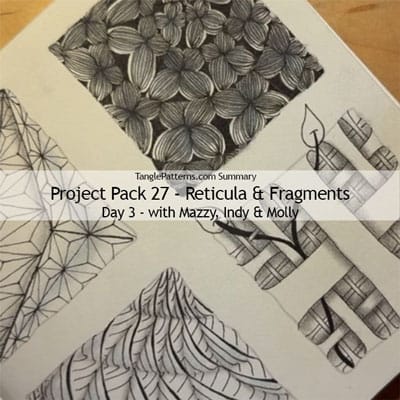
Day 3
In Day 3’s video (36:51) – With Molly commentating, her daughters Mazzy and Indy tangle with the fragments G7, D1, and A1 on the spread on pages 4-5 in the Project Pack booklet.
Step 1: At 00:44 – After their introductions, Mazzy turns to the spread on pages 4-5 for them both to work on.
Step 2: At 01:08 – With the Black Micron #01, on the left side of the spread Mazzy adds an example of the first fragment of the day, G7 from the Zentangle PRIMER Vol 1 (page 114).
Step 3: At 01:54 – Moving to the lower left string on page 5, Mazzy adds pencil strokes creating a checkerboard of the string.
Step 4: At 02:22 – She adds her G7 fragment to each square, all going in the same direction.
Step 5: At 05:12 – Mazzy adds graphite shading to her fragments along the string lines.
Step 6: At 07:02 – She adds Blue chalk on one half of each fragment and blends it in.
Step 7: At 07:52 – On the left side of the spread (page 4) and using the graphite pencil, Mazzy adds dots and connects them creating another fragment square.
Step 8: At 08:19 – She adds fragment D1 in the example square.
Step 9: At 08:41 – Moving across to the top left string on the right side of the speadd (page 5), with the Black Micron #10 she adds the fragment in the whole square, and uses it as a string.
Step 10: At 09:21 – She changes to the Micron #01 to divide the center diamond shape into squares and the outer triangles in half.
Step 11: At 10:48 – She fills the grid with the D1 fragment, mirroring them from the center outwards.
Step 12: At 13:37 – Mazzy adds shading on the lines of the original large fragment, and then Blue chalk and lastly her chop.
Step 13: At 16:49 – Mazzy passes the book over to Indy who adds a pencil square on the left spread to add and example of her first fragment then fills it with the fragment using the Micron 01.
Step 14: At 19:38 – Moving to the top string on the right side of the spread (page 5), with the Micron 01 Indy divides the spiral string (which is also fragment V7) into squares and then fills them with the fragment.
Step 15: At 12:29 – She adds graphite shading emphasizing the original spiral string and then adds some Blue chalk highlights.
Step 16: At 27:47 – Moving back to the left side of the spread, Indy adds her second fragment, A1 from the Zentangle PRIMER Vol 1.
Step 17: At 29:13 – She fills the last string with a large version of A1, and then in the smaller sections using the drawing behind concept she adds bands similar to the fragment creating a woven effect. She repeats this in the smaller sections just created by the bands.
Step 18: At 31:11 – She turns the booklet and adds the same type of “behind” bands at right angles to the first ones.
Step 19: At 31:41 – Indy adds graphite shading to the over-unders of the bands.
Step 20: At 34:12 – Indy adds “something special”, a Pokeleaf vine weaving behind and over the fragments.
Step 21: At 35:47 – She adds Blue chalk highlights on her work and then her chop.
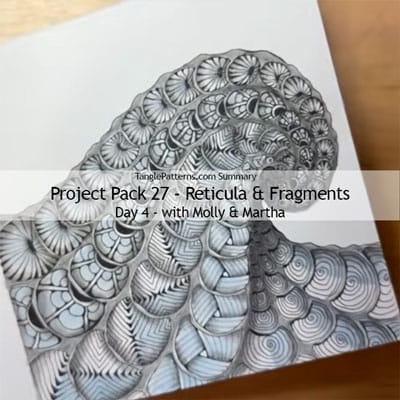
Day 4
In Day 4’s video (40:40) – With sister Martha keeping her company, Molly focuses on orb fragments for the curved string on the spread on pages 10-11 in the booklet.
Step 1: At 01:35 – After introductions and a pause for gratitude, Molly begins with the Micron Gray #10 and on the right side of the spread she fills two of the string sections with orbs, tucking each one slightly behind the other. She’s building the framework for filling the page with circular fragments.
Step 2: At 03:21 – When she comes to the outside “channel”, she decides it’s too wide and divides it in half. She then fills those with orbs, repeating as before, and also fills the remaining channels with orbs.
Step 3: At 05:43 – She goes back to fill the spaces/interstices left between the orbs with the gray ink and redefining edges etc.
Step 4: At 07:18 – On the left side of the spread, after redefining the circles with the gray pen she changes to the Black Micron #01 to add the circular fragments (“specimens“) we’ll be using today. In the middle one (#3) of the five circles she adds a Mrth-like fragment.
Step 5: At 08:35 – “Now these are very involved fragments … this is an investment in time,” with the advice to give ourselves time to do these lessons because the videos have been edited down considerably.
Step 6: At 08:54 – She adds a Crescent Moon+Purk-like fragment just below it in circle #4.
Step 7: At 09:11 – In circle #2 she adds fragment C22 from page 121 in the PRIMER.
Step 8: At 10:05 – In the bottom circle she adds a fragment L25 with auras.
Step 9: At 11:01 – In the top circle she adds a Printemps spiral (F24) for this fragment.
Step 10: At 11:27 – Moving over to the right spread, Molly works on the outside “channel”. She outlines the orb with the black pen, then adds the Mrth-like fragment within, repeating this along the entire channel.
Step 11: At 14:19 – Moving to the next channel of orbs, Molly adds the Crescent Moon+Purk-like fragment, outlining each orb as she goes.
Step 12: At 17:25 – In the next channel Molly adds the second fragment (C22), using the same outlining and filling method as the others. She points out the importance of keep the aura spacing consistent, and she adds some weighting detail.
Step 13: At 22:12 – In the fourth channel she fills the orbs with the fifth fragment, L25. Instead of doing the auras with the 01, she changes to the Gray 10 to do the parallel lines, then uses the Black #01 to add rounding in the corners.
Step 14: At 25:51 – After outlining the orbs in the next channel she adds the Printemps fragment in each orb, starting from the outside and working inwards so she could mimic the shape of the orb. She repeats the Printemps fragment in the two remaining channels.
Step 15: At 27:34 – She adds weighting around the top edge of the Printemps fragments.
Step 16: At 27:51 – She “adds love” and finishing details around the outer edge
Step 17: At 29:17 – Molly begins the shading process, using the Blue chalk pencil first, then adding graphite, working on completing each band at a time and moving from the outside inwards, noting “I do take shading to another level. It’s something that brings me as much joy as the tangling process.”
Step 18: At 39:34 – With the Micron 01, Molly restates some of the lines that have become lighter from the shading before adding her chop.
Day 5
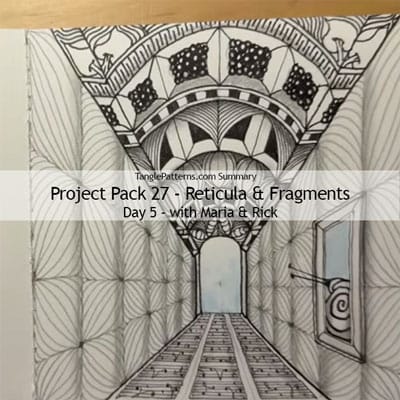
In Day 5’s video (38:43) – With Rick keeping her company, Maria tangles fragments T3, X7, two versions of A5, G2, F2, and E5 in the center spread of the booklet (pages 12-13). Bands of orbs, Knightsbridge, and Doodah are included and Bijou makes a special appearance.
Step 1: At – After their introductions, Maria adds additional pencil lines dividing the string further using the vanishing point in the middle to guide where her pencil lines will come from.
Step 2: At 03:10 – With the #10 Gray Micron, “we’re going to outline. This is the first thing we’re going to do because I want you to isolate one little space and then don’t touch it.”
Step 3: At 03:38 – “I’m taking four blocks and finding a center,” and starting with a diagonal stroke in the middle of each connecting to the center point, Maria adds the fragment T3 with tethered auras in the upper right of the four blocks. She then adds it to the remaining three blocks such that a floral-type of shape is formed.
Step 4: At 06:07 – “We’re going to go above that” to the next block of four and repeat the same fragment in those blocks.
Step 5: At 06:57 – She finds the center of the next block of four and repeats the previous two steps. She repeats this all the way to the end of the “hallway”.
Step 6: At 07:36 – “We’re going to do this on the other side too, but don’t touch the window!”
Step 7: At 08:55 – With the sides done, Maria changes to the Black Micron 01 and puts parallel lines inside the boxes forming the floor to create texture.
Step 8: At 10:13 – She adds a line down the left and right sides of each set of boxes, “bringing it together and holding it together“.
Step 9: At 10:53 – She gets a tile out, “so I just want to show you what we’re going to do next. It’s just sort of like a Fescu.” She adds them and plain dots on the three panels of “carpet”.
Step 10: At 12:29 – She begins on the “ceiling”. With the Black #10 and restates the string lines, “to give us some boundaries. And when we do reticula, we do them in pen. The reticula itself is part of the pattern.“
Step 11: At 13:42 – Maria adds “a couple more lines because I want some more stripey things going on, not just big blocks.”
Step 12: At 14:46 – With the Black 01, Maria adds fragment X7 rice shapes alternating directions in the bottom row of “ceiling” squares. Then she adds orbs inside them.
Step 13: At 16:09 – She adds aura outside the rice shapes to fill each square.
Step 14: At 16:30 – Maria moves to the left side of the spread and in one of the four squares she adds the fragment she just finished.
Step 15: At 17:06 – Back to the right side, she adds a wide aura on the top of the band just finished and then fills it with orbs/perfs.
Step 16: At 17:40 – Moving up to the next band, she traces over the string lines to define the reticula then adds a version of fragment A5, a coffered fragment by aura-ing the inside of each square, then connecting the corners.
Step 17: At 19:40 – Moving up to the next band, she adds fragment G2, a rice shape along each string line, then a tethered aura on each, then aura-ing the triangular shapes at the top and bottom of each and filling each with vertical strokes. “Coloring in like I did is a texture instead of doing the solid black. Those lines will translate into a gray of some sort instead of the boldness of [solid black].”
Step 18: At 21:48 – Moving up to the next band Maria adds fragment F2 which has “hints of Cubine“, mirroring the fragment along the band.
Step 19: At 24:17 – She adds a band of Knightsbridge.
Step 20: At 25:28 – She repeats a row of the coffered fragment A5 but fills the middle with a Bronx Cheer texture using the Black #10.
Step 21: At 27:30 – She adds a band of Doodah, still using the #10.
Step 22: At 28:21 – First adding an aura to set it off, in the last band at the top Maria adds the Pokeleaf fragment E5.
Step 23: At 30:00 – She outlines the window with the #10 and then adds and coffered frame with the #01 before using the #10 to add Bijou peeking in the window.
Step 24: At 32:26 – She adds accents with the Blue chalk pencil and then graphite shading.
Step 25: At 37:06 – She finishes adding her fragments on the facing page, then adds her chop.
Day 6
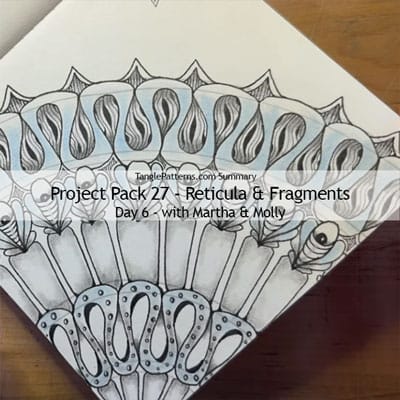
In Day 6’s video (30:29) – With Molly keeping her company, Martha adds teardrop-shaped fragments on the string on the right side of the spread on pages 14-15.
Step 1: At 01:12 – After introductions, Martha takes the Black #10 she fills the large outer band of the string with teardrop shapes, starting in the middle and alternating them up and down.
Step 2: At 02:21 – She adds another band of teardrop shapes directly opposite the rounded ends of the first one.
Step 3: At 03:15 – She connects the points of the teardrops around the top edge, staying within the aura band above them. This is the construction method of CZT Tomàs Padrós’s Oasis tangle.
Step 4: At 04:05 – Turning the booklet around, she repeats this on the other side of the row of teardrops but going behind the third row of teardrops where she comes to them.
Step 5: At 04:58 – Returning to the first band of teardrops, with the Black #01 she adds a fragment filler, “it’s kind of a take on a Diva Dance textural tangle“, starting with an S-stroke in the middle and adding ink and auras beside it. She fills the band with this fragment, “trying not to make them identical“.
Step 6: At 07:54 – Moving down to the third row of teardrops, with the Black #01 she adds auras forming a row of CZT Lynn Mead’s Abeko tangle.
Step 7: At 09:12 – In the bottom space starting in the middle she adds a row of narrow teardrops with the Black #10, alternating them up and down as she did the first row.
Step 8: At 09:49 – She connects the points as she did in Steps 3 and 4.
Step 9: At 10:30 – She goes back to the Abeko row and adds a large orb at the fat end and auras that to the point, then adds a small black orb resting on the base of the large orb.
Step 10: At 11:25 – Still with the #10 she adds a triangular embellishment on the outer edge of the top band where the connecting line meets and fills it with vertical strokes, then adds an aura on the top. She repeats this along the band.
Step 11: At 12:02 – From the bottom of the Abeko shapes on each side she drops a vertical line to connect to the band below.
Step 12: At 12:42 – She adds ink weighting in the rounded end of the teardrops in the bottom band.
Step 13: At 13:50 – With the Black #01, Martha adds simple auras and fills them with vertical strokes.
Step 14: At 14:36 – She adds rounding at the base of the vertical strokes under the Abeko flowers.
Step 15: At 15:20 – She adds a line of evenly spaced small open orbs through the middle of the bottom band.
Step 16: At 16:01 – With the graphite pencil Martha adds small arcs from the top left corner of the page then fills it with alternating narrow teardrops then connects the tips of them, “point to point”. Then she adds a fragment inside the teardrops of a pair of vertical lines down the middle and a Crescent Moon shape on each side. She finishes the band off with the same triangle and aura embellishment of Step 10.
Step 17: At 18:12 – She connects the bottom right corner band to the corner of the page with vertical strokes.
Step 18: At 18:38 – She begins to add graphite shading.
Step 19: At 21:21 – Martha adds Blue chalk pencil and white charcoal pencil highlights around her work.
Step 20: At 25:55 – Martha adds the fragments she used on the left side of the spread and shades them. Lastly, she adds her chop.
Day 7
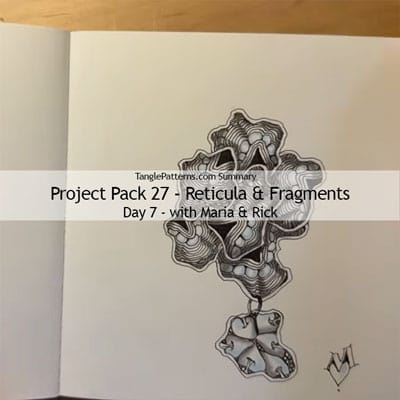
In Day 7’s video (19:26) – With Rick keeping her company, Maria tangles on the spread on pages 16-17 with fragments in a reticulum formed from Pangea.
Step 1: At 00:54 – After their introductions, Maria explains she’s going to be working on the spread on pages 16-17 in a Pangea-shaped reticulum. Rick explains, “Pangea comes from the concept of the tectonic plates of the Earth that perhaps used to all fit together like puzzle pieces and are floating around and then they fit together, and we’re going to see how that works.“
Step 2: At 01:00 – With the Black #01, on the left side of the spread Maria illustrates what the fragment she’ll be using looks like.
Step 3: At 01:57 – Maria says, “So you can see here I’m just having a little bit of fun. And we’re just doing some real simple things that might remind you of other tangles, but we’re just going to throw it together and then repeat it.”
Step 4: At 03:36 – Rick notes, “This will be a really interesting exercise because in so many of the other fragments and reticula, it is very defined, which part goes where. And in this one there’s a certain creativity or freedom, it’s just open to interpretation.“
Step 5: At 04:00 – On the right side of the spread Maria adds Pangea shapes, “they can be really anything but they start and end at the same place.” She adds the first random shape and auras the inside of it.
Step 6: At 05:00 – Maria explains that as she adds the Pangea shapes, she “likes to touch on in two places“, as she adds Pangea shapes for a total of six spaces.
Step 7: At 05:44 – She begins to fill the first shape. They comment on the quality of the auras and Maria adds “wiggly” parts and weight to some, giving more texture to the overall effect. She continues to fill the other shapes, noting that she wanted the bold triangular shape to be oriented in different ways throughout.
Step 8: At 10:30 – With all the shapes now filled, Maria adds color with the Blue chalk pencil on the orbs.
Step 9: At 11:30 – She adds graphite shading.
Step 10: At 12:57 – She adds “a little jump ring … and we’re going to add another Pangea.”
Step 11: At 13:58 – Before she fills the new shape, moving to the left side of the spread “I just wanted to give you an option of other fragments.” She adds a Pokeleaf fragment for an example.
Step 12: At 15:36 – She fills the last Pangea shape with the Pokeleaf fragment.
Step 13: At 16:30 – She adds graphite shading on the fragment and softens it, then adds “a hint” of Blue chalk. Lastly she adds her chop.
Wrap Up
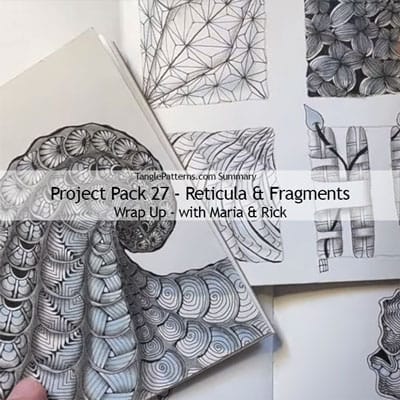
In the final video in the Project Pack 27 Series (06:40) – Rick and Maria review the pages of the booklet created throughout this Project.
Step 1: At – First they revisit the page Julie did on Day 1.
Step 2: At 00:53 – For Day 2, they review the fragment Rick used on the first page of the booklet, and that peaks through the cover.
Step 3: At 01:45 – “On Day 3 we invited our superstars, Indy and Mazzy,” Molly’s daughters.
Step 4: At 03:10 – Molly’s page from Day 4.
Step 5: At 03:49 – Maria’s page from Day 5.
Step 6: At 04:33 – Martha’s page from Day 6.
Step 7: At 05:27 – Maria’s page from Day 7.
Step 8: At 06:24 – Wrapping it up with thanks.
This recap of Zentangle’s Project Pack #27 will make it easy for you to find all the related videos and any parts of them you may wish to refer to again.
Remember the images above are linked to their YouTube video, simply click the image to go to the video.
For a complete list of Zentangle’s Project Packs click the PROJECT PACKS link in the pink alphabetic tangle menu bar.
|
.oOo. |
|
Enhance your Zentangle experience while supporting TanglePatterns: |
|
BRAND NEW! TanglePatterns.com TANGLE GUIDE, 2026 Edition |
|
 |
The 15th Edition of the TanglePatterns.com TANGLE GUIDE is an instant-download 123-page interactive digital eBook/PDF containing over 2,300 tangles on the site from May 2010 through December 31, 2025. It's a great resource and a must-have digital tool for using the site. Visit the STORE > E-BOOKS page and help keep TanglePatterns.com going by getting your copy now! |
|
"Linda, Thank you! I was relying on too few and getting stuck after 3 years of daily working with Zentangle. This has inspired me to ‘begin again’ with renewed excitement." ~ Barbara R. |
|
| See the BOOK REVIEWS page for more details on its features and view a sample page. Note: this is a digital product to download immediately when ordering, nothing will be physically mailed to you. | |
| If you're new to Zentangle® and tangling, my TanglePatterns.com BEGINNER'S GUIDE TO ZENTANGLE is just what you need to get started. Also available en Français and en Español. | |
|
|
|
 |
This is the only Zentangle book you'll ever need: the fabulous Zentangle PRIMER Vol 1. It's your CZT-in-a-book by the founders of Zentangle®. For more about the content and to read the rave reviews, visit the BOOK REVIEWS tab. |
| Available in KINDLE format for $9.99. Spanish Edition here. Japanese Edition here. | |
| "Absolutely the best Zentangle Book yet! As an accomplished artist I used to think I did not need instruction on this art form. How wrong I was! My tangling improved by leaps and bounds after reading this book. If you think you have Zentangle down then you need this book more than ever!" ~ Kris H | |
|
|
|
|
.oOo. |
|







Hi Linda,
Thanks for doing such a thorough job of analyzing and time-stamping the PP #27 videos (and all the others)! It is a great help.
Linda Friedly
Thanks so much, Linda. I really appreciate hearing that 🙂
Hermoso proyecto, te agradezco el resumen que has publicado, facilita la busqueda, para aquellos, me incluyo, lo hacemos como podemos a nuestro ritmo. Un lujo cada dia, exhaustivo detalle explicativo en cada uno. Nos brindas la posibilidad de elevar nuestra imaginacion y aplicar lo aprendido. Infinitas gracias.
Linda’s edit with the help of Google Translate:
Beautiful project. I appreciate the summary you published. It makes the search easier for those of us, including myself, who do it as best we can at our own pace. A luxury every day, with exhaustive explanatory details in each one. You give us the opportunity to expand our imagination and apply what we’ve learned. Thank you so much.
Linda,
I for one cannot thank you enough for your wonderful description of 27’s goings on. Beautifully done. Thank you for your hard work and attention to detail. You are very appreciated.
Shiloh
🙂 Thanks, Shiloh!
Merci beaucoup pour vos explications, celles-ci me permettent de bien comprendre les vidéos du projet et de mieux les suivre.
j’attends toujours votre publication avant de me lancer dans la réalisation d’un projet Zentangle
Merci encore…
Linda’s edit with the help of Google Translate:
Thank you very much for your explanations; they help me better understand the project videos and follow them.
I’m always waiting for your post before starting a Zentangle project. Thanks again…
Merci, Marie. I’m so pleased these summaries help to understand the videos and the projects. 🙂
Thank you for the detailed breakdown of each video with time stamps, quotes and links included! It’s such a huge amount of time and effort for you to do this with each video, and it’s so very appreciated!! And having it all on one page is the chef’s kiss <3