


 From the Zentangle newsletter introduction to Project Pack #19:
It has become an annual Zentangle tradition for us to celebrate the holiday season with a video series we call The Twelve Days of Zentangle.
This Project Pack series is unique as we will be working on one singular piece of tangled art over the course of twelve lessons. We will work on a customized surface that will provide structure and a common element to guide us on this adventure together. We will methodically and magically add to the structure as we simultaneously discuss and share our system of collecting, deconstructing, and categorizing tangles.
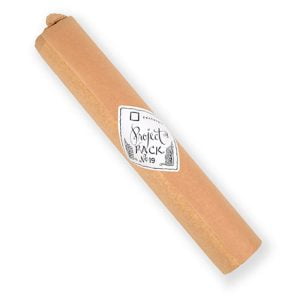
SUPPLIES: This Project Pack is available here ($39.95) in the zentangle.com store and it’s a convenient way to get all the supplies for the project. However, the first video reviews the items in the Project Pack and you might discover you have suitable alternatives in your own Zentangle supplies:
- One Sakura Micron 01 pen, Black
- One Sakura Micron 08 pen, Black
- One Sakura Micron 05 pen, Brown
- Three colors (717 Yellow Ochre, 767 Vermilion, 721 Teal) of General’s Kimberley Watercolor pencils
- One #7 Round watercolor paint brush
- One Zentangle graphite pencil
- One Zentangle General’s White Charcoal pencil
- Two tortillions
- One 11.5 x 19.5 inch (about 29 x 50 cm) sheet of watercolor paper with a pre-printed string of a large tree-like trellis structure
The following chronology is a summary of the videos for this Project Pack with links to the individual videos. Either click the Day #’s title link or the image itself to view the full video on YouTube.
It is recommended to watch the videos for Project Pack #19 in sequence because it is a cumulative project.
CZT Molly Hollibaugh recommends we watch Project Pack videos completely through once before beginning:
“You’re going to have a little more confidence, you’re going to be a little more aware of what’s happening next. Then you might try something different, you might explore it in a different way”.
QUICK LINKS TO DAILY SUMMARIES
Jump to:
Day 1 – Day 2 – Day 3 – Day 4 – Day 5 – Day 6 –
Day 7 – Day 8 – Day 9 – Day 10 – Day 11 – Day 12 – Wrap Up
Day 1
In Day 1’s video (19:41) – Rick, Maria and Molly introduce this Project Pack and Molly takes us through the first stage of preparing our surface for the tangles in the days to come.

Step 1: At – Rick, Maria and Molly introduce themselves and then Molly unwraps the Project Pack revealing the rolled pre-strung watercolor piece we will be working with. She demonstrates how to flatten the tightly-rolled cotton paper template to get it so we can work with it. The template is “an organic, tree-like structure” as Rick calls it later in the video.
Step 2: At 02:10 – Molly shows the watercolor brush and three watercolor pencils, some of the tools contained in the Pack.
Step 3: At 02:27 – She advises us to watch the video all the way through before beginning “to allow yourself to digest what’s happening here”, as she uses one of the pencils to begin coloring in one of the arcs of the template. She notes we can choose to use just one of the colors, two of them, or all three.
Step 4: At 03:18 – Pointing out they want us to watch all the way through because there are many different options, Molly uses the same pencil to color in another arc and notes that she’s using the pencil on its side to get a softer effect rather than using the point to color in.
Step 5: At 03:45 – “As you’re working you really want to make sure you leave white space,” as this is what creates the eventual background for where our tangles will go.
Step 6: At 04:46 – As she continues adding blue watercolor pencil to the template, Molly advises “take your time with this coloring in process because it’s just as much a part of your artwork as any other.”
Step 7: At 05:23 – Maria says, “I want them to notice too how imprecise you’re being. You’re kind of using the string here to guide you along without it being exact. Because of how we’re going to add the water to it, you’re not even going to remember what this looked like after the water’s on.”
Step 8: At 06:02 – “Molly’s purposely showing you that she has to sharpen these pencils quite a few times just to keep a broader edge because you don’t want it to be pointy at any time.”
Step 9: At 06:20 – Molly introduces another color (Yellow Ochre), and begins to add this color to the remaining channels on the template. “But as you’ll see with some of our other examples, the color can be put on really in so many different ways.” Rick uses the analogy of choosing dishes at a banquet.
Step 10: At 07:16 – As Molly continues to add Yellow Ochre to the template, Rick notes the metaphor is appropriate for a new idea they’ve been working on for quite some time, Zentomology™.
Step 11: At 07:42 – “We’ve been playing around with this term for years and we finally did this whole project with this. And Zentomology is our playful approach to categories of tangles, much like entomology is a more structured approach to insects.”
Step 12: At 08:09 – He reads their definition of Zentomology: “Zentomology describes the system of categorizing the various characteristics of tangles and their relationships with other tangles within the study and practice of the Zentangle Method™”.
Step 13: At 08:29 – “Fair notice here, we’re treating this very playfully, just to be clear.” Maria adds “we are artists, we are not scientists”.
Step 14: At 08:48 – Molly changes from the pencil to the watercolor brush and dips it into a cup of water to begin adding water to dissolve the pencil she’s been adding.
Step 15: At 09:21 – “As you can see I’m adding quite a bit of water to the surface first, but her “very smart sister” Martha found she could use the brush’s plastic protective sleeve as a pipette to add water to the surface. Maria describes how to do that.
Step 16: At 10:25 – Molly points out that “if you don’t have enough water on there, you might get a dry stroke so you’ll get a feel for how much water is helpful.”
Step 17: At 11:29 – Rick comments that we can see “the looseness of how the original pencil is now melting and merging, and I think that’s a really nice metaphor for all of these categories that are going to melt and merge together in this whole Zentomology playfulness.”
Step 18: At 11:54 – “We’re also introducing this new term called tangle genus … a way of looking at things in a fresh way. A tangle genus is a category of tangles with a common characteristic, such as organic, texture or drama. And tangles can belong to more than one tangle genus. So some of the tangle genuses might be beginner tangles or favorite tangles.”
Step 19: At 13:01 – So we’re going to use that approach of different genuses and different types of tangles and we’re going to fill in this trellis tree.” At this point Molly has added water to blend the color on the entire left side of the tree.
Step 20: At 14:56 – Rick notes that the tool pack includes “some larger pens because this is a larger surface. We’re going to be encouraging your to work larger and to play with size and proportions to the piece.”
Step 21: At 15:23 – Molly shows us another variation of color, one where a different approach to where the watercolor pencil was put down. This one uses all three colors, “there wasn’t much of a system to it”. Molly adds water to this sample and gives some tips about working with it.
Step 22: At 17:17 – Rick reminds us to “be gentle with yourself and remember to trust this process” because this is going to be covered with tangles and this watercolor process is “setting the table” for the Project.
Step 23: At 17:59 – Molly notes that this Project Pack is a cumulative process and we are not meant to skip ahead.
Step 24: At 18:16 – They show more examples of “what other people did and their different approaches” for a reference “and realize that yours is going to be different than all of these.”
Day 2
In Day 2’s video (38:57) – Molly tangles Pokeroot, Pokeleaf and Rixty on our now fully dried watercolored background.

Step 1: At – After her introduction, reminding us that this Project Pack is cumulative and “we recommend following along with them in sequential order”, Molly explains her threefold preparation whenever she begins lessons, then she selects the Brown 05 Micron to begin today’s lesson.
Step 2: At 02:31 – She honors “the first step in the Zentangle Method, and that is gratitude and appreciation”.
Step 3: At 03:53 – She says that today she will be working with organic tangles, and gives a definition: “An organic tangle is a tangle that grows and morphs and fills a space much like a plant might. … they’re curvy and wild and they grow in unexpected ways. Most but not all organic tangles are inspired by nature, easily drawn with a string. Organic tangles meander in limitless directions.”
Step 4: At 04:43 – Molly begins with the tangle Pokeroot and explains, “what I’m going to do is use the tree trunk structure as a guide, as a suggestion”.
Step 5: At 05:16 – She begins by tracing over one of the original tree lines with the Brown Micron and adds Pokeroot to each side of the tree trunk base, advising us “try not to make your berries too small”.
Step 6: At 06:59 – As Molly adds more Pokeroot, she again reminds us “as usual when we’re working on a Project Pack we encourage you to watch as long as you like before starting on your own piece so you can process and think about it”.
Step 7: At 13:03 – After Molly has densely filled the base of the tree structure with Pokeroot, she explains that she’s going to grow the Pokeroot up the radiating string arcs to about the fourth one and evolve it into another tangle. She explains she’s “going to rotate between putting in a little bit of Pokeleaf, another organic tangle, and Rixty. … I’m going to show you one way to do it and then you can play around with how you want to incorporated these tangles into your work.”
Step 8: At 14:22 – She adds a stem and a Pokeleaf, then working further up the string, she branches and adds more Pokeleaf going up the string to the fourth arc.
Step 9: At 16:48 – She moves to the right and adds Rixty to the next string using the same concept as she’s just done with the Pokeleaf.
Step 10: At 21:13 – She adds a few more Pokeleafs around the Pokeroot area and tells us not to worry about filling in too much because in later days we’ll be adding more to the spaces.
Step 11: At 21:36 – Moving to the next spine to the right, and adds more Pokeleaf and Pokeroot and Rixty, “it might just get a little invasive and crazy so we’ll see what happens”.
Step 12: At 24:52 – She moves to the next spine to the right and adds Rixty.
Step 13: At 27:29 – Molly turns the paper to work on the last string at the bottom on the right side and adds Pokeleaf.
Step 14: At 28:46 – She turns the paper back to work on the center string using Rixty and Pokeleaf.
Step 15: At 31:15 – She works on the left side of the piece adding in Pokeleaf and Rixty until she finishes that side in the same fashion as she did the right side.
Step 16: At 36:58 – Molly explains that she’s not going to add more detail until later because she wants to see what Martha will add to the piece in Day 3’s lesson tomorrow.
Step 17: At 37:22 – She shows us what Martha, Julie, Rick and Maria have done with their Day 2 approach.
Day 3
In Day 3’s video (35:22) – Martha guides us as she adds Bronx Spears and two different variations of Verdigogh to our template.

Step 1: At 01:10 – After her introduction, Martha explains we will be continuing to add tangles “on into the corners of our project”, and we will continue to use the Brown Micron 05 as we did yesterday as well as the graphite pencil.
Step 2: At 02:31 – After a pause for deep breaths and thoughts of gratitude, Martha uses the graphite pencil “to mark off some areas that we don’t want to touch because we have some big plans for you later on in the series”. She places a small graphite X on each of the two strings that extend to the two top corners to remind us not to tangle on those yet.
Step 3: At 03:48 – Martha says she’s going to keep going with the organic tangles and she begins by adding a Bronx Spear to continue up the center string to the tip.
Step 4: At 11:34 – “We’re going to add two more of these Bronx Spears somewhere else,” and we can choose wherever we want to put them, just not on the strings where we’ve placed our X in Step 2.
Step 5: At 16:35 – Once she has added all three Bronx Spears, Martha begins to add a variation of Verdigogh to one of the spines, this version has a different shape to the “needles”.
Step 6: At 22:35 – She adds two more of the same variation of Verdigogh on the ends of two more of the strings.
Step 7: At 24:48 – On the remaining spines that are not marked with the graphite X, Martha adds another variation of Verdigogh named Spiraling Verdigogh. [The Spiraling Verdigogh version was originally introduced on Day 5 of Project Pack 14.]
Step 8: At 33:59 – Martha shows the Day 3 template progress of the other members of the team – first Molly’s, then Julie’s, then Rick’s and then Maria’s. Each one has subtle variations.
Day 4
In Day 4’s video (20:41) – With Rick keeping her company, today Maria teaches us the new tangle Mysealiam which was introduced to CZTs in November at the annual zenAgain conference and she also adds an embedded letter using auras and Fescu fronds.

Step 1: At 00:00 – Maria explains she will be working with the Black Micron 01 and 08 pens from the kit to add the new tangle Mysealiam.
Step 2: At 001:28 – “Mysealiam was named for our grandson Liam, who is all about the ocean.”
Step 3: At 01:00 – Maria points out the space she’s going to add Mysealiam to and holds a Phi tile there to show the size of the space. Then she uses the tile and a Micron 01 to show us “that first stroke just so you can see where it’s going to go. It’s like an upside down smile, a smirk, or a little mustache.”
Step 4: At 01:22 – Rick suggests we watch the entire video because “you’ll see at the end of the video different versions that each of us have done.”
Step 5: At 01:30 – Maria “puts down that first little upside down smile and it doesn’t have to be centered or anything.”
Step 6: At 01:45 – She adds the second stroke that comes up to meet the first stroke and then adds the “take off and land” stroke that widens the base of the second stroke, and she fills in the wedge shape created.
Step 7: At 02:20 – She adds the top stroke, “the top one is not going to touch the smirk as it’s going to come down and then stop leaving a small gap.”
Step 8: At 02:42 – She adds the take-off-and-land stroke to this line and fills in the gap.
Step 9: At 02:58 – She auras the bottom line and adds the “Scena” stroke and fills in that space. She repeats this procedure three or four times on the added stroke.
Step 10: At 04:27 – “We’re going to repeat this on the other side … I’m going to do it like four times”. Rick notes that the aura is spaced at a consistent gap from its neighboring stroke.
Step 11: At 05:26 – She repeats this on the “top” side of the Mysealiam, noting the strokes do not touch the very first “smirk” stroke but also have that consistent gap, and matching the corresponding strokes on the other side of that smirk.
Step 12: At 06:57 – “So now what we’re going to do is we’re going to start more like halfway down instead of way at the tip.” Rick explains, “It’s just coming off like in a takeoff sort of way.”
Step 13: At 07:15 – She continues adding to that side until it tapers down to the end of the smirk.
Step 14: At 08:04 – She turns the template and adds the matching auras and wedges on the opposite side, meeting up but not touching their corresponding ones on the other side.
Step 15: At 08:37 – They note we are not shading our pieces until the very end because it would be smudged with our hands.
Step 16: At 10:20 – “The second half here we’re going to do an embedded letter … I’m using my 05 Brown.” She adds her initial M on the left side of the template as Rick notes, “This will be like putting the chop in in advance.”
Step 17: At 12:00 – “Now I’m going in with the 01 (Black) and I’m going to go all around the letter ” with an aura.
Step 18: At 13:06 – Still with the 01, “I”m going to shoot off some of those little Fescu fronds … just willy-nilly”.
Step 19: At 14:12 – Maria adds rounding wherever the fronds meet the aura.
Step 20: At 14:43 – She adds an aura around the whole letter and Fescu form then adds rounding and inner auras to fill the spaces. She keeps adding the sprouts, auras and rounding until she has it to her satisfaction.
Step 21: At 19:26 – They show us the progress and point out the features done by the other team members starting with Julie, then Molly, Rick, Martha.
Day 5
In Day 5’s video (20:26) – For the fifth lesson in this Project Pack, Maria tangles Maria tangles Fengle embellished with Moon Pie and Doodah in the upper left corner of our template. In the second part she adds Marasu on the right side of the template.

Step 1: At 00:20 – Maria explains she’s going to be tangling Fengle using a Black Micron 08. Rick explains how Fengle got its name.
Step 2: At 00:37 – Maria begins to add Fengle to the upper left corner of the template. Instead of drawing off a shared center point, Maria adds each S-shape “leg” branching (“piggybacking”) slightly off the previous one.
Step 3: At 01:59 – She adds the “back stroke from the end of those S’s to about half way” to the original lines until we see “the star-shape shell come into being”.
Step 4: At 02:50 – She adds similar strokes going in the opposite direction around the star.
Step 5: At 03:30 – She adds a stroke from the tip to the inside. Rick comments that in this case it really helps to turn the template to do the strokes.
Step 6: At 04:46 – With the Brown Micron 05 she adds “some Moon Pie” on the outside where the strokes meet, “it’s become one of my favorites and anytime I see a little corner or a pizza shape I can throw in some Moon Pie“.
Step 7: At 06:51 – She continues adding Moon Pie around the Fengle.
Step 8: At 09:25 – Next she adds Doodah with the Black 08 Micron, changing the pressure on her pen as she adds the stroke.
Step 9: At 12:32 – Turning the template to the right side, still with the Black Micron 08 Maria adds Marasu, explaining “it’s named for my sisters Madeline, Rachel and Sue”. She goes on to explain it was inspired by the craft of spool knitting (also known as corking, French knitting and tomboy knitting) she did in her childhood.
Step 10: At 16:37 – She uses the Brown 05 to aura the black areas she’s just added to Marasu.
Step 11: At 19:04 – They show us the rest of the team’s progress on their projects, first Julie, then Rick, then Molly, and finally Martha. All following the same instructions but with different interpretations.
Day 6
In Day 6’s video (17:12) – With Maria keeping him company, Rick works with two seed tangles: Cadent and Huggins.

Step 1: At 00:07 – Rick explains we’re going to be working with seed tangles today and he points out the section he plans to begin with using his Black Micron 05.
Step 2: At 00:57 – He begins to put down orbs in a grid layout across the whole section, reducing them in size as he goes down the page and putting some “behind” where there are other tangles or parts of the “trellis”.
Step 3: At 03:29 – Once the grid is laid down, he moves back to the left section and begins to connect the orbs in a take-off-and-land fashion using the S stroke for the tangle Cadent.
Step 4: At 05:32 – When all the vertical dots have been connected on the left side, he turns the template 90° and repeats the process. Rick and Maria talk about how Cadent was named.
Step 5: At 07:02 – He moves to the right side and it’s grid of orbs to create Huggins. He connects the orbs using the take-off-and-land technique using a C-shaped stroke.
Step 6: At 08:58 – When he finishes the vertical strokes, he again turns the template 90° and repeats the process, reminding us that the curve strokes never cross each other and this tip assists in determining the direction of the connecting stroke.
Step 7: At 11:01 – Working on the left side (Cadent) he adds “tethered aura” strokes on all four sides of the Cadent orbs.
Step 8: At 12:27 – On the Huggins side, he adds a regular aura on the side of the vertical C-curves.
Step 9: At 13:06 – He turns the template and repeats the auras while explaining the origins of the Huggins name.
Step 10: At 14:04 – Rick switches to the 08 and fills in the orbs on the Huggins side.
Step 11: At 14:48 – On the Cadent side he auras the inside of the orbs, leaving a highlight in the center of each.
Step 12: At 15:50 – They again review the rest of the team’s progress with their templates: Julie, Martha, Molly and Maria.
Day 7
In Day 7’s video (32:32) – Julie Willand adds the drama tangles Bunzo and Pouyang to our template.

Step 1: At 01:11 – Julie explains she will be using the Black Micron 08 and 01 to add drama tangles to the template and she describes drama tangles. “The first thing that comes to mind when describing a drama tangle is more ink. Drama tangles pack a lot of punch as they tend to have intense areas of ink or open spaces.”
Step 2: At 02:42 – She will be using the Micron 08 to add Bunzo, noting that it has its roots in Striping.
Step 3: At 03:46 – She begins to add Bunzo near the tree trunk.
Step 4: At 08:52 – Julie moves on to another space and adds more Bunzo and reminds us that the larger areas of ink can take a bit longer to dry so be mindful not to smudge with our hands.
Step 5: At 13:26 – She proceeds to “add a few Bunzos here and there”.
Step 6: At 15:22 – Julie moves on to our second drama tangle, Pouyang, using the Micron 01.
Step 7: At 21:40 – Julie tells us a little about the tangle. “We have a dear dear friend here at Zentangle, he works for Sakura of America and his name is Peter Ouyang, hence the Pouyang. He has been such a friend and mentor to all of us here at Zentangle over the past 20 years that it only seemed fitting that we honor him by giving him his very own tangle.”
Step 8: At 30:58 – When Julie has finished adding Pouyang, Rick and Maria wrap up by showing the progress of the others: first Maria, then Martha, Rick, and Molly.
Day 8
In Day 8’s video (15:00) – With Maria keeping him company, Rick works on a square grid tangle, one of the 102 originals called Cubine. When they wrap up the video at the end you’ll see the variations done by Julie, Maria, Martha and Molly.

Step 1: At 00:19 – Rick uses the Black Micron 01 to lay down a square grid on the left side of the template.
Step 2: At 03:44 – He starts with one section and adds a Cubine fragment to it then continues to add them to the rest of the grid.
Step 3: At 09:28 – He switches to the 08 to fill in the squares in each fragment.
Step 4: At 12:57 – He uses the graphite pencil to add “the other component of Cubine“, adding graphite shading to one of the remaining spaces in each fragment.
Step 5: At 13:39 – He wraps up with the progress of the others on the template: first Julie, then Maria who does a curved version “sort of Crazy Cubine” using the Brown Micron, then Martha who added an aura embellishment, then Molly who filled her Cubine square with strokes instead of solid black.
Day 9
In Day 9’s video (14:24) – With Maria keeping him company, today Rick tangles a triangular grid and adds Tripoli to the template.

Step 1: At 00:17 – Rick explains he’s using a Micron 08 to work in the mirror section of where we worked on the template yesterday and will add the tangle Tripoli. He begins to add the triangle grid. As he adds the grid he keeps the aura space between the triangles a consistent size space.
Step 2: At 04:49 – Maria notes “in Tripoli your triangles more often than not are all different sizes as opposed to some other grids where things a little bit (easier to see where you’re going).” And she notes Tripoli is one of her favorites.
Step 3: At 06:50 – At this point Rick begins to add fills to the triangles, “putting in your fragment”.
Step 4: At 09:45 – Rick notes, “you can do different fills and we also encourage to to wait and see what everybody else did here at the end”.
Step 5: At 10:37 – He has filled all the triangles with the fragment and changes to a Brown Micron to fill in the spaces surrounding orbs. (Maria notes he’s using an 01 which isn’t included in the Pack but we can use our 05’s.)
Step 6: At 12:52 – “Let’s take a walk through what other people have done.” First Julie’s who’s done a little enthatching on her Tripoli, then Molly’s and she used aura strokes for hers, then Martha’s and she used a wavy line for hers, then Maria who used auras on hers, similar to Molly’s.
Day 10
In Day 10’s video (16:41) – In the first part of the video we watch as Rick and Maria describe how Molly is filling in her composition by adding tangles we’ve previously used in this Project, adding them in various places to balance the composition. In the second part Rick and Maria comment as Maria does the same with her composition before we move on to shading our entire piece.

Step 1: At 00:11 – Rick and Maria describe Molly’s additions to her composition. Molly uses the Brown 05 Micron to add more of tangles we’ve done earlier in the Project. As Maria explains, Molly is “putting them in more places for balance, for interest.” Molly begins adding Pokeleaf and Rixty.
Step 2: At 00:54 – Rick says, “We’re just going to see all the different places and get a sense of how she’s approaching these empty spaces.”
Step 3: At 01:06 – Maria notes that by going back and forth, we have tangles in front and in back in the composition.
Step 4: At 01:22 – Rick encourages us to be taking photos of our progress along the way, “particularly before we get deep into shading tomorrow”, as we watch Molly continue adding bits of the tangles around her composition.
Step 5: At 03:40 – Molly adds some more Marasu in several different places around the composition.
Step 6: At 05:42 – Molly uses the Black Micron 01 to add some fills in various spaces.
Step 7: At 06:38 – She adds some “Bunzo accents” to fill in more spaces around the Project, balancing light and dark areas.
Step 8: At 08:01 – We switch to Maria’s template to see how she adds more bits of tangles to hers, she uses the Brown Micron 05 to add Pokeleaf, Pokeroot and Rixty.
Step 9: At 09:16 – With the Black Micron 01, Maria works on extending the Cubine in her template up begin the Fengle.
Step 10: At 10:28 – After extending the Cubine grid, Maria uses the Brown 05 to aura inside each square.
Step 11: At 11:43 – In one of the Fengle “petals”, Maria adds an aura and then some Mooka fronds inside it.
Step 12: At 13:17 – She goes back to adding some Pokeleaf and Rixty in various spaces.
Step 13: At 15:08 – Again we wrap up with a look at the progress of the others: Julie, Martha, and Rick.
Day 11
In Day 11’s video (46:30) – Martha adds texture tangles to our template, first Betweed, then Tipple, Indy-Rella, weighted Printemps and Diva Dance.

Step 1: At 01:06 – Martha introduces her day’s tangling noting we’ve done several genuses of tangles so far in this project: drama, grid, blossoming and vine and today we will be doing texture tangles.
Step 2: At 01:45 – She reviews some of the changes she made on her composition on Day 10 (yesterday).
Step 3: At 03:28 – Martha says she’s going to be adding Betweed to two adjacent open areas left in her template.
Step 4: At 04:10 – She uses the Black Micron 01 but notes we can use “Brown and any other pens you have that you think would fit on your tile”, as she begins to add Betweed.
Step 5: At 08:55 – When her first Betweed is finished she goes back to add a little line weight where the strokes join.
Step 6: At 10:39 – She adds Betweed to another space.
Step 7: At 13:33 – Martha moves to another section, the arc at the bottom of the “tree” to add Tipple.
Step 8: At 21:00 – She adds some ink in the center of some of the Tipple.
Step 9: At 23:14 – Martha moves to another section to add another texture tangle, Indy-Rella.
Step 10: At 27:24 – She adds “a little ink to the curve” in the Indy-Rella.
Step 11: At 28:46 – She adds bits of Indy-Rella to the ends of the “Moon Pie berries” she added yesterday, kind of like Zinger.
Step 12: At 29:51 – “I’m going to put down my black pen for a while … and I’m going to add a texture that’s a little bit different”, as she uses one of her watercolor pencils (Teal) after sharpening it first to add some weighted Printemps. She uses a heavier weight on her pencil on the same part of the stroke for each of them then a lighter weight on the rest.
Step 13: At 34:37 – She uses a tortillion to “encourage this watercolor spiral to fade into the watercolor that’s already there, and it’s a luscious texture”.
Step 14: At 35:15 – Martha adds more of that texture to another space on the template using another of her watercolor pencils (Yellow Ochre). She then blends that lightly with a tortillion.
Step 15: At 37:15 – With the Black Micron 01, Martha adds some Diva Dance.
Step 16: At 42:36 – Martha adds more Betweed.
Step 17: At 43:03 – She adds more Tipple in another space.
Step 18: At 43:23 – She points out where she’s repeated more of today’s tangles around her template.
Step 19: At 45:18 – Rick and Maria “take a look at some of the other ones”, first Rick’s, then Maria’s then Molly’s as they point out some of the different approaches to the same process.
Day 12
In Day 12’s video (50:01) – Rick, Maria and Molly take us through the last lesson in this Project Pack where we shade and highlight our work. We are shown the approach of each of the artist’s (Molly, Maria, Rick, Martha, and Julie) who each have different techniques and ideas. We are encouraged to take a photo of our project before we begin adding shading and highlights today.

Step 1: At 00:25 – As Molly begins to add graphite and highlights to her piece, she notes we’ve waited until the end to add the shading and highlights so the piece would not become smudged as we worked over the last 11 days. Much later on in the video she suggests we use an extra piece of paper under our hand to prevent smudging during today’s lesson.
Step 2: At 00:45 – “I think I spent a whole day doing this one day … just shading. So take your time, enjoy the process. … just go along at your own pace.”
Step 3: At 01:45 – “In this last video we’ve actually recorded four of the five artists that have been teaching here … to show you some really different ways not only that the projects have evolved” differently but also how each approached this last step.
Step 4: At 02:07 – As she works on the Pokeroot Molly explains she “really wanted to dig deep into creating form with the chalk and graphite”.
Step 5: At 03:40 – She says her approach was to choose one element and work on those throughout the piece.
Step 6: At 04:20 – Rick encourages us to take a picture of our piece before we begin this process and Maria adds to be sure to take an after photo too so we can compare the two.
Step 7: At 06:09 – Molly works on the Verdigogh. As she continues to work on various parts of the piece she and Maria have commentary on their decisions and process with this piece.
Step 8: At 10:55 – At this point Molly has reached the Huggins.
Step 9: At 11:26 – She moves on to the Fengle and talks about Martha’s technique of adding watercolor pencil tangles and how it acts as a resist when she puts graphite and charcoal pencil over it.
Step 10: At 12:30 – We move on to Maria’s composition. She explains she decided to use the red watercolor pencil for her Pokeroot because she already had a lot of yellow in the composition, “I thought it looked a little jaundiced, a little too much yellow ochre.”
Step 11: At 14:32 – With all of her Pokeroot berries now red, Maria adds white charcoal highlights then she adds graphite shading round the berries.
Step 12: At 16:26 – Maria adds graphite shading around the whole bottom of the piece. She continues to work around the piece on all the tangles we’ve added during the Project.
Step 13: At 24:25 – Molly suggests we use an extra piece of paper under our hand so we don’t smudge during this process, “because I found that the whole side of my hand was covered in graphite”.
Step 14: At 26:42 – We switch to Rick’s project and his shading, he begins with “traditional shading” on Huggins.
Step 15: At 32:37 – As he works he note that he decided to work first with the graphite across his entire composition and then go back with the white charcoal.
Step 16: At 33:33 – They discuss how the project can appear overwhelming at this stage and suggest we approach the shading component in our own time and if desirable in bits and pieces. “Do a little bit here and there and don’t give up on it.”
Step 17: At 37:32 – Molly also reminds us that “just because you started your shading process doesn’t mean you can’t pick up a pen” to add bits where we feel we want to.
Step 18: At 41:22 – We switch to Martha’s project.
Step 19: At 45:40 – And lastly, we check out Julie’s project.
Step 20: At 47:11 – Rick says, “remind yourself that everybody had the same colored pencils, the same tangles, and look how different it came out”.
Wrap Up
In the final video in the Project Pack 19 Series (10:27) – Rick & Maria take us through some of the highlights of the project on each of their pieces.
Step 1: At 00:00 – Rick and Maria begin to review the complete pieces, beginning with Julie’s and they point out various features of Julie’s approach.
Step 2: At 01:54 – “We go from Julie’s to Maria’s.”
Step 3: At 03:43 – We review Rick’s.
Step 4: At 05:07 – Next up is Martha’s, “there’s so much to look at here”.
Step 5: At 07:12 – Next is Molly’s.
Step 6: At 08:48 – Lastly we have a “special guest presentation of somebody that’s been tangling along with us, that is Nomi.” For more about the fanciful character Nomi you’ll need to visit Zentangle’s blog post beginning this Project Pack.
This recap of Zentangle’s Project Pack #19 will make it easy for you to find all the related videos and any parts of them you may wish to refer to again.
Remember the images above are linked to their YouTube video, simply click the image to go to the video. Or, you can view the complete video on the corresponding tangle’s page on TanglePatterns, they make a fascinating “historical” record of Zentangle videos on each tangle.
For a complete list of Zentangle’s Project Packs click the PROJECT PACKS link in the pink alphabetic tangle menu bar.
|
.oOo. |
|
Enhance your Zentangle experience while supporting TanglePatterns: |
|
BRAND NEW! TanglePatterns.com TANGLE GUIDE, 2026 Edition |
|
 |
The 15th Edition of the TanglePatterns.com TANGLE GUIDE is an instant-download 123-page interactive digital eBook/PDF containing over 2,300 tangles on the site from May 2010 through December 31, 2025. It's a great resource and a must-have digital tool for using the site. Visit the STORE > E-BOOKS page and help keep TanglePatterns.com going by getting your copy now! |
|
"Linda, Thank you! I was relying on too few and getting stuck after 3 years of daily working with Zentangle. This has inspired me to ‘begin again’ with renewed excitement." ~ Barbara R. |
|
| See the BOOK REVIEWS page for more details on its features and view a sample page. Note: this is a digital product to download immediately when ordering, nothing will be physically mailed to you. | |
| If you're new to Zentangle® and tangling, my TanglePatterns.com BEGINNER'S GUIDE TO ZENTANGLE is just what you need to get started. Also available en Français and en Español. | |
|
|
|
 |
This is the only Zentangle book you'll ever need: the fabulous Zentangle PRIMER Vol 1. It's your CZT-in-a-book by the founders of Zentangle®. For more about the content and to read the rave reviews, visit the BOOK REVIEWS tab. |
| Available in KINDLE format for $9.99. Spanish Edition here. Japanese Edition here. | |
| "Absolutely the best Zentangle Book yet! As an accomplished artist I used to think I did not need instruction on this art form. How wrong I was! My tangling improved by leaps and bounds after reading this book. If you think you have Zentangle down then you need this book more than ever!" ~ Kris H | |
|
|
|
|
.oOo. |
|


The amount of work and time that goes into your summaries for the project packs is truly astounding. I appreciate having all the videos on one easy page, and it makes it very straightforward for me to keep track of where I am with the videos. Having the time notations and what is happening when in each video is a lot of work for you but one that is incredibly helpful and useful!
Thank you so much, Linda <3
I agree whole heartily! Thank you, Linda, for all the work that you do to make it easy for the rest of us to be organized. . . I, for one, would be totally lost without your help! It makes it so much easier for me to find where I need to go back and watch to catch up! Thank you!