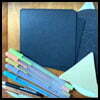
 Zentangle’s Project Pack #08 introduces us to a brand new selection of colors of Moonlight Gelly Roll pens from Sakura of America.
As described in the Zentangle newsletter:
We have designed Project Pack No. 08 as a fun opportunity to explore new materials and tangling techniques with some outside-the-box colors.
Be challenged with fun ways to layer tangles and colors to create interest and depth in a whole new tangling adventure.
Join us as we tangle our way through the 2020 world-wide launch of these delightful new Gelly Roll Moonlight Pens from Sakura of America.
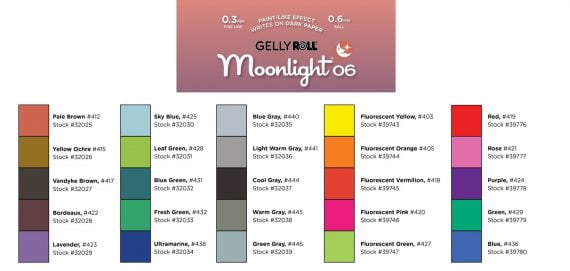
Sakura’s website details the features and includes a larger version of this color chart of the newest Gelly Roll Moonlight Pens with Ice Cream Smooth™, opaque ink.
SUPPLIES: This Project Pack is available here ($26.95) in the zentangle.com store and it’s certainly a convenient way to get all the supplies for the project. However for those of us whose budgets are tight, the Introduction video reviews the items in the Project Pack and you might discover you have suitable alternatives in your own Zentangle supplies.
Using the chart above, the Sakura Gelly Roll Moonlight pen colors in this Project Pack are:
- Pale Brown (#412 – the cap looks peach to me, Maria calls this Light Brown)
- Yellow Ochre (#415 – like gold without a metallic shine)
- Lavender (#423)
- Blue Green (#431)
- Fresh Green (#432)
You can find the color number in itsy bitsy teeny tiny print right above the bar code on your pens.
The following chronology is a summary of the videos for this Project Pack with links to the individual videos. Either click the Day #’s title link or the image itself to view the full video on YouTube.
TIP: Where there is a tangle involved, you can also view each of these videos by visiting the corresponding tangle’s page on TanglePatterns.
Day 1 – Introduction
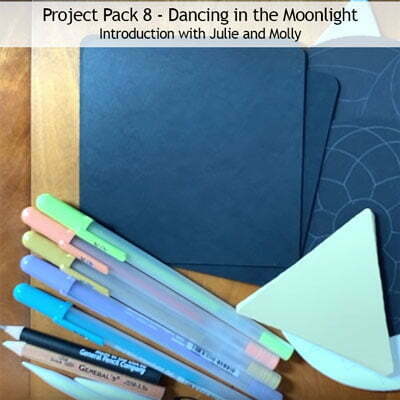
In the introduction video (4:53), CZTs Julie Willand (Zentangle HQ) and Molly Hollibaugh (Maria’s daughter) introduce the materials in Project Pack No. 08 and give some background information on the theme of this series.
Molly and Julie go over each of the supplies in your project pack and explain a little about each of the tiles we will be working on in the series.
“In each of these videos we will be using specific materials from the Project Pack, but we encourage everyone to tangle along with whatever materials they may have.”
Day 1
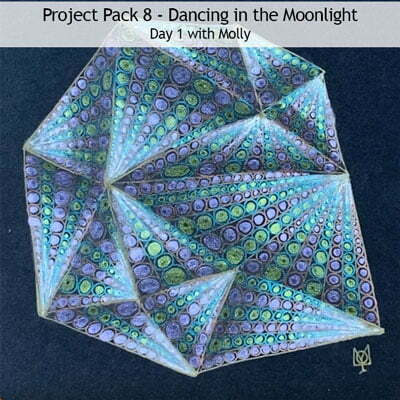
In Day 1’s video (22:06) – Molly tangles a colorful Munchin on a black Apprentice tile.
Note: I think it will be helpful for you to watch the video through first before doing your own tile so you understand exactly what you’ll be doing and you can fully absorb Molly’s tips and advice before you launch in.
Step 1: At 1:01 – Molly explains we’re going to be working with the tangle Munchin. And in order to choose random colors for this tangle on a Black Apprentice Tile, we mix up our pens, lay them down side by side.
Step 2: At 1:43 – Molly picks up the first pen from the left side, in this case the Yellow Ochre.
Step 3: At 2:06 – If you haven’t used the Moonlight Gel pens yet, use the back of the tile to get the ink going. Molly also points out these pens take a bit longer to dry than the Microns, so be mindful for the smudge factor.
Step 4: At 2:45 – Molly starts Munchin, “as I always do by laying down a few dots sort of like a constellation in the sky.”
Step 5: At 3:20 – Once you have enough dots down you can get started and Molly explains the sequence, noting to be sure to leave plenty of space between the lines because later we are going to be “playing inside these spaces“. If you draw the lines too close together you won’t have enough room for the next step.
Step 6: At 4:41 – “We’re going to create more of these that kind of evolve from one to the next.” Again noting to be sure to leave plenty of space.
Step 7: At 6:39 – After reminding us to turn the tile and remembering to breathe, Molly encourages that we can add more dots where we feel like we want them.
Step 8: At 8:08 – Molly changes pens (Pale Brown) and begins to add a series of orbs, “smushing them in“, cautioning “don’t jump ahead”.
Step 9: At 8:56 – Molly skips a space and does exactly the same thing. She works her way around the entire tile adding a row of orbs and skipping a space between.
Step 10: At 9:27 – She changes to her third color pen (Lavender) and for this step she adds a dot inside the orbs she just created, “purposely not filling to the edges of the orbs“.
Step 11: At 11:10 – Molly recommends working with the gel pens by holding them a little more upright than the Microns.
Step 12: At 11:41 – Moving on to the next step, Molly selects the next color pen (Blue Green) and goes into the blank spaces doing exactly the same thing as before, filling each with orbs. She points out that if you love your tile just the way it is now before moving on, then you can hold off doing her next steps until she gets to the shading step.
Step 13: At 12:35 – She reminds us that this ink can stay wet and to be very careful about smudging.
Step 14: At 13:15 – With the last color pen (Fresh Green), Molly repeats Step 10 adding dots inside of all of the newly-created empty orbs but not entirely filling them.
Step 15: At 14:15 – All the orbs have been filled in at this point and you should make sure that everything is completely dry before proceeding to add dimension with shading and highlights.
Step 16: At 14:40 – With the graphite pencil and the white charcoal pencil and their corresponding tortillions, Molly begins the shading.
Step 17: At 15:26 – She adds graphite along the bottom edge of each of the original triangles, noting to be sure to use the side of the pencil because the tip will scratch the gel ink.
Step 18: At 17:16 – With all the graphite down she buffs it out with the tortillion.
Step 19: At 18:05 – With the charcoal pencil, she adds it just at the tips of each triangle, “just feathering it out from the point“.
Step 20: At 19:22 – With the other tortillion Molly softens the white charcoal into the paper.
Step 21: At 20:10 – With the very first color used to create the Munchin, in this case Yellow Ochre, Molly goes back over the tips of the triangles to bring back the original color.
Day 2
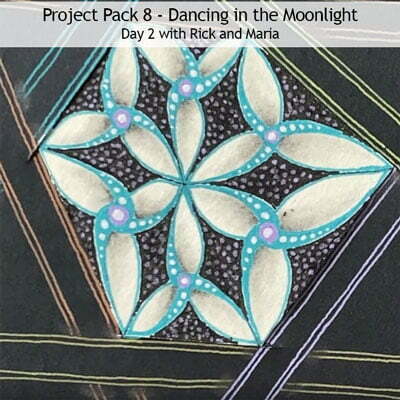
In Day 2’s video (18:25) Rick tangles Well and Hollibaugh on Bijou and Apprentice tiles with Maria keeping him company.
Step 1: At 00:27 – With a white Bijou tile and a black Apprentice tile, Rick prepares them for tangling. Once he cuts the black tile and inserts the Bijou, he adds tape on the back to secure the two together.
Step 2: At 03:18 – With a black Micron 01, he places a dot “not particularly in the middle but somewhere towards the center” of the Bijou tile then connects the dot by extending a line to each corner of the exposed Bijou creating triangle-shaped sections.
Step 3: At 03:50 – Into each of the triangles created, Rick begins drawing the tangle Well: With one of the Gelly Roll Moonlight pens (Blue Green), he draws an orb in the center of each section.
Step 4: At 04:25 – Continuing with the same color Gelly Roll pen, he takes off from a corner and lands on its center circle. Then repeats with other other two corners of that section, remind us to turn the tile each time.
Step 5: At 04:56 – In the adjacent section he repeats the process but this time mirroring the direction of the previous section’s strokes. Maria points out that Rick is going clockwise on one, then counterclockwise on the next one. He continues around the tile, mirroring the adjacent section.
Step 6: At 06:40 – He adds curved arc-shaped strokes within each section, creating the look of flower petals, much like a Trillium or a trefoil-like shape when done. (In their discussion about a flower they had seen in Bermuda, I believe they refer to the beautiful and intoxicatingly-scented Frangipani which we also enjoy here in South Florida.)
Step 7: At 07:50 – With the take-off-and-land technique he adds another curved stroke on the inside of each of the strokes made in Step 6.
Step 8: At 08:54 – With the same pen he inks in the space just created in the previous two steps.
Step 9: At 09:27 – Changing to the Lavender (#423) color pen, Rick fills the original center orbs with ink.
Step 10: At 09:59 – With the black 01 Micron, he fills in the large sections between the “three-petal flowers“. By 11:22 he has filled in all the spaces between the floral shapes with black ink, having left the petal shapes themselves the white of the tile.
Step 11: At 11:39 – With a white Gelly Roll (“You’re cheating“, the white Gelly Roll was not included in the PP), Rick adds a white dot to the center of the Lavender orbs.
Step 12: At 11:58 – He layers small orbs over the Blue Green petal shapes. Maria notes, “take your time when you’re doing these little dots, I find that the lighter the pressure you put on them, the more beautiful the little orbs created.“
Step 13: At 12:43 – Switching to the Lavender pen, Rick adds small dots to all the black-inked areas of the Bijou tile. You might have to clean off the nib every once in a while by rolling it on a scrap piece of paper or a tissue.
Step 14: At 12:59 – Off camera Rick added some Hollibaugh bands (“boards”) to the black Apprentice tile surrounding the Bijou with each of the other Gelly Roll colors.
Step 15: At 13:15 – He adds an inner aura to each of the bands with the same color he used for each.
Step 16: At 14:13 – With a graphite pencil Rick adds “a little shade of gray” at the base of each petal shape then blends it outwards with a tortillion.
Step 17: At 16:14 – He adds shading to the “over-unders” of the Hollibaugh bands using the graphite on his tortillion. He creates a small palette of graphite by scribbling his pencil on a scrap of paper, and from that palette he can pick up additional graphite on the tortillion.
To finish the tile, Rick adds his chop with the Blue Green and Lavender pens.
Day 3
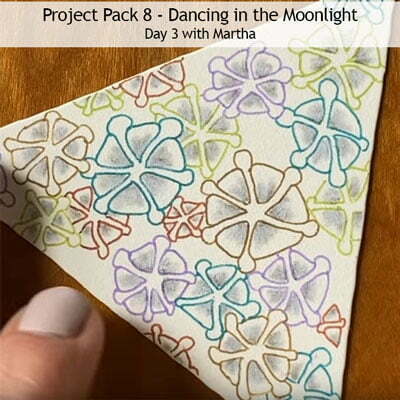
In Day 3’s video (14:32) – CZT Martha Huggins (Maria’s daughter ) tangles a colorful “jellyfish” variation of Tripoli on a 3Z tile.
Step 1: At 00:20 – Martha begins tangling Tripoli on a 3Z tile with a Yellow Ochre (#415) Moonlight Gelly Roll pen.
Step 2: At 01:10 – Once she has finished a circle of Tripoli triangle shapes, Martha adds a curve at the outside edges linking adjacent triangles to one another.
Step 3: At 01:42 – Martha adds two more of these “jellyfish shapes” around the tile, varying their sizes.
Step 4: At 02:31 – Martha changes to the Lavender (#423) Gelly Roll pen and adds more of these shapes around the tile.
Step 5: At 04:32 – She changes to the Blue Green Gelly Roll and adds more shapes, layering some behind as she goes around the tile.
Step 6: At 06:45 – A change to the Fresh Green (#432) Gelly Roll to add more.
Step 7: At 07:27 – “You can stop at any point along the way if you feel your tile is full.“
Step 8: At 08:19 – A change to the Yellow Ochre (#415) Gelly Roll to fill remaining spaces on the tile.
Step 9: At 09:31 – With her graphite pencil Martha adds shading to the center points of each triangle. “You can add shading to just some or all of the jellyfish shapes.”
Step 10: At 11:51 – With her white charcoal pencil Martha adds charcoal over the graphite to fade it back a bit, adding interest with “another shade of gray“.
Step 11: At 12:49 – Martha adds her chop.
Day 4
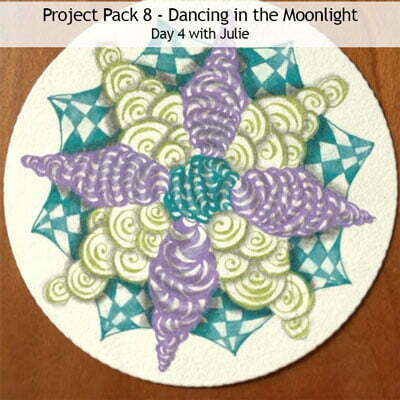
In Day 4’s video (28:20) – Julie tangles Printemps, Bunzo and Knightsbridge on a prestrung Zendala using the new Sakura Moonlight Gelly Roll Pens.
Step 1: At 00:54 – Julie selects the Lavender Moonlight Gelly Roll pen and a prestrung Zendala tile.
Step 2: At 02:03 – She begins with one of the sections and the tangle Bunzo. As she adds the “Bunzo mounds“, she fills every other one with ink.
Step 3: At 05:14 – “Every now and again I step outside my string a little bit, and that’s okay.“
Step 4: At 05:42 – Julie continues adding Bunzo to alternating spaces around the Zendala tile.
Step 5: At 06:38 – Julie reminds us to bear in mind the ink takes a while to dry so take care not to smudge.
Step 6: At 07:08 – “What I like about this tangle is it is so different each time.“
Step 7: At 07:38 – Julie changes to the Blue Green Moonlight Gelly Roll pen and adds Bunzo to the center space of the tile.
Step 8: At 09:00 – She changes to the Fresh Green (#432) Moonlight Gelly Roll pen and begins adding a weighted Printemps to the spaces between the completed Bunzo “cones”. “Adding weight to my tangles is one of my favorite ways to give it a little bit more character, a bit more drama.“
Step 9: At 10:25 – “You don’t want to add weight all the way around, you want to add it all on the same side.“
Step 10: At 11:17 – Julie adds weighted Printemps all the way around the tile in the same shaped section.
Step 11: At 12:56 – With the Blue Green Moonlight Gelly Roll pen, Julie adds Knightsbridge to the remaining sections of the tile to give contrast to the roundness of the Bunzo and Printemps sections.
Step 12: At 16:20 – A reminder to breathe, relax your grip on the pen, and check your posture.
Step 13: At 18:16 – Julie adds shading to the tile, beginning with adding graphite to the Bunzo “cones”.
Step 14: At 20:50 – She adds graphite to the Printemps areas.
Step 15: At 21:16 – With her tortillion, she blends and softens all the graphite that’s been added.
Step 16: At 21:54 – She adds graphite where the edges of the Knightsbridge areas meet the other tangles, then softens it with the tortillion.
Step 17: At 22:50 – With the white charcoal pencil Julie adds highlights to the tangles then blends it with the tortillion.
Step 18: At 25:35 – With the gel pens, Julie redefines some of their lines to bring back the color where the graphite may have covered it.
Lastly, Julie adds her chop and signs her tile.
Day 5 – Part 1
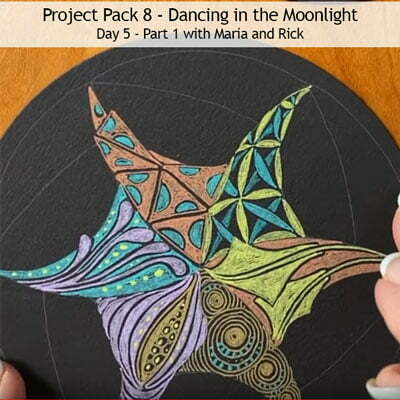
In Day 5’s first video (27:45) – With Rick keeping her company, Maria tangles Well, Mooka, Tripoli, a “Kite on a String” motif, Printemps, Gourdgeous, and Fife on several different black prestrung Zendala tiles. In the second video for Day 5, Maria will complete the tiles started in this video.
Step 1: At 00:52 – After showing two different black prestrung Zendalas, Maria selects one with larger sections. We’re going to divide these sections using the tangle Well. Maria starts by adding a circle in each one of the big sections on the tile using the Yellow Ochre Moonlight Gelly Roll Pen.
Step 2: At 01:22 – She begins by going clockwise around one of the circles and making a stroke into one of the corners of the prestrung section.
Step 3: At 01:42 – She turns the tile and does the same stroke again around the circle and into a corner.
Step 4: At 02:12 – Rick notes that if you have a different string on your Zendala tile, Maria is going to go through all the different strings.
Step 5: At 02:26 – Maria adds the circle-to-corner strokes to the remaining Well sections of the tile.
Step 6: At 02:30 – She explains her goal is to not pay attention to the star patterns of the strings on the Zendalas but to “ignore that we and we are going to fill six different tangles in all different random places on each one of the tiles.“
Step 7: At 02:43 – On another prestrung Zendala, Maria adds a version of Mooka with the Lavender Moonlight Gelly Roll pen for the first tendril, then she uses the Blue Green pen to aura around the tendril then fill in the background of the section.
Step 8: At 03:57 – Again with the Lavender pen, she adds more Mooka tendrils and repeats the aura and background fill with the Blue green until the section is full.
Step 9: At 04:15 – Rick points out how the black aura space around the Mooka tendrils gives a nice contrast.
Step 10: At 04:29 – With the Fresh Green pen Maria adds dots to the Blue Green background.
Step 11: At 04:53 – Switching to another black prestrung Zendala and using the same Lavender and Blue Green pens, Maria “is going to do the same tangle on a few different prestrung Zendalas just so you can see how differently they’ll look“.
Step 12: At 05:24 – Maria notes, “have fun with this, twist it, turn it, it doesn’t have to go in the same direction or make any sense at all. It doesn’t have to be balanced. Let’s just do these in true random beautiful Zentangle style.“
Step 13: At 06:03 – She adds Fresh Green dots to the Blue Green backgrounds.
Step 14: At 06:24 – On another tile, with the Yellow Ochre Pen Maria adds “a Kite on a String” motif to add “something more angular” to the tile.
Step 15: At 08:48 – With the Pale Brown pen (she calls it Light Brown), Maria fills in the background around the Kite on a String motif using the same aura and fill technique.
Step 16: At 09:55 – On another prestrung Zendala with angular strings, Maria adds the same Kite on a String motif (“Kleaf“) in several sections using the Fresh Green and Pale Brown pens as on the previous tile.
Step 17: At 10:43 – Going back to one of the earlier tiles, Maria adds Tripoli with the Pale Brown pen. Rick notes that the consistency of the aura gap adds to the design.
Step 18: At 12:11 – With the Blue Green pen, Maria adds Crescent Moon-like shapes inside each of the Tripoli triangles.
Step 19: At 12:42 – With the Pale Brown pen she adds an aura and fill around the Crescent Moon-like shapes, again leaving that consistent aura spacing.
Step 20: At 13:26 – On yet another black prestrung Zendala, still using the Pale Brown pen, Maria “goes outside the lines” of the string and adds Tripoli over them, “impromptuing“.
Step 21: At 14:57 – With the Blue Green pen, as in Step 18, she adds crescent shapes to each triangle and at 15:27 fills in the background with Pale Brown. Then she repeats the motif around the tile.
Step 22: At 15:56 – On another tile with the Yellow Ochre pen Maria adds a “seed” portion of the tangle Gourdgeous in the center of a section.
Step 23: At 17:79 – With the Lavender pen, in the same section Maria continues with Gourdgeous on either side of the seed section.
Step 24: At 19:57 – On another tile, Maria repeats the Yellow Ochre and Lavender Gourdgeous motif, fitting it into another shape section.
Step 25: At 20:09 – With the Fresh Green pen she adds some highlights to Gourdgeous.
Step 26: At 20:24 – Maria repeats the Gourdgeous motif around the tile with the same pen colors as before.
Step 27: At 21:00 – With the Yellow Ochre pen she adds circles within the Well circles already present on the tile.
Step 28: At 21:15 – On a previous tile that now has 4 different tangles on it, With the Yellow Ochre pen she adds Printemps.
Step 29: At 23:07 – With the Blue Green pen she adds perfs to a few of the Printemps rings.
Step 30: At 23:53 – On another black prestrung Zendala tile, Maria repeats the same Printemps treatment with the Yellow Ochre and Blue Green pen.
Step 31: At 24:41 – On the tile from Step 28, with the Yellow Ochre and Blue Green pens pen Maria adds Fife to the last main section of the tile. she then adds Pale Brown dots to the spaces left in Fife.
Step 32: At 26:39 – On another black prestrung Zendala tile Maria adds Fife using the same pens as Step 31.
In the second video for Day 5 Maria will be completing the Zendala tiles begun in this first video.
Day 5 – Part 2
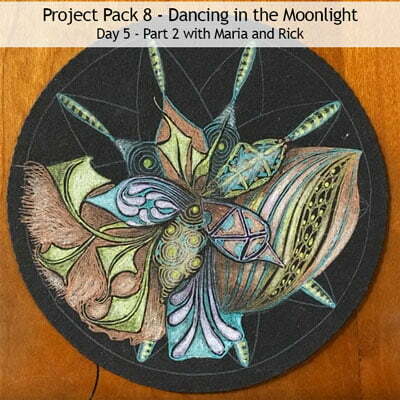
In Day 5’s second video (33:17) – With Rick keeping her company, Maria goes through each of the 10 Zendalas from the Part 1 video and adds graphite shading, white charcoal highlights, occasionally restating some of the inked lines, and using the black 01 Micron to cover some of the remaining white string lines on the tile.
Throughout their commentary they provide tips and observations about how and why Maria made some of her additions.
Step 1: At 00:30 – (Tile 1) Maria adds graphite shading to one of her Zendala tiles from the previous video.
Step 2: At 02:20 – She adds white charcoal highlights.
Step 3: At 02:33 – She restates some of the aura spaces using a black 01 Micron, then continues with the white charcoal.
Step 4: At 04:21 – With the black 01 Micron, Maria “takes out some of the white lines that were left“.
Tile 2: At 04:48 – Maria takes another of the finished tiles, one with angular strings, and adds graphite shading and white charcoal highlights.
Tile 3: At 07:23 – Maria repeats shading and highlights with a third tile after demonstrating on its corresponding blank tile how she began the tile with Gourdgeous.
Tile 4: At 11:02 – Same process of shading, highlights, removing white lines.
Tile 5: At 13:26 – (with Mooka center) Same process of Steps 2-4 shading, highlights, removing white lines.
Tile 6: At 15:40 – (with Printemps border) With the Fresh Green pen, Maria begins adding Doodah. The video then skips to shading and highlighting the completed tile. At 18:21 Maria adds some Therefore in the black spaces on the tile.
Tile 7: At 18:52 – Same process of shading, highlights, removing white lines. In this one Maria adds a white charcoal “glow” around the frame.
Tile 8: At 21:35 – Done with the same string as Tile 7.
Tile 9: At 23:39 – Maria gives tip about keeping several freshly-sharpened white charcoal pencils handy when she’s starting out.
Tile 10: At 27:43 – “Like something from outer space“.
Maria’s Experiments: At 30:34 through the end – Maria shows some of the drawings she did “in preparation for working with these pens“, testing the colors and getting used to which colors went well with others. Lots of fun inspiration there!
Day 6
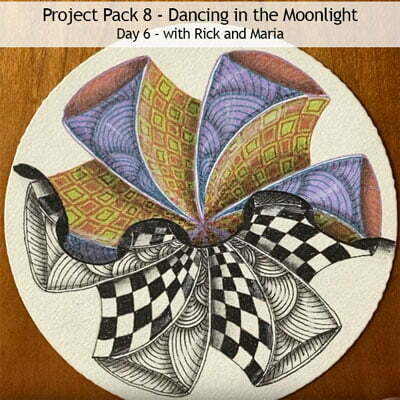
In the Day 6 video (26:32) – With Maria keeping him company, Rick tangles Mi2, Shattuck, Knightsbridge and Doodah on a white prestrung Zendala tile using a black Micron 01 and the new Sakura Moonlight Gelly Roll Pens.
Step 1: At 00:01 – On a white prestrung Zendala tile, Rick starts tangling Mi2 across the center of the tile with a black Micron 01 by laying down a series of equidistant dots, then the curved strokes of Mi2 and completes the vesica piscis shapes created. (BTW – Rick misspoke, the step-by-step instructions for Mi2 are not in the Mosaic app or the Zentangle newsletter, they are on TanglePatterns.)
Step 2: At 02:48 – Still with the Micron he retraces some of the string shapes on this particular tile then auras them.
Step 3: At 03:11 – Maria cautions us not to jump ahead but to watch what Rick is doing.
Step 4: At 03:43 – Between the bands her just formed Rick adds Shattuck, still with the black Micron.
Step 5: At 06:11 – In the adjacent section, Rick retraces the string lines for that section and then adds Knightsbridge to it.
Step 6: At 08:09 – Rick retraces the arc-shaped string line at the end of the Shattuck/Knightsbridge section and adds his version of Doodah to the section created.
Step 7: At 09:12 – Rick has repeated the prior steps in all the sections on the same side of the Mi2 dividing the tile.
Step 8: At 09:20 – With the Lavender Moonlight Pen, Rick moves to the other side of Mi2 on the tile and fills the section with solid Lavender ink.
Step 9: At 11:01 – In the Knightsbridge section adjacent to the solid color, Rick switches to the Pale Brown pen.
Step 10: At 12:13 – Now that the Lavender section has had time to dry, Rick uses the Blue Green pen to add Shattuck over the Lavender.
Step 11: At 13:11 – With the Fresh Green pen, Rick fills in the white spaces of the Knightsbridge section.
Step 12: At 13:59 – “Sort of inspired by some of Klimt’s work“, Rick adds Fresh Green auras inside the Pale Brown squares of Knightsbridge, then adds Pale Brown auras over the Fresh Green squares.
Step 13: At 14:50 – With the Pale Brown pen Rick outlines the vesica piscis shape at the end of the section he’s just completed, then fills the section with the brown ink. Once the ink has dried he adds Doodah to the section with the Lavender pen.
Step 14: At 16:07 – Rick has repeated the same steps around the rest of the sections on the tile. He now goes back with the black Micron and adds Knightsbridge to the spaces in Mi2.
Step 15: At 18:33 – With all of the ink down, Rick adds shading and highlights.
Day 7
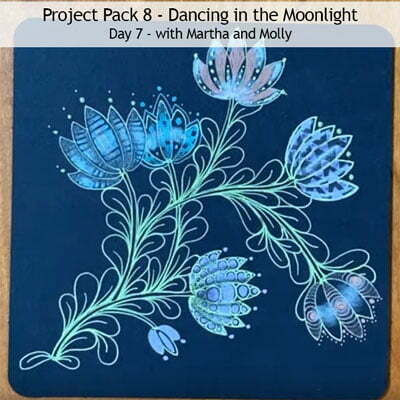
In today’s video (34:02) – Martha and Molly tangle a whimsical “garden” on a black Apprentice tile using the new Sakura Moonlight Gelly Roll Pens.
Step 1: At 00:01 – Martha and Molly introduce themselves and explain they’re going to “tangle a garden” with a floral reticulum on a black Apprentice tile.
Step 2: At 00:57 – Martha begins with the Fresh Green (she calls it bright green), and first she makes sure the ink is coming out smoothly by drawing (a Printemps spiral) on the back of the tile first.
Step 3: At 01:35 – She draws “some wonderful vining stems” starting in the bottom corner then adds a thin-spaced aura next to it to create a thin vine,
Step 4: At 01:53 – At the end of the stem she adds a large rice shape (“seed pod“) for the center of the flower, then adds more petals on each side. Note that each of the petals are generous in size for later fills.
Step 5: At 02:33 – She continues adding another stem growing off the first one, “always turning the tile as I go“, with the flower at the end.
Step 6: At 03:14 – A third stem growing out between the first two with a flower at its end.
Step 7: At 03:35 – A fourth stem and flower branching off the previous one.
Step 8: At 04:14 – A fifth stem and flower branching off the third one.
Step 9: At 04:52 – Molly steps in to begin filling the flowers. She uses the Blue Green pen and (05:30) starts in the middle of one petal and adds horizontal stripes through the petal that don’t touch the Fresh Green lines of the petal. She fills the petal with stripes.
Step 10: At 06:34 – She moves to the adjacent petal and fills it in the same manner.
Step 11: At 08:32 – With the ink dry on the completed flower, the Molly adds dots of Pale Brown ink on top of the Blue Green stripes.
Step 12: At 09:35 – With the Lavender pen, on another flower Martha adds small triangles up the edges of the center petal “like Jack o Lantern teeth“, then adds more triangles on the rest of the petals.
Step 13: At 11:36 – She restates some of the original petal lines with the Fresh Green.
Step 14: At 12:11 – On another flower using the Pale Brown pen, she divides each of the outer petals in half vertically and in the center petal she extends the shape of the adjacent petals down to the middle where all the petals join, then adds “a little embellishment“.
Step 15: At 12:39 – She colors in the inner half of each petal section.
Step 16: At 13:38 – She adds dots in the black sections of the petals with the Fresh Green pen.
Step 17: At 13:52 – “Maybe I’ll do the tips just for fun.“
Step 18: At 14:21 – Molly fills in one of the two remaining flower shapes with orbs within the petals using the same Fresh Green used to create the flowers.
Step 19: At 13:50 – With the Lavender pen she fills the orbs with smaller ones but leaving an aura around them so they do not touch the Fresh Green outlines.
Step 20: At 16:43 – On the fifth flower, With the Pale Brown pen she places a spiral in the middle of the center petal and when it fills the center she adds auras on either side until the petal is full.
Step 21: At 17:14 – She leaves the two inner petals blank and adds some dots outside around the top edges of the petals.
Step 22: At 18:20 – Molly adds graphite shading to the one she did with Blue Green Stripes because it will be dry now. She adds white charcoal highlights then restates the lost Pale Brown dots.
Step 23: At 20:47 – On the Fresh Green flower filled with orbs, she adds a little bit of white charcoal highlights.
Step 24: At 20:46 – On her last one with the Printemps spiral she adds graphite shading and a white charcoal highlight across the middle of the whole flower. She restates some of the Printemps with the Pale Brown pen.
Step 25: At 22:17 – Martha takes over again to add shading and highlights to her two flowers beginning with the”zig zaggy” one.
Step 26: At 24:21 – On the last flower, she adds only white charcoal highlights.
Step 27: At 25:19 – They decide to “add a couple more little ones“.
Step 28: At 26:19 – Martha adds “a little Knightsbridge” with the Blue Green pen to one of the new flowers she just created. She embellishes the flower with orbs and an outer aura.
Step 29: At 28:11 – On the last little one she fills in the leaves with Lavender and adds some dots just off the ends of the leaves.
Step 30: At 28:38 – Molly decides to add some Flux to the arrangement, while she’s adding it they discuss other possibilities for the spaces like Pokeroot, Mooka, and Hollis.
Step 31: At 32:22 – She adds a touch of shading to the newest flowers and then “some dot work” around several of the flowers.
The video wraps up as Molly shows another tile “garden” done by Martha earlier.
Day 8
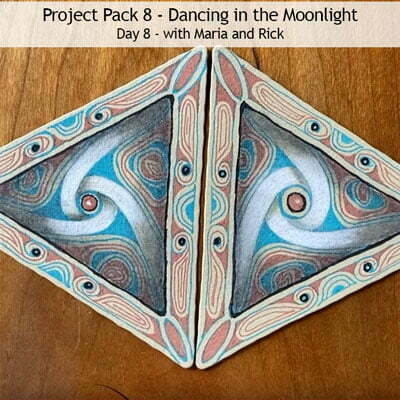
In the last lesson in the Project Pack 8 Series (24:20) – Rick keeps Maria company while she tangles using Well on six Renaissance Tan 3Z tiles.
Step 1: At 00:46 – Maria has chosen the Blue Green and Pale Brown pair of pens and she uses the end of the Blue Green pen as a measure to place a dot with pencil in each corner to create a border.
Step 2: At 01:20 – With the Blue Green Gelly Roll Maria slowly connects the dots.
Step 3: At 01:50 – She puts a circle in the middle “about the size of an eraser head on a pencil“.
Step 4: At 01:56 – Again using the tangle Well, Maria uses the take-off-and-land technique to add strokes coming clockwise off the center circle into the corners.
Step 5: At 02:20 – She adds an aura to the right of each of the three lines.
Step 6: At 03:04 – She adds rounding in the three middle corners.
Step 7: At 04:19 – Next she auras the lines again but not as wide as the first one.
Step 8: At 05:04 – Switching to the Pale Brown pen, Maria adds an aura to the previous line, then adds rounding to the corners and repeats this in the other two sections.
Step 9: At 05:47 – Still using the Pale Brown pen, she auras the sections just created. (“It’s like a form of Diva Dance.”)
Step 10: At 06:11 – With the Blue Green pen she fills the remaining areas by going back and forth with aura, then rounding, and switching to the Pale Brown pen as before.
Step 11: At 06:54 – They point out that normally you would hold these pens more upright (“because they’re a ballpoint“) than the angle we see her using in the video but that’s because if she held the pen correctly her hand would be in the way and we wouldn’t be able to see what she is doing. So a reminder to get to know your pens and to use them in an upright position.
Step 12: At 07:40 – She adds “a little brown in the middle” of the center orb, not touching the original Blue Green orb and leaving an open spot in the middle.
Step 13: At 07:56 – With a black Micron 01, she builds up the original border line: “I just wanted this particular line to be really bold and be different from the other lines in this composition.“
Step 14: At 08:40 – Rick observes that this way of thickening the line gives it a different character like the deckled die cut edges of the tile.
Step 15: At 08:45 – With the Blue Green pen Maria puts rice shapes (“marquise shapes“) at the corners
Step 16: At 09:14 – She auras the space between the two marquise shapes, and repeats around the tile.
Step 17: At 10:27 – She adds a stroke parallel to the edge of the tile, basically aura-ing the edge until she reaches almost half way then she adds an inward spiral to the end of the stroke. She repeats from the other end and then repeats on the other two sides.
Step 18: At 11:21 – With the Pale Brown pen, she adds rounding to the spaces she just created around the edge of the tile.
Step 19: At 12:18 – She adds an inner aura inside each of the brown spaces (“those odd little shaped things“) around the edge of the tile, then auras inside those until she reaches the center.
Step 20: At 13:13 – Still with the Pale Brown pen she fills in the marquise shapes until they touch the Blue Green outline.
Step 21: At 13:55 – With the Blue Green pen, in the curved space around the edges between the spirals she adds auras and fills the last one in (“like a little Crescent Moon“). They have a brief exchange about Rick’s bees (he’s been a beekeeper for years, the honey is delicious!) “It’s been a good winter for the bees, they’re doing really well.“
Step 22: At 14:40 – Maria uses the Blue Green pen to add little touches around the tile.
Step 23: At 14:57 – She adds graphite shading “aggressively” inside the black outline and smooths it with a tortillion.
Step 24: At 16:10 – “The tan tiles are probably our most fragile tiles and you don’t want to press too too hard.“
Step 25: At 16:28 – With the graphite on her tortillion Maria adds shading to the center where the bands appear to go under the other, then adds a touch of graphite to darken the corners.
Step 26: At 17:15 – She adds white charcoal highlights, “the icing on the cake“, and blends it with a tortillion.
Step 27: At 19:07 – With the black Micron 01, she outlines the center circle, then adds small black orbs to the spirals around the border, and touches up the black line.
Step 28: At 20:02 – Maria explains that we have six 3Z tiles and we’re going to do two more exactly like the one just finished. And the other three will be made with Step 4 going in a counterclockwise direction as she demonstrates at 20:44.
Step 29: At 20:21 – Maria repeats the first steps on a fresh tile.
Step 30: At 23:02 – She displays the clockwise and counterclockwise tiles side by side.
Step 31: At 23:29 – She shows all six tiles arranged together.
Step 32: At 23:54 – She shows some experimental tiles where she used different colors with the same technique.
Day 8 – Wrap Up
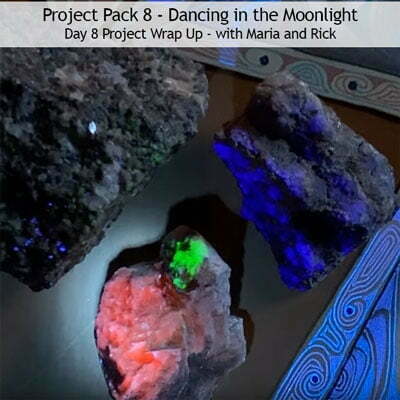
In the final video in the Project Pack 8 Series (4:35) – Rick & Maria demonstrate how the Moonlight Gelly Roll Pens are fluorescent.
Step 1: At 01:35 – Rick uses a UV flashlight to illuminate some rocks a friend had given them and we see how stunningly beautiful their fluorescent colors are.
Step 2: At 02:17 – He moves the rocks aside and uses the flashlight over some of the tiles from the series. “They all just light up” and new and interesting aspects of the tangles and the tiles show up.
And there you have it. This recap of Zentangle’s Project Pack #08 will make it easy for you to find all the related videos and any parts of them you may wish to refer to again.
Remember the images above are linked to their YouTube video, simply click the image to go to the video. Also: each of the complete videos are included on the corresponding tangle’s page on TanglePatterns.
For a complete list of Zentangle’s Project Packs click the PROJECT PACKS link in the pink alphabetic tangle menu bar.
|
.oOo. |
|
Enhance your Zentangle experience while supporting TanglePatterns: |
|
BRAND NEW! TanglePatterns.com TANGLE GUIDE, 2026 Edition |
|
 |
The 15th Edition of the TanglePatterns.com TANGLE GUIDE is an instant-download 123-page interactive digital eBook/PDF containing over 2,300 tangles on the site from May 2010 through December 31, 2025. It's a great resource and a must-have digital tool for using the site. Visit the STORE > E-BOOKS page and help keep TanglePatterns.com going by getting your copy now! |
|
"Linda, Thank you! I was relying on too few and getting stuck after 3 years of daily working with Zentangle. This has inspired me to ‘begin again’ with renewed excitement." ~ Barbara R. |
|
| See the BOOK REVIEWS page for more details on its features and view a sample page. Note: this is a digital product to download immediately when ordering, nothing will be physically mailed to you. | |
| If you're new to Zentangle® and tangling, my TanglePatterns.com BEGINNER'S GUIDE TO ZENTANGLE is just what you need to get started. Also available en Français and en Español. | |
|
|
|
 |
This is the only Zentangle book you'll ever need: the fabulous Zentangle PRIMER Vol 1. It's your CZT-in-a-book by the founders of Zentangle®. For more about the content and to read the rave reviews, visit the BOOK REVIEWS tab. |
| Available in KINDLE format for $9.99. Spanish Edition here. Japanese Edition here. | |
| "Absolutely the best Zentangle Book yet! As an accomplished artist I used to think I did not need instruction on this art form. How wrong I was! My tangling improved by leaps and bounds after reading this book. If you think you have Zentangle down then you need this book more than ever!" ~ Kris H | |
|
|
|
|
.oOo. |
|






Oh WOW, what an amazing amount of work you put into this! Thank you thank you thank you!! The Sakura color chart is handy too, all in all a fantastic resource. 🙂
🙂 Thanks for your thanks Susanne, it was a very busy week indeed!
Thank you so much for posting this Linda! I have been out of town for a short stay at the Mendocino Coast and haven’t been able to keep up with this project pack. Just too many other fun things to do. I’m going back home tomorrow and will be able to work on this there. I’ve done the first 2 and I really love them. Love the Moonlight pens. I just have to get the new colors. 😀 In the meantime I’ll use what I have. Thanks again for all you do!
Thanks Linda for putting all the project packs together and in one spot so it makes it easy for us to find and to tell others about it. It is much appreciated.