 From the Zentangle newsletter introduction for Project Pack #23.
This year, 2024, will mark twenty years since the first official public Zentangle class was given. In honor of this monumental milestone, we thought it appropriate to spend the whole year celebrating. Project Pack 23 will honor those initial strokes that resulted in the birth of Zentangle. We will look closely at that magical moment when Rick and Maria unexpectedly discovered something they knew they had to pursue.
This project will feel important and ornate and illuminated. It will comfort you with its history and challenge you with its grandeur. You will finish this series with art that speaks of the history of the Zentangle Method™ but more importantly, displays and honors your work as the artist and creator.
“This project is cumulative, so we suggest starting from the beginning and completing the videos in order.”
SUPPLIES: This Project Pack is available here ($39.95) in the zentangle.com store and it’s a convenient way to get all the supplies for the project. However, the introductory video reviews the items in the Project Pack and you might discover you have suitable alternatives in your own Zentangle supplies. “If you do not have the project pack materials, we encourage you to follow along with whatever you have available.”
- Bubble wrap pouch containing:
- One Sakura Micron 01 pen, Black
- One Sakura Micron 05 pen, Black
- One Sakura Micron 12 pen, Black
- Three General’s Kimberly Watercolor pencils: 705 Red, 769 Lt Olive, 763 Prussian Blue
- One Sakura Pen-touch 2.0 mm Paint Marker (permanent, opaque), Gold metallic
- One #7 Round Watercolor Brush
- One Zentangle graphite pencil
- One Zentangle General’s white charcoal pencil
- Two tortillions
- One 19.5 x 11.5 inch (about 50 x 29 cm) sheet of watercolor paper with a pre-printed template
The following chronology is a summary of the videos for this Project Pack with links to the individual videos. Either click the Day #’s title link or the image itself to view the full video on YouTube.
CZT Molly Hollibaugh recommends we watch each Project Pack video completely through once before beginning our tiles:
“You’re going to have a little more confidence, you’re going to be a little more aware of what’s happening next. Then you might try something different, you might explore it in a different way”.
QUICK LINKS TO DAILY SUMMARIES
Jump to:
Day 1 – (1) Preparing the template with tea and watercolor washes, (2) adding strings
Day 2 – Martha adds Funls and Frondous
Day 3 – Julie adds Printemps and Keeko
Day 4 – Molly adds Fife and Bunzo
Day 5 – Martha adds Betweed stars and Mooka
Day 6 – Rick adds Aquafleur and Flux
Day 7 – Maria adds fragments
Day 8 – Molly adds Moon Pie and Purk
Day 9 – Molly adds Pokeroot, Rick adds Tipple
Day 10 – (1) Molly prepares a letter and Maria adds Mooka and Well, (2) Molly “adds love”
Wrap Up – Rick and Maria reflect on the project
Introduction
In the introductory video (16:38) – Rick, Maria, and Molly go over the materials and review some inspirations for the theme of this project pack.
Step 1: At 01:31 – After unwrapping the Project Pack template, Molly shows a flattened version and recommends to achieve the same with ours, to gently spread it open and then gently to roll it in the other direction. Then let it settle “and it will get flattened“. [Linda’s note: after unrolling mine I placed it face down under some heavy books for a day or two and that worked great to make it stay flat.]
Step 2: At 01:51 – Next she opens the bubble pack pouch and reviews the tools it contains.
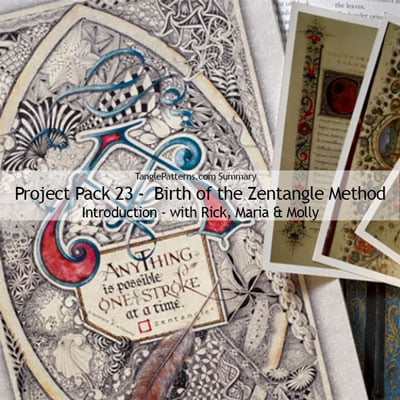
Step 3: At 03:41 – Molly displays a piece of illuminated letter artwork by Maria that was the inspiration for this project. Rick gives a bit of Zentangle history.
Step 4: At 04:29 – Molly explains this project is “a fun way to memorialize the moment and also play around with that idea of inspiration“.
Step 5: At 04:55 – She displays several books from Maria’s personal library about illuminated letters starting with The Book of Kells. Next is Illuminated Letters by Aidan Meehan, Henry Shaw’s Alphabets and Numbers of the Middle Ages, and The Decorated Letter by Jonathan James Graham Alexander.
Step 6: At 06:47 – These books also served as inspiration and they note that colors red, blue and green we’re using in this project are frequently used together in the inspiration illustrations and go well with the gold embellishments.
Step 7: At 07:09 – The template is also inspired by many of the inspiration illustrations.
Step 8: At 07:52 – Molly displays several color photographs of illuminated letters and illustrations that Maria had taken in her travels. She also shows sample illustrated letters from Codices Illustres – The World’s Most Famous Illuminated Manuscripts by Ingo F. Walther, Norbert Wolf.
Step 9: At 10:14 – Rick notes that during this project we’ll see what they did with the inspiration and this template.
Step 10: At 10:30 – “We have 10 days of lessons that will be every other day so you’ll have time to absorb things and do them at your own pace … you can actually take months and months and months to do this … enjoy it, take your time.“
Step 11: At 12:40 – Rick explains we’ll also see Maria back tangling (see Day 7)! (Note: Maria injured her hand last year and she hasn’t been seen tangling in the last few project packs as she recovered.) They have a conversation about adapting to challenges while remaining creative.
Step 12: At 14:50 – Molly explains this project is also based on a Zentangle Master Class from 14 years ago when there was a an Illuminated Tangle Letter. They invite anyone who attended that class to email them a photo of their project.
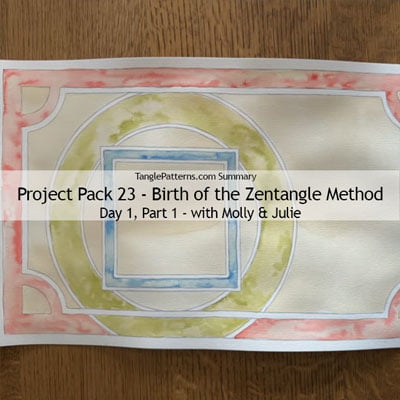
Day 1, Part 1
(21:35) – In part 1 of the first day’s tutorial, Molly and Julie guide us through adding watercolor to our templates. Molly emphasizes we should watch this entire video through before we start on our surface, they also show some other variations at the end of the video we might want to consider instead. They point out we do not need to do our template exactly as they have, we might even choose not to add color until later in the project, if at all.
Step 1: At 00:20 – Julie and Molly introduce themselves and Molly explains we’re preparing our surface today. She has “a little vessel of water and I also have a vessel of tea (which we’ll talk about in a minute)“, and a couple of pieces of heavier weight scrap paper (copier paper isn’t thick enough).
Step 2: At 01:15 – Molly emphasizes we should watch the entire video through before we start on our surface, let the tutorial sink in and decide what we want to do.
Step 3: At 01:31 – Julie explains that Molly is adding a light layer of tea to the background. They recommend using one teabag steeped in a small amount of water. Molly uses the paintbrush to add a light tint of tea to the large bottom section of the template.
Step 4: At 02:21 – Julie notes that we can use color if we want, we don’t have to use tea.
Step 5: At 02:43 – Molly notes that because we’ll be filling it with tangles, we don’t want to make it too dark.
Step 6: At 03:33 – She turns the template and adds tea to the large top section.
Step 7: At 04:11 – She then adds tea in the four large arc sections as well as the square in their center.
Step 8: At 05:36 – She also adds tea to the corner triangular sections.
Step 9: At 05:57 – “One of the reasons we’ve invited you to watch this first and wait till the end is that we show a whole bunch of variations at the end of this video.” Molly uses her brush to pick up an excess puddles, Julie suggests using paper towel. If left to dry as a puddle, it will produce “like a water stain”.
Step 10: At 06:31 – Molly puts it aside to dry for a minute and prepares our color.
Step 11: At 06:40 – Similar to the way we create graphite “puddles” to use with our tortillion, with the watercolor pencils Molly creates individual color palettes by scribbling a heavy patch of each color on separate pieces of scrap card.
Step 12: At 07:52 – Molly says we might want to wait until our template is completely dry but hers is still a little damp as she proceeds. Continuing to use the tea water to “add some kind of antiquing to my colors“, she puts down some tea water to dampen the surface in the large circular band. Then she dips her brush in the tea water and picks up a small amount of the green watercolor and drops it into the damp tea surface. She continues to work her way around that section with the tea water and green watercolor.
Step 13: At 10:15 – Molly reminds us not the make the color too dark because we will be tangling in these spaces later in the project.
Step 14: At 11:02 – She gives some tips about the kind of pace to work at so the water doesn’t dry and re-wetting as necessary.
Step 15: At 12:08 – Moving on from the green, she changes to working with the red using the same process of dampening the outer frame area with tea water then dropping in the watercolor and gently moving it with the brush.
Step 16: At 14:29 – If you’ve never done this technique or used watercolor pencils before, Molly suggests we might want to experiment first on a small tile before taking on the template.
Step 17: At 15:16 – Julie shares that she used tiles for her color palettes then saved them to tangle on later. “I use two colors on the same so they began to bleed together.“
Step 18: At 16:20 – She changes to the blue watercolor palette and because it’s intense, we don’t need very much color because “it can become dark fast“. She adds a light wash.
Step 19: At 18:21 – After noting that we can add color later, she recommends we take care of our brush and make sure to wash it in clean water then smooth the bristles to a point while it’s wet so the point will be good for later.
Step 20: At 19:07 – Molly shows the completed, dried template.
Step 21: At 19:16 – We are shown a couple more examples then a couple of Julie’s done with coffee instead of tea. The first is in a red palette and the second a lovely mix of the blue and green done with just clean water (no tea or coffee). The last one is Martha’s and she used a floral tea instead of black tea.
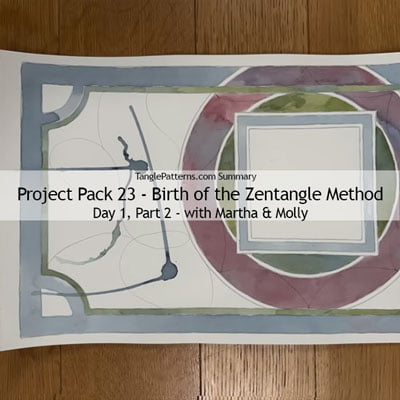
Day 1, Part 2
(09:02) – In part 2 of the first day’s tutorial, Martha and Molly show us how to break up the larger sections with a graphite string including some options and examples.
Step 1: At 00:20 – Molly reviews a variety of strings on square white tiles, “the magic underneath our artwork“.
Step 2: At 02:05 – Molly notes that different strings will be shown throughout the video “that you might understand there’s options” as she proceeds to add strokes “very gesturally” to break up the large space at the bottom.
Step 3: At 02:45 – She turns the template to add strokes in the top space to break it up into smaller sections.
Step 4: At 03:10 – Martha adds a string on a fresh blank “unwatercolored” template and they emphasize we can add more strings later or even ignore the ones we’ve added.
Step 5: At 04:08 – Molly goes back to her template to add string sections to the ring, “and this time we’re going to be a little more methodical about it“, as she adds tick marks to divide the space first into quarters then into eighths like a clock or a compass. She then adds a curved “swoop” stroke connecting adjacent tick marks, creating a scalloped line around the ring.
Step 6: At 06:02 – Martha uses the same concept on her white template but connects the ticks with straight lines creating a zigzag string around the ring. “Don’t use rulers, don’t use compasses, just eyeball it .. we want that softness, that organic feel to it.“
Step 7: At 07:37 – They display several “strung” templates showing a variety of options, including Martha’s colored one where she explains, “I had a spill, so I embraced the spill“.
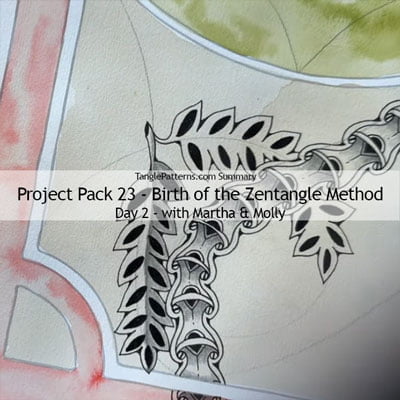
Day 2
In Day 2’s video (45:49) – With Molly keeping her company, Martha adds the first tangles on our template. First she adds CZT Margaret Bremner’s Funls from 2012 (see note in Step 1) and Frondous.
Step 1: At 04:08 – After an introduction and some preliminaries, Martha selects the black 05 Micron and explains she’s “going to take a grid tangle and turn it into a vining tangle” a she selects one of the longer string lines in the bottom section of the template to add “a column of pegs” to begin what she refers to in this video as “Puppy Huggins” – which has been around since 2012 as Canadian CZT Margaret Bremner’s Funls.
Step 2: At 07:35 – She adds “the mates that go with these orbs“.
Step 3: At 09:15 – She continues adding pairs of orbs that travel outside of the section to the template edge.
Step 4: At 09:29 – She adds reverse S strokes linking the orbs with the take-off-and-land technique, and continues the same stroke in the same direction all the way down the line of orbs.
Step 5: At 12:53 – She shows us how to make the stroke so it appears to go under the border. She then adds the S strokes connecting the adjacent line of orbs.
Step 6: At 14:51 – She joins the pairs of orbs with a reverse C shape stroke, again using the take-off-and-land technique.
Step 7: At 17:13 – She adds an aura to the top of each one. Then she adds a small Crescent Moon shape with an aura sitting on each one with a matching triangle and aura on the other side of each.
Step 8: At 21:44 – She adds an aura around “the whole thing“.
Step 9: At 23:20 – She adds detail to the orbs, noting we can just add a bit of ink to the center of each.
Step 10: At 23:49 – Molly notes that because we’re working on a much larger format than we’re accustomed to, we want to avoid the tendency to work small in the larger space, to make our tangles BIG “and then you can always work smaller within the tangle“.
Step 11: At 24:56 – Martha changes to the Micron 01 to add rounding along the auras just added and then another decorative detail inside the tangle.
Step 12: At 27:36 – She uses the graphite pencil to add shading and smooths it with the tortillion.
Step 13: At 30:04 – With the exception of the outer circular area and the square space in the middle of the template which we should leave blank for later developments, “We want you to choose another place on your composition,” and add the same tangle in it. Martha shows her template with this already completed in an area at the top of it.
Step 14: At 31:09 – Next she’s going to add the tangle Frondous and shows us the areas where she’ll be working at the bottom of the template adjacent to Funls.
Step 15: At 32:25 – With the Black 05, Martha adds a seed/rice shape about the width of her fingernail, then fills it with ink noting if we want to we can sculpt the shape as we add ink.
Step 16: At 33:11 – She adds rice shapes pointing in opposite direction along the string line, much like leaves on a stem.
Step 17: At 34:27 – She adds an aura the shape of all the Frondous rice shapes and then goes back to fill them in and sculpt their shapes using the Black Micron 12 pen.
Step 18: At 37:20 – She repeats this process, adding Frondous to an adjacent string section and connecting their “stems” at the bottom.
Step 19: At 40:04 – Using the Black 01, Martha explains “I’m going to add just a little bit of extra ink in there to help get that solidified on the paper” as she adds rounding to the Frondous edges.
Step 20: At 40:47 – She adds graphite shading to the right side of both Frondous fronds, noting it’s helpful to use a scrap piece of paper to rest your hand on as we go through this to prevent smudging the graphite.
Step 21: At 44:39 – “So we’re going to stay away from the big circle and we’re going to say away from the square, but perhaps just in a clever little spot here or there that you think would add balance to what’s here so far“, you might want to add a second bit of Frondous (as we did with Funls) in another location. She shows us a completed Frondous she’s already placed in one of the small spaces on the template.
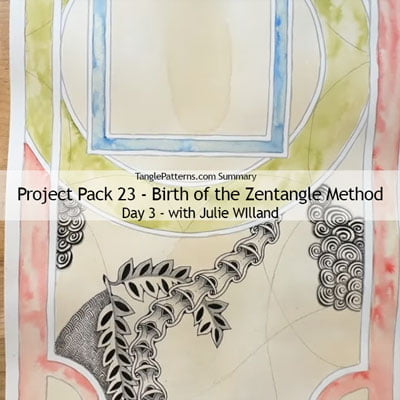
Day 3
In Day 3’s video (20:23) – Julie Willand adds Printemps and Keeko on the template we’ve been watching Molly and Martha working on in the previous two days.
Step 1: At 02:20 – After an introduction and a reminder this is a cumulative project to be followed sequentially, Julie explains she will begin by adding Printemps to the template we’ve been working with so far.
Step 2: At 3:10 – Using her 01 and reminding us we’re staying clear of the square center and the circular band, Julie selects a section and adds a weighted Printemps to fill it.
Step 3: At 05:24 – She changes to the 05 Micron and continues to add larger Printemps to the cluster she’s already done with the 01.
Step 4: At 06:31 – She switches from the 05 to the 12 and continues adding larger weighted Printemps.
Step 5: At 08:31 – Julie changes to another section and, as Martha did in Day 2, adds a second weighted Printemps area on the template.
Step 6: At 09:00 – The next tangle Julie adds is Keeko, and with the 05 Micron she uses it to fill a space beside Martha’s tangles.
Step 7: At 15:26 – She moves to another space on the template and adds a second area of Keeko.
Step 8: At 15:47 – She adds shading to her Printemps and Keeko, again reminding us to use a scrap piece of paper under our hand to prevent smudging of the graphite.
Step 9: At 19:39 – She adds White Charcoal highlights to her tangles.
Day 4
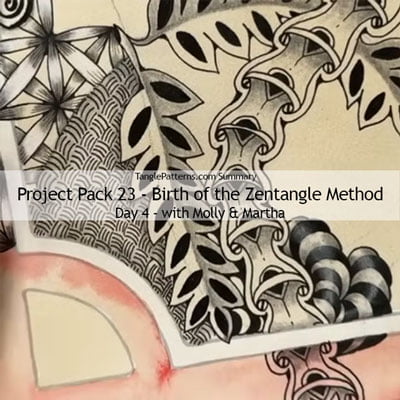
In Day 4’s video (28:51) – With Martha keeping her company, Molly adds Fife and Bunzo to our template.
Step 1: At 03:33 – After their introductions, Molly uses the 05 and says she’ll be adding Fife on the template, attaching itself to a little bit of the border.
Step 2: At 04:52 – She places pairs of evenly spaced dots in the border area, in this case creating 8 square spaces between them.
Step 3: At 05:50 – She begins to add the Fife rice shapes to connect the dots horizontally across the border from each other.
Step 4: At 06:36 – After turning the template she connects the first rice shapes vertically with another rice shape and towards the bottom she plays with the idea that the rice shape is going behind the string line.
Step 5: At 08:03 – She turns the template again and adds Fife‘s diagonal rice shapes in each space, alternating the diagonal in each space.
Step 6: At 09:07 – She adds Fife‘s final diagonal rice shapes going behind the first ones.
Step 7: At 10:02 – She adds more Fife within the template as if it is emerging from the first section she’s done, first adding the dots and then repeating the strokes as above.
Step 8: At 12:38 – She “finishes” the Printemps spirals that looked like they were going behind to make them come forward into the white space.
Step 9: At 13:29 – She adds to the first piece of Fife by making it look as if it’s going under the Printemps and then extends her first piece upwards.
Step 10: At 15:00 – With the Micron 01, Molly adds rounding to the Fife, “just a drip of ink“.
Step 11: At 15:59 – She adds “one more detail to my Fife“, enthatching.
Step 12: At 17:40 – She adds shading with the graphite pencil, including what my Mom called “the over-unders“, then softens it with a tortillion.
Step 13: At 20:23 – She adds highlights with the White Charcoal Pencil.
Step 14: At 20:24 – She adds “a tiny bit more” Fife on the other side of the template where the other Printemps and Keeko are.
Step 15: At 21:27 – Molly reminds us we will need a scrap of paper underneath our hand to protect the work already there.
Step 16: At 22:03 – Using the Micron 05, next Molly adds Bunzo to the template. She says the Micron 12 was included for filling in tangles so we might want to use it to fill in Bunzo and at 24:10 she switches to the 12 to fill in hers.
Step 17: At 25:00 – She adds another spot of Bunzo in another space on the template.
Step 18: At 25:35 – She adds graphite shading to both pieces of Bunzo, noting it’s the kind of tangle that will fit in anywhere so she anticipates adding more later as the template develops.
Step 19: At 26:40 – With the scrap paper under her hand, Molly adds White Charcoal pencil highlights over Bunzo.
Day 5
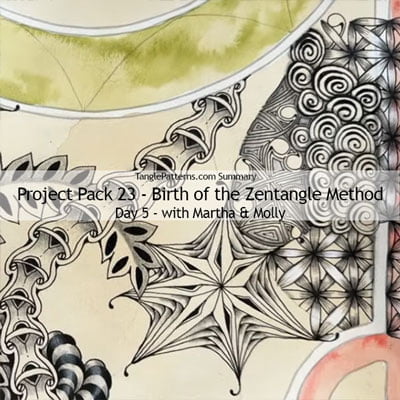
In Day 5’s video (25:54) – Molly keeps Martha company as she adds Betweed stars and Mooka to the template.
Step 1: At 02:31 – After introductions and a reminder this project is cumulative and is best watched from the beginning, Martha selects the 05 Micron to begin adding a Betweed star.
Step 2: At 04:03 – She chooses an open space where two string lines cross to begin adding this “blossoming tangle” which radiates out from the center and restates part of the intersecting string lines to create a cross.
Step 3: At 05:23 – Molly notes that while it’s convenient if you have a place where two strings cross, it isn’t necessary for this tangle.
Step 4: At 05:39 – She adds strokes in the middle between the first set of strokes, intersecting them all at a point in the middle.
Step 5: At 06:26 – “To build the star, we’re going to add a point in each of these triangular spaces.”
Step 6: At 7:14 – She connects the center with each of the dots, then adds a stroke to connect it to the two tips between each of the star spokes.
Step 7: At 08:29 – “Before we get to the ‘Betweed-ing’ part, I’m going to add just a little element to the long star points,” she adds a “half diamond” shape on one side of each of the base star strokes and fills them in.
Step 8: At 09:30 – She adds the Betweed lines in each of the triangular spaces around the center.
Step 9: At 12:15 – Molly reminds us we might need a piece of scrap paper under our hands to protect the work we’ve already done.
Step 10: At 12:25 – Martha switches to the Micron 01 to go back and add a little rounding.
Step 11: At 13:13 – She adds an aura around the half diamond shapes she added earlier.
Step 12: At 13:52 – Changing to the 05, Martha adds a tiny Fescu frond coming off the star points.
Step 13: At 14:41 – She adds graphite shading to the Betweed
Step 14: At 16:26 – Martha chooses another location to add another Betweed star.
Step 15: At 18:52 – She adds Mooka, using here Micron 05 she “adds Mooka strands in a Hollibaugh way“.
Step 16: At 21:20 – To add “a little flair” to the Mooka Martha fills the spaces between them with auras, similar to the spacing of the Mooka stems.
Step 17: At 22:47 – Changing to the 01, Martha adds rounding on the Mooka.
Step 18: At 23:14 – She adds shading around the edges of the section and softens it with a tortillion.
Step 19: At 24:30 – With the White Charcoal Pencil, she adds highlighting.
Step 20: At 24:53 – Martha chooses another spot to add more Mooka in the same way she did her first piece.
Day 6
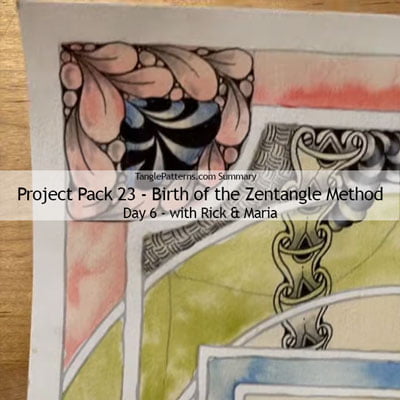
In Day 6’s video (16:09) – With Maria keeping him company, Rick tangles Aquafleur and Flux in the four corners of the template.
Step 1: At 00:44 – After their introductions, Rick selects the 05 Micron to add Aquafleur on the bottom left corner of the template.
Step 2: At 04:09 – He adds a little Fescu frond in the corner.
Step 3: At 04:30 – He moves to the right corner and says he’s going to use the same approach in each corner.
Step 4: At 06:26 – He moves to the top corners and repeats adding Aquafleur.
Step 5: At 07:12 – He says he wants to “take over that whole corner area“, lightly adding another pencil string to define the corner areas, and then adds Flux to fill the space.
Step 6: At 09:44 – In the “available space“, he adds orbs starting with adding a big orb in the largest space and building from there with smaller orbs.
Step 7: At 11:29 – He inks in the interstices around the orbs and adds rounding where he can fit it in.
Step 8: At 12:36 – He adds graphite shading on the Flux and orbs, pushing them into the background.
Step 9: At 14:00 – After looking at his composition he decides to add color shading to the Aquafleur with the Blue Watercolor Pencil and softens it with a tortillion.
Day 7
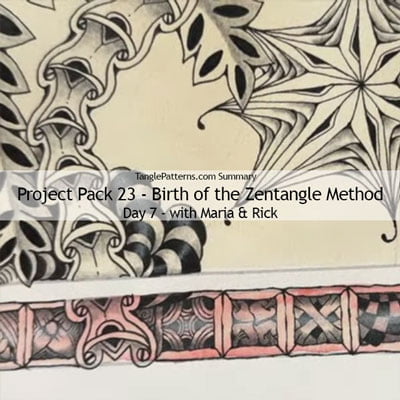
In Day 7’s video (20:19) – With Rick keeping her company, Maria tangles a mix of fragments from the Zentangle PRIMER Vol 1 around the outside band of the template. She also adds PokeLeaf, Knightsbridge, Noom, and Mooka. It is so delightful to see Maria tangling again. This is the first time we’ve seen Maria on video since her arm injury and nerve damage from a fall many months ago and she explains she still doesn’t have enough strength in her thumb and forefinger to hold the pen the usual way. But with dogged determination and persistence she has tried a variety of ways to accomplish tangling again and we see her innovative grip in this video. Maria’s attitude and spirit are an inspiration and lesson for all who struggle with challenges.
Step 1: At 00:23 – After introductions, Maria says, “the girls asked me to do the borders” and she decided it would be fun to “use all different kinds of fragments“. Instead of the fragments being used in a reticula, Maria’s going to add them as a frame (or ribbon!) around the outside band on the template.
Step 2: At 00:41 – Using the 05 Micron, Maria starts out by making vertical strokes about the same width (~ 3/4″) apart as the length of the strokes to divide the band into a series of squares, or as she calls them “little tiles“.
Step 3: At 01:09 – “So whenever I’m doing something like this like the tangle hanging down in the middle, I start from the left and start from the right and meet in the middle“. This way you don’t end up with a, awkward partial square at one end.
Step 4: At 01:42 – She turns the template to add the connecting strokes and encourages us to add them one square at a time “so each line is alive“, instead of one long connecting stroke across the entire section. She wants them to look like little tiles that have been cemented down. She also makes the corners “not quite straight” so they look even more like individual tiles.
Step 5: At 02:43 – She adds a small aura around the inside edge and then adds coffering, adding a stroke connecting the aura at each corner. So each square “has a little frame around it.”
Step 6: At 03:45 – “These tiles are going to go together as a collection because they have a common thing to tie them together.”
Step 7: At 03:50 – Maria changes to the 01 Micron which she has adapted for her grip by wrapping with self-adhesive bandage. “These aren’t necessarily tangles that are going in there but they’re little kind of cool designs on each one.” Rick notes we can find “a whole collection” and these are some of them.
Step 8: At 06:30 – As she continues to add a different fragment in each “tile” Maria talks about the thought process and gives us tips.
Step 9: At 07:18 – She adds Pokeleaf to one of the tiles.
Step 10: At 09:15 – She adds Knightsbridge to another.
Step 11: At 10:20 – She adds Noom (aka Noom Repus), “super moon spelled backwards“.
Step 12: At 11:32 – Having finished one segment in the band, Maria says she’s going to go all the way around using those same fragments and a couple of different ones. She changes to the 05 and repeats all of the previous steps in the remaining bands, starting by creating the small coffered “tiles” in each one.
Step 13: At 16:49 – She adds Mooka in one of the tiles.
Step 14: At 17:34 – Maria notes that because “it’s still a little difficult for me to hold the small pencil,” Molly comes in to add shading and highlights to Maria’s additions with Rick and Maria providing commentary. Molly starts by adding shading on the top and bottom edges of the coffering in each tile.
Step 15: At 19:07 – Molly uses the White Charcoal Pencil to add highlights.
Step 16: At 19:34 – Molly turns the template so we can see the overall effect of Maria’s tangling and Molly’s enhancements.
Day 8
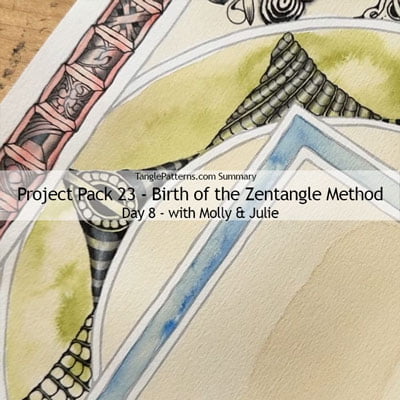
In Day 8’s video (14:39) – With Julie keeping her company, Molly adds Moon Pie and Purk to the large outer ring on the template.
Step 1: At 00:47 – After Julie and Molly introductions, Molly says we’re going to be working the large outer ring. With the 05 Micron she divides one of the curved sections with parallel lines in the middle then adds a Moon Pie-like aura-ed Crescent Moon on each side and then adds orbs along the aura.
Step 2: At 03:31 – She then fills the space with more, wider auras then inks alternating spaces in, like Striping. She points out the stripes do not need to be the same number on each side.
Step 3: At 06:01 – Skipping the adjacent curved section, Molly moves to the next “point” along and repeats her first steps, repeating it around the band so there are four spaces the same.
Step 4: At 07:09 – She adds the tangle Purk in the four blank spaces between the areas she just finished, completing the 8-point scalloped area.
Step 5: At 10:07 – She adds shading with the graphite pencil and highlights with the White Charcoal pencil.
Day 9
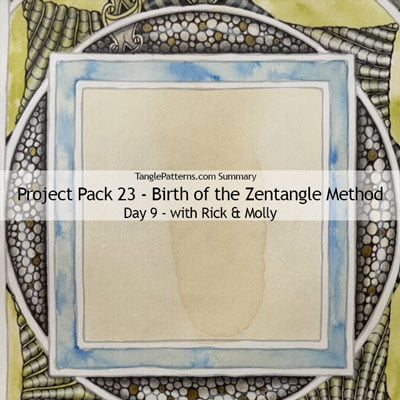
In Day 9’s video (23:58) – Molly adds Pokeroot and small pieces of tangles we’ve added previously (Printemps, Bunzo, Keeko) to fill in some of the remaining spaces on the template. Then Rick fills in the four curved sections around the center frame using Tipple and the Sakura Gold Pen-touch paint marker.
Step 1: At 01:17 – Molly begins with the 05 Micron and adds Pokeroot in one of the remaining spaces, reminding us with the larger format to draw it bigger than we’re accustomed to. She fills the spaces between the Pokeroot with solid ink and with parallel strokes.
Step 2: At 06:22 – Molly adds some Printemps, “revisiting some of the other tangles we already have here on the composition“.
Step 3: At 07:06 – She adds a bit more Keeko in another space.
Step 4: At 08:07 – She adds Pokeroot to another small space on the template and a little more Bunzo.
Step 5: At 08:31 – She adds some “very aggressive” graphite shading in her Pokeroot sections to push it into the background, noting this won’t be to everyone’s taste.
Step 6: At 12:22 – Rick takes over, “to add a little bit of accent or texture around that center frame“. He shows the tools he’s going to be using, including the Gold Pen-touch paint marker saying, “I encourage you to read the writing on the back” of the marker to understand how it works. He uses a scrap piece of paper under his hand to prevent smudging the shading already in place.
Step 7: At 13:40 – Rick reads the directions on the Gold Sakura Pen-touch paint marker and demonstrates how to get it started, being sure to shake the marker WITH THE CAP ON. Once he gets it primed, he practices making a few marks on a tile to get rid of the excess paint and tests it to make the small orbs he intends to use it to add. Molly says “definitely do that on another piece of paper and really get comfortable with the pen” before working on the template.
Step 8: At 15:06 – He adds a few metallic gold paint dots, “not many“, of various sizes within a section using the Gold Pen-touch marker and then carefully caps it well.
Step 9: At 15:42 – After letting the gold paint dry “a good 5 or 10 minutes“, using the Micron 05 he outlines each of the gold dots with a stroke.
Step 10: At 16:17 – He adds a border “right up against the string“.
Step 11: At 16:47 – He adds varying sizes of Tipple orbs to fill the space around the gold paint dots. He then changes to the 01 to fill in the spaces between the orbs.
Step 12: At 19:35 – He adds heavy graphite shading around the straight side of the section and lighter graphite around the curve. He softens it with the tortillion.
Step 13: At 20:59 – He adds White Charcoal highlights in the middle, being careful not to go over the gold metallic paint.
Step 14: At 21:22 -He repeats this in the three remaining curved sections around the edge of the inner frame.
Day 10, Part 1
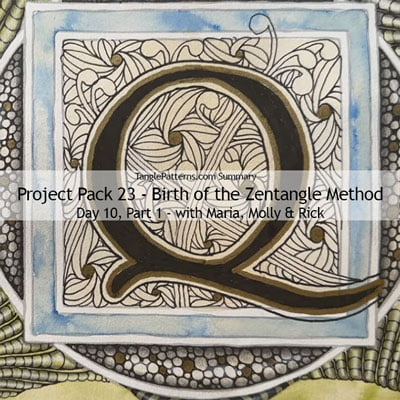
(15:10) – In part 1 of the day’s tutorial, Molly prepares a letter for the template and Maria adds Mooka and Well.
Step 1: At 00:54 – After their introductions and a “Cliffs Notes” version of their discovery of the Zentangle Method, Molly shows us “the Illuminated Letters for tracing” as Rick explains that she’s going to show us how to work with them. (Note: go to the video and click the “see more” link in the Description Box below the video for a link to download the free alphabet letter templates.)
Step 2: At 01:18 – Maria says, “Molly’s going to use the Q, I figured not many people use Q and it’s a shout out to an old friend. She’s going to tape the Q to the back, put it up in the light and see where it centers.” Molly has roughly cut around the letter and used washi tape to adhere it to the back of the template.
Step 3: At 01:50 – Molly is shown holding the template up against a window (with a snow storm going on outside) so she can see the letter through the template and she traces the letter onto the template. A light table can also be used if you have one.
Step 4: At 02:21 – Back at Maria’s desk, she reviews the tools we’ll be using: the 12, the 05, the gold marker, the graphite and white charcoal pencils and tortillions.
Step 5: At 02:45 – Maria says, “I decided I wanted the letter to really pop out, so we’re going to do the letter in black.” She outlines the letter using the Micron 12. They note we don’t have to use a letter, we might want to choose a punctuation mark of some type or even a letter or symbol from another language.
Step 6: At 04:01 – With an extra piece of paper under her hand, Maria colors in the letter with black ink, Rick notes that this much dense ink takes a little bit longer to dry.
Step 7: At 05:08 – “And then we’re going to work with the gold paint pen,” and they suggest we get used to how it works first as Maria cleans the marker off on another scrap piece of paper.
Step 8: At 05:34 – Maria outlines the black letter with the gold marker, noting “this is really wet ink, you are NOT going to want to put your hand over this” and Rick suggests letting it dry between steps.
Step 9: At 06:34 – Then she adds a black aura around the letter with the Micron 12.
Step 10: At 07:45 – With the Micron 05, Maria add Mooka to the background. She adds a few Mooka fronds “which are going to act as a string for the next tangle“.
Step 11: At 08:54 – Maria suggests we might want “watch this whole Mooka section so that you can see what I’m trying to accomplish here“, then go back and do ours later.
Step 12: At 09:40 – The Mooka stems Maria has added have divided the space into several sections. Maria adds a large orb in the center of each section so she can add the tangle Well.
Step 13: At 10:05 – Working with the number 9 shape, “we’re going to go all around in each section, spinning off the center hub there“, noting the importance of turning the piece while doing this.
Step 14: At 10:45 – “After all those are in there, we’re going to tether auras around those number 9 strokes, making a sort of petal shape.“
Step 15: At 11:32 – Once all of those are done, she repeats this adding a couple more auras on each side until all the spaces are filled up.
Step 16: At 14:20 – Maria uses the gold marker to fill in the orbs, “take your time and don’t press too hard because it’ll blob if you press hard” and being careful of the wet ink.
Day 10, Part 2
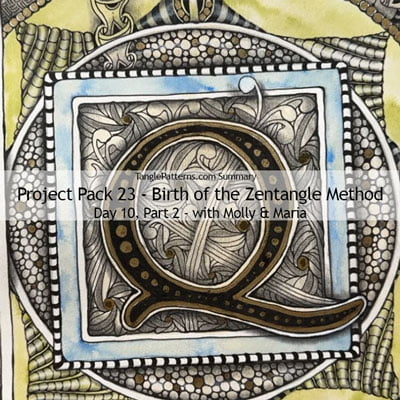
In Day 11’s video (21:16) – Molly and Maria (her Mom) add final details and last bits of love to the template.
Step 1: At 00:33 – On this final day of the Project Pack series, Molly and Maria explain that today “is designed to show you to go back in and add what we call love to our Zentangle artwork. A little bit of shading, a little tweaking …“
Step 2: At 00:47 – Using the Micron 05, Molly adds an outline around the lettered area Maria tangled in Day 9, noting that she adds the outline by going with and around the tangles that are there, not just in a straight line. As Maria says, this gives it “an interesting, energized border“.
Step 3: At 02:10 – Molly adds “just a little ink here, a little weighting there” around the border she’s just added.
Step 4: At 02:54 – She turns the piece and adds ink, “trying to figure out where do I need a little more emphasis here, can I clean up my strokes“. She adds an outline around the letter Q’s gold aura.
Step 5: At 04:18 – Molly adds a black outline around the inside and outside of the blue border framing the center area and around the area framing the blue border.
Step 6: At 05:57 – She adds striping around the white outer band adjacent to the blue frame.
Step 7: At 06:28 – She outlines the thin inner white ring.
Step 8: At 07:43 – She adds orbs in the thin outer white ring.
Step 9: At 08:30 – She outlines the remaining white border,
Step 10: At 09:16 – Molly notes that these last steps of adding love can take quite a bit of time, and encourages us to take our time with it.
Step 11: At 11:17 – She works on the outside edge, adding ink and weighting as needed.
Step 12: At 11:55 – Molly changes to the graphite pencil and adds shading to the composition, beginning with the tangling Maria did around the letter Q. She colors in the “leaves” on each of the Well sections.
Step 13: At 13:58 – She adds shading around the Mooka fronds.
Step 14: At 14:26 – She adds shading around the inside and outside of the letter Q and the square framing it.
Step 15: At 17:33 – She adds highlights with the White Charcoal pencil, also using it to bring back the white areas that have become smudged with graphite.
Step 16: At 18:17 – She changes to the Gold Pen-touch Marker as Maria reminds us to test it on a scrap piece of paper to get the ink flowing, Molly adds graduating orbs over the black ink inside the Q. They emphasize to let it dry because it will take quite a while to dry over the black ink.
Step 17: At 18:57 – She adds another dot of gold ink in the middle of the gold orbs in the Well sections.
Step 18: At 19:22 – She adds gold ink inside the orbs she had added earlier in one of the outer white bands.
Step 19: At 19:37 – She adds a little bit of shading where the borders overlap.
Step 20: At 20:15 – She adds a tucker enhancement where the Frondous stem went under one of the bands.
Step 21: At 20:29 – She adds more White Charcoal highlights here and there.
Wrap Up
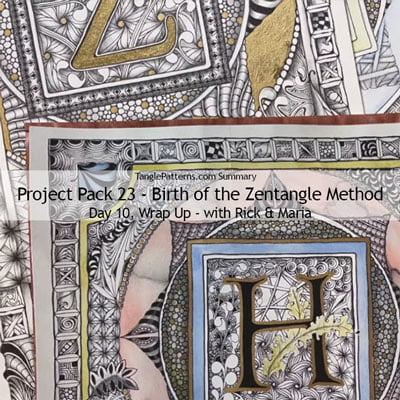
In the final video in the Project Pack 23 Series (09:57) – Rick and Maria “reflect on this beautiful project”. showing the inspiration for it and some of the completed ones done by Zentangle HQ folks.
Step 1: At 00:00 – Rick and Maria introduce themselves and begin by showing Maria’s prototype for an illuminated letter Master Class project done in Rhode Island in August 2020.
Step 2: At 01:47 – She shows a piece from that class belonging to Jean M., a Zentangle staffer.
Step 3: At 02:18 – They show another from CZT Diane Lachance.
Step 4: At 03:01 – The last one shown from the 2010 class is Molly’s.
Step 5: At 04:13 – Rick says, “We took that class as our inspiration in this 20-year celebration of the founding of Zentangle to come up with something that would be a revisiting of that.”
Step 6: At 04:28 – The first of their current examples from this project is by Martha who chose to do hers in a landscape orientation.
Step 7: At 05:31 – Next up is Molly’s, done in the portrait orientation we’ve used throughout the project.
Step 8: At 07:02 – Next we see Julie’s lovely version.
Step 9: At 08:12 – Lastly they show the one we’ve been watching develop throughout the course of the project.
This recap of Zentangle’s Project Pack #23 will make it easy for you to find all the related videos and any parts of them you may wish to refer to again.
Remember the images above are linked to their YouTube video, simply click the image to go to the video. Or, you can view the complete video on the corresponding tangle’s page on TanglePatterns, they make a fascinating “historical” record of Zentangle videos on each tangle.
For a complete list of Zentangle’s Project Packs click the PROJECT PACKS link in the pink alphabetic tangle menu bar.
|
.oOo. |
|
Enhance your Zentangle experience while supporting TanglePatterns: |
|
BRAND NEW! TanglePatterns.com TANGLE GUIDE, 2026 Edition |
|
 |
The 15th Edition of the TanglePatterns.com TANGLE GUIDE is an instant-download 123-page interactive digital eBook/PDF containing over 2,300 tangles on the site from May 2010 through December 31, 2025. It's a great resource and a must-have digital tool for using the site. Visit the STORE > E-BOOKS page and help keep TanglePatterns.com going by getting your copy now! |
|
"Linda, Thank you! I was relying on too few and getting stuck after 3 years of daily working with Zentangle. This has inspired me to ‘begin again’ with renewed excitement." ~ Barbara R. |
|
| See the BOOK REVIEWS page for more details on its features and view a sample page. Note: this is a digital product to download immediately when ordering, nothing will be physically mailed to you. | |
| If you're new to Zentangle® and tangling, my TanglePatterns.com BEGINNER'S GUIDE TO ZENTANGLE is just what you need to get started. Also available en Français and en Español. | |
|
|
|
 |
This is the only Zentangle book you'll ever need: the fabulous Zentangle PRIMER Vol 1. It's your CZT-in-a-book by the founders of Zentangle®. For more about the content and to read the rave reviews, visit the BOOK REVIEWS tab. |
| Available in KINDLE format for $9.99. Spanish Edition here. Japanese Edition here. | |
| "Absolutely the best Zentangle Book yet! As an accomplished artist I used to think I did not need instruction on this art form. How wrong I was! My tangling improved by leaps and bounds after reading this book. If you think you have Zentangle down then you need this book more than ever!" ~ Kris H | |
|
|
|
|
.oOo. |
|






Once again, thank you so much for all the time and energy that you put into these detailed Project Pack summaries! From the timing and notes on what is said and shown, links to the tangle step outs, and to the clickable links to books that are referred to in the videos, it’s all here – and that’s a lot of work! I love having all the videos listed in one handy place <3
Many thanks, Jenn 🙂 Each summary is a whole bunch of hours to invest so I’m pleased to know these are of value. It’s great encouragement to keep it up 🙂 Thanks again.