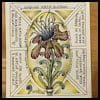
 In a previous Zentangle Project Pack (Project Pack #19), we studied the concept of Zentomology, the system of categorizing the various characteristics of tangles and their relationships with other tangles within the study and practice of the Zentangle Method.
In this very playful approach, we learned about and explored tangle genuses, which are categories of tangles with common characteristics.
This series will shed light on the tangle genus of organic tangles, specifically ones of a botanical nature. As tanglers, we will come together and plant some seeds. We will nurture them and watch them grow. And, in true Zentangle tradition, we will share these ideas and techniques with you in fun and unexpected ways.
Join us as we gather specimens from our tangled gardens and chronicle them in creative ways using the specially curated materials in Project Pack No. 21.
SUPPLIES: This Project Pack is available here ($39.95) in the zentangle.com store and it’s a convenient way to get all the supplies for the project. However, the introductory video reviews the items in the Project Pack and you might discover you have suitable alternatives in your own Zentangle supplies.
“If you do not have the project pack materials, we encourage you to follow along with whatever you have available.”
- NOTE: In this Project Pack the brown paper envelope packaging is also part of our supplies. It should be saved and not altered.
- One Sakura Micron 01 pen, Black
- Two Sakura Moonlight Gelly Roll 06 pens: (earth tones) 415 Yellow Ochre, 412 Pale Brown
- Four General’s Pastel Chalk pencils: (primary colors) 4412 Canary Yellow, 4227 Rose Madder, 4403 Indigo, 4436 Sap Green
- Zentangle graphite pencil
- Zentangle General’s White Charcoal pencil
- Six tortillions
- The above tools are contained in a cotton Zentangle Tool Pouch with drawstring closure
- Fifteen 5.5″ x 7″ preprinted, punched “specimen” templates with matching chipboard backing + Cover Sticker + Binding Cord + Adhesive Sheet.
The following chronology is a summary of the videos for this Project Pack with links to the individual videos. Either click the Day #’s title link or the image itself to view the full video on YouTube.
It isn’t necessary to watch the videos in sequence, but it will be very helpful for you to watch the Introduction video first.
CZT Molly Hollibaugh recommends we watch Project Pack videos completely through once before beginning our tiles:
“You’re going to have a little more confidence, you’re going to be a little more aware of what’s happening next. Then you might try something different, you might explore it in a different way”.
QUICK LINKS TO DAILY SUMMARIES
Jump to:
Day 1 – Lady Diva’s Slipper
Day 2 – Hanging Paradox
Day 3 – Squidahlia
Day 4 – Mytho-Temps
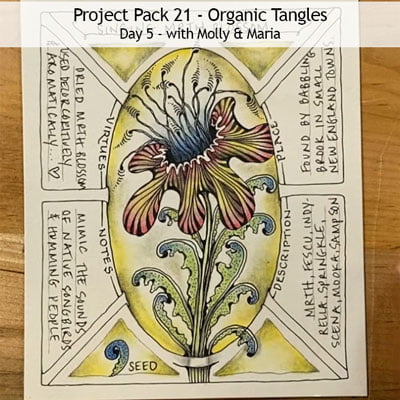
Day 5 – Singing Mrth Blossom
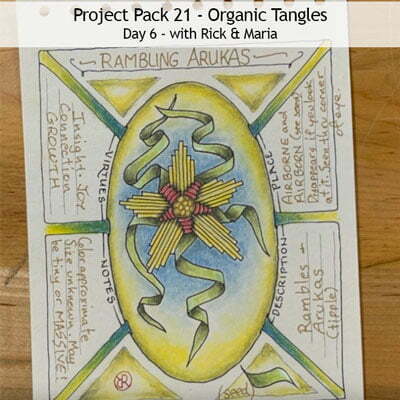
Day 6 – Rambling Arukas
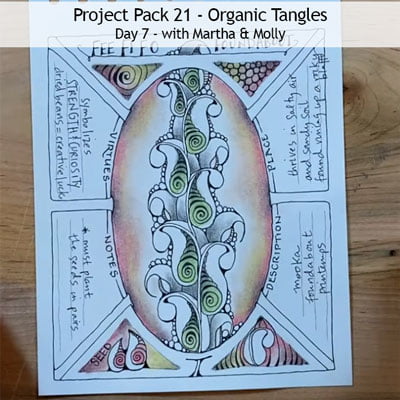
Day 7 – Fee Fi Fo Foundabout
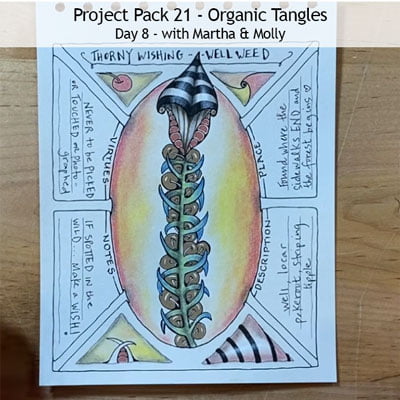
Day 8 – Thorny Wishing Well Weed
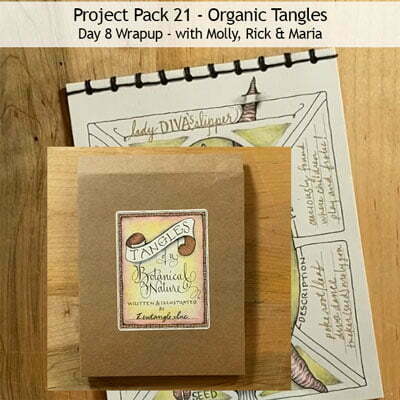
Wrap Up – How to assemble our book
Challenge – Project Pack #21 Bonus CHALLENGE
Introduction
In the introductory video (11:04) – Rick, Maria and Molly introduce themselves then Molly explains how this Project Pack developed and reviews the tools and supplies for it.
Step 1: At 01:20 – After introducing themselves, Molly explains, “we wanted to do a Project Pack that was about organic tangles and we wanted to think a little bit outside the box.” In preparation, the team started researching old books from Maria’s collection and became inspired by old botanical illustrations.
Step 2: At 01:59 – “So we decided how fun it would be to become not only botanists but also inventors and most importantly artists, and use our Zentangle language to create our own tangled species. And that’s what this Project Pack is about, it’s taking inspiration from these historical images and creating our own fantastical worlds … of creating Tangles of a Botanical Nature”.
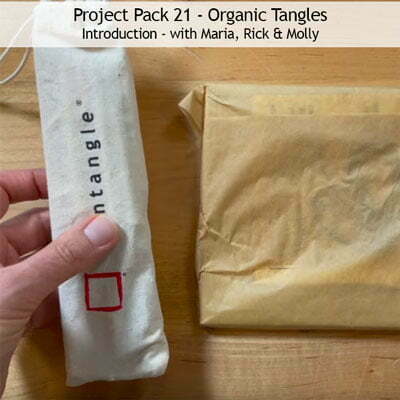
Step 3: At 04:10 – Molly reviews “what’s in the box” of tools for this project.
Step 4: At 04:48 – The cotton pouches.
Step 5: At 04:49 – The contents of the tissue paper-wrapped pack, including the templates designed by Maria and Molly.
Step 6: At 06:55 – “One thing we want to make sure that you all do is hang on to this envelope and don’t write on it or try to do anything to it, just keep it aside”, we’re going to be using that at the end of the project.
Step 7: At 07:34 – Molly reviews the tools contained in the cotton pouch (See Supplies list above).
Step 8: At 10:18 – They wrap up the video with some “personnel updates”: Julie isn’t in this Project Pack’s videos because she’s on maternity leave and they offer her their congrats. Lastly, Molly explains that Maria isn’t these videos either because she’s recovering from a pinched nerve in her hand/arm although Maria did have time before her hand injury to do some samples and these will be shared at the end of the project.
Day 1 – Lady Diva’s Slipper
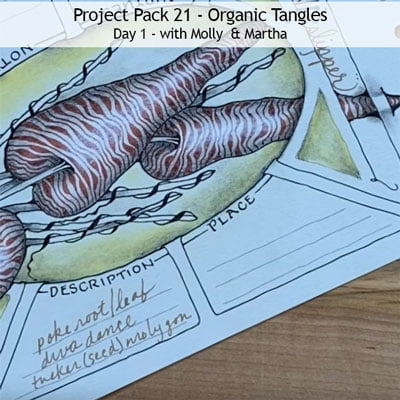
In Day 1’s video (52:29) – in this Tangles of a Botanical Nature series, Molly and Martha combine some familiar Zentangle-original tangles to create a fanciful Lady Diva’s Slipper tangleation.
Step 1: At 00:30 – After introducing themselves, Molly and Martha explain this Project Pack explores “the tangle genus we call organic tangles … and we’re going to have some fun here”.
Step 2: At 01:44 – “It’s a stretch of the mind .. .and we’re calling this series as sort of Tangles of a Botanical Nature.”
Step 3: At 01:56 – “We’re going to plant some seeds and some of these will be literal seeds and some will be a little more metaphorical. We will nurture them, watch them grow, and in true Zentangle tradition we will share these ideas and techniques with you in fun and unexpected ways.”
Step 4: At 02:45 – Again it’s pointed out that in the series final day’s video we’re going to be using the actual envelope that the Project Pack came in, “so we want to make sure you have that intact, and do not alter it or throw it away.”
Step 5: At 04:15 – Molly explains, “We’re kind of combining all kinds of tangles to create a new species, a tangle of a botanical nature. So I’ve collect a couple of tangles and smushed them all together to create something we’re going to be calling today the Lady Diva’s Slipper.” She explains the background of this spring orchid, the Lady Slipper Flower.
Step 6: At 04:42 – “This sort of fanciful flower that I’ve invented with tangles is sort of a depart off of that, or a playful imaginative variation of the the Lady Slipper.”
Step 7: At 05:12 – Molly begins with the Sakura Micron 01 and explains she’s going to be using the tucker technique, “it’s a way to make tangle to look like it’s tucking through the sheet or the page”.
Step 8: At 07:01 – She explains she’s creating a tangleation of Pokeleaf or Pokeroot and she draws a thin stem on the template and adds the familiar arc at the top, then adds a long thin “leaf” at the top. “So that’s my Lady Diva Slipper.”
Step 9: At 09:22 – Molly notes that her Lady Diva’s Slipper flowers differ in that they usually grow in clusters so she adds additional ones to the original.
Step 10: At 12:51 – Molly adds some “spindly leaves” to the composition.
Step 11: At 15:01 – Martha takes over to add color to Molly’s basic Lady Diva’s Slipper. She begins by adding Diva Dance texture inside the blossoms using the “peachy-colored” Pale Brown Gelly Roll.
Step 12: At 22:21 – When she finishes the first shape, Martha moves on to fill another.
Step 13: At 23:18 – She works on the third one.
Step 14: At 25:38 – Molly notes, “Before we shade, we have a very important thing we need to put in here.” She adds a “seed” illustration.
Step 15: At 27:10 – She adds “the Diva Dance detail to it”, then the text label “Seed”.
Step 16: At 28:20 – Molly adds graphite shading.
Step 17: At 32:39 – She also adds shading to the tucker detail.
Step 18: At 34:47 – “Now we’re going to add some background color and that’s what these beautiful Pastel Chalk Pencils are for.” Molly adds Canary Yellow Chalk around the edge of the oval frame and the triangles.
Step 19: At 36:01 – She uses a tortillion to soften the Canary Yellow and push it into the grain of the paper.
Step 20: At 37:22 – She adds graphite shading around the parts of the edges of the oval frame and blends it over parts of the Canary Yellow background giving the effect of depth.
Step 21: At 39:27 – Molly adds highlights with the White Charcoal pencil.
Step 22: At 40:01 – Martha uses the black Micron 01 to go back and restate/revisit some of the ink lines to “clean up the edges” and add rounding where lines meet.
Step 23: At 42:49 – “We’re going to bedazzle these little stems.”
Step 24: At 45:50 – Molly adds some text to the spaces around the illustration, including the Lady Diva’s Slipper title, using the “goldish” Yellow Ochre Gelly Roll.
Day 2 – Hanging Paradox
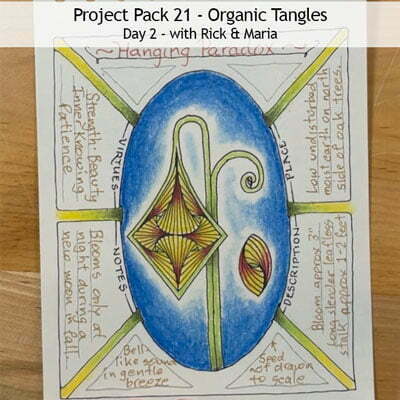
In Day 2’s video (24:06) – With Maria keeping him company, Rick tangles a fanciful Hanging Paradox. using influences from Hollibaugh and Hollis.
Step 1: At 00:37 – Rick explains that he’s going to show us his discovery and it’s related to Paradox.
Step 2: At 00:47 – With the black Micron 01 he creates “a matrix for this Paradox element which is actually part of the blossom of this flower”.
Step 3: At 01:22 – “Part of this theme is looking at tangles that might not be thought of as Botanical in nature.”
Step 4: At 01:48 – Rick proceeds to add Paradox to the four triangular sections he has created, mirroring the adjacent space as he goes and giving specific tips for tangling Paradox.
Step 5: At 05:51 – When all four sections are filled, he adds an aura all around, leaving an open space at the top, “this is where the stem comes”.
Step 6: At 07:14 – “This aura transitions into this stem,” part of which is drawn behind like Hollibaugh, creating a hanging “blossom” Rick is calling Hanging Paradox (07:35).
Step 7: At 07:56 – He adds Hollis-inspired branches
Step 8: At 08:32 – He adds a “seed” filled with a “Paradox-effect”.
Step 9: At 08:57 – He adds a larger seed sample in the space on one side of the main blossom.
Step 10: At 10:48 – With the Sap Green Chalk pencil he colors the aura and stem.
Step 11: At 11:35 – He adds Rose Madder Chalk shading in the Paradox.
Step 12: At 12:18 – He adds Canary Yellow Chalk, blending it into the red. He finishes by adding a touch of Sap Green.
Step 13: At 13:55 – He colors the large specimen “seed” using the same technique.
Step 14: At 14:57 – Using the Yellow Ochre Jelly Roll pen, he adds “the story”, starting with the title: Hanging Paradox, and moving around the template to fill in the remaining boxes while explaining his fanciful Specimen.
Step 15: At 17:46 – With the Indigo Blue Chalk pencil he colors the edge of the frame around the blossom.
Step 16: At 19:05 – He blends/softens the Indigo Blue with a tortillion.
Step 17: At 19:53 – He adds Sap Green Chalk to one end of the “bars along the edge … the supports that hold that oval”.
Step 18: At 20:15 – He adds Canary Yellow Chalk on the other end, blending where they meet.
Step 19: At 20:42 – He adds graphite shading then blends it in using the Sap Green Chalk pencil.
Step 20: At 23:13 – He uses a tortillion to do some more work softening the Indigo Blue blending.
Step 21: At 22:57 – He adds graphite shading around the inside edge of the oval and blends that out. Lastly, he adds his chop.
Day 3 – Squidahlia
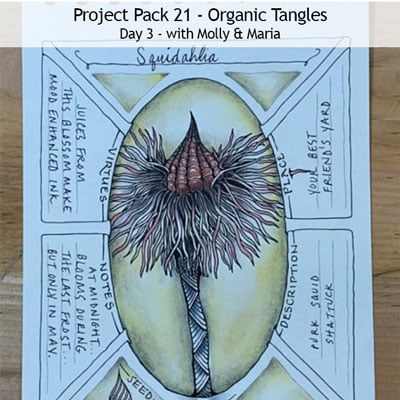
In Day 3’s video (37:51) – with Maria keeping her company and adding her observations, Molly tangles a magical Squidahlia using Squid, Purk and Shattuck.
Step 1: At 03:00 – After introducing themselves and the Project Pack and a pause for gratitude, Molly begins with the graphite pencil to create her string and says we’re going to work with the tangle Squid.
Step 2: At 05:02 – With the Black Micron 01 Molly begins to add the strokes for Squid, using the Hollibaugh principle of drawing behind.
Step 3: At 10:42 – She tells us this particular flower is called a Squidahlia.
Step 4: At 11:07 – Molly inks in some spaces at the top where the Squid lines come out of the string.
Step 5: At 12:16 – Molly explains the next tangle we’re adding is a variation of Purk.
Step 6: At 12:39 – Still using the Micron 01, Molly adds a “Hershey’s Kiss”- shape for Purk and adds contour lines.
Step 7: At 14:04 – She adds orbs to fill the striped sections.
Step 8: At 16:17 – Now that the blossom is in place, Molly adds more Squid strokes behind it.
Step 9: At 16:40 – She adds a stem for the Squidahlia blossom.
Step 10: At 17:26 – Molly begins to fill the stem with Shattuck and then adds more Squid strokes to make that part of the blossom denser.
Step 11: At 20:20 – With the Pale Brown Gelly Roll (“it looks peachy in the pen cap”) Molly inks in the Purk orbs, leaving a little highlight in each.
Step 12: At 22:22 – Molly adds some graphite shading to the blossom and the stem, blending it in with a tortillion.
Step 13: At 24:44 – While blending the Shattuck shading she discovers her tortillion has a little Indigo Blue Chalk on it, so she adds more blue “just to make it look purposeful”.
Step 14: At 25:22 – She adds Rose Madder Chalk to the blossom “in random places”.
Step 15: At 26:06 – She adds more graphite shading.
Step 16: At 26:38 – She adds color around the edge of the background with the Canary Yellow Chalk and then graphite.
Step 17: At 27:12 – She demonstrates how she did that background by adding the effect to the corner triangles.
Step 18: At 27:46 – She adds the Purk-inspired “seed” specimen in one of the bottom triangles, then she adds a title, some Pale Brown Gelly Roll and some graphite shading.
Step 19: At 30:21 – She adds some shading to the tucker at the base of the stem. Maria notes that you almost don’t need any graphite for this, you can use what’s already on your tortillion.
Step 20: At 21:13 – Molly adds some rounding, “bits of love” wherever she feels it’s needed.
Step 21: At 32:00 – She adds her Squidahlia flower’s name in the title area, noting to be careful of smudging the colored chalk surface and she uses a sheet of scrap paper to shield the drawing while she writes the title.
Step 22: At 32:57 – She adds the descriptions in the spaces around the illustration while explaining its fanciful origins and magical properties.
Day 4 – Mytho-Temps
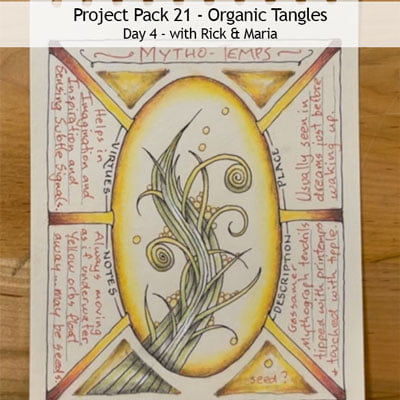
In Day 4’s video (29:56) – with Maria keeping him company and adding her observations, Rick tangles his imaginary Mytho-Temps specimen combining Mythograph, Printemps, and Tipple.
Step 1: At 00:30 – After introducing themselves, Rick explains we’re going to be doing a specimen today that includes the new tangle Mythograph. Before proceeding to our specimen template, with a black Micron 01 he demonstrates on a Phi tile how to tangle the basic strokes of Mythograph.
Step 2: At 01:22 – He explains the reason for the name Mythograph is that it’s named after Martha.
Step 3: At 02:42 – He notes that this reminds him of how Arukas is constructed.
Step 4: At 04:41 – “Now that you’ve been introduced to Mythograph, let’s go to our Project Pack.” Again we are reminded to keep our envelope and keep it pristine until the Day 8 video when we’re going to use it.
Step 5: At 05:07 – With the black Micron 01, Rick adds Mythograph to the specimen template, only this time this fanciful version will be “the plant that I found”.
Step 6: At 06:31 – On one of the “attachments”, Rick extends it into Printemps.
Step 7: At 08:56 – He adds another Printemps “extension, so it actually looks a little bit like fiddleheads“.
Step 8: At 10:58 – “So again, the principle is aura, aura, aura.”
Step 9: At 13:34 – Rick extends the stems under the border and into the triangle shape at the bottom.
Step 10: At 14:03 – Now that we have the foundation of our plant, Rick uses the Pale Brown Gelly Roll pen to add “little bubbles”, some Tipple-like orbs – in a few of the spaces between and around the fronds. He then adds a few floating bubbles/orbs.
Step 11: At 16:11 – With the Sap Green Chalk pencil, Rick adds “a subtle green … I’m not just coloring everything in.”
Step 12: At 16:41 – He adds Canary Yellow Chalk pencil to the fronds and to the orbs.
Step 13: At 17:43 – With the graphite pencil he adds “a little over and under, a little shading”.
Step 14: At 18:37 – He blends the graphite in with a tortillion and then does the same with the pastel chalk colors.
Step 15: At 20:04 – He adds highlights with the General’s White Charcoal pencil.
Step 16: At 20:31 – He adds Canary Yellow Chalk around the inside edge of the frame and blends it with a tortillion.
Step 17: At 21:18 – He reminds us to be mindful of smudging the chalk with your hand as you’re working.
Step 18: At 21:26 – He adds a little bit of the Rose Madder Chalk pencil to the edge of the yellow frame then blends it in.
Step 19: At 22:32 – He adds another layer with the graphite pencil around the edge.
Step 20: At 23:29 – He adds touches of graphite shading within the plant and blends it in.
Step 21: At 23:54 – He adds Canary Yellow Chalk to one end of the “bars” around the oval.
Step 22: At 24:52 – He then adds Rose Madder Chalk to the other end of the bars and blends the two colors before adding a touch of graphite to each.
Step 23: At 26:25 – Rick adds Canary Yellow and Rose Madder Chalk and graphite layers to the triangles in the spaces around the edges of the template.
Step 24: At 28:01 – Using a spare sheet of paper to protect the image from his hand, Rick says “So the name we came up with is Mytho-Temps“, as he adds the specimen title and imaginary descriptions using the Pale Brown Gelly Roll pen.
Day 5 — Singing Mrth Blossom
In Day 5’s video (41:11) – with Maria – her Mom – keeping her company and adding her observations, Molly tangles Maria’s imaginary Singing Mrth Blossom specimen using Fescu, Springkle (=Fescu+Indy-Rella), Scena, Mooka, and Sampson (or Icanthis depending on your POV).
Step 1: At 03:09 – After introducing themselves and a pause for gratitude, Molly explains she’ll be tangling for Maria because she has a hand injury.
Step 2: At 03:27 – Molly notes that Maria’s imaginary botanical specimen is called a Singing Mrth Blossom.
Step 3: At 04:26 – With the Black Micron 01, Molly begins in the upper third of the oval and adds a C shape to which she then adds Fescu.
Step 4: At 06:35 – Maria comments, “Fescu was one of the first tangles that we had created and it was so simple. It was just the single line and that little bulb at the end that would wiggle in different ways … and it has morphed over the years.”
Step 5: At 08:19 – Molly says she’s going to add an Indy-Rella topper to the Fescu fronds, this creates the tangle Springkle.
Step 6: At 10:53 – “So the next thing to do is I’m going to work up to my Mrth,” Molly adds a zigzag aura-ed “collar” to the initial C shape and adds some ink detail to the collar.
Step 7: At 12:30 – “The next layer is going to be two tangles we introduced about a year ago. One of them is basically a tangle that was also a reticula (sic) that we called Pangea … Another filler called Mrth that was basically a filler of this Pangea tangle.”
Step 8: At 13:38 – She adds a Pangea shape for the base of the blossom.
Step 9: At 14:20 – She begins to add Scena-type strokes to fill the Pangea shape to create Mrth, adding auras with weighting along the curve.
Step 10: At 15:55 – She changes direction of the aura lines.
Step 11: At 16:10 – Maria says, “I think that Scena is a sculpting tool.”
Step 12: At 18:36 – Molly adds a space for her tucker detail before she add strokes forming a stem for the Mrth blossom.
Step 13: At 19:38 – She adds “a series of Mooka or Fescu-esque branches” from the base of the stem.
Step 14: At 20:10 – After adding one Fescu, Molly adds “a little bit of Icanthis in there” to add a leaf to the branch, Maria observes “kind of like Sampson“.
Step 15: At 21:57 – After she finishes adding the aura-ed Fescu leaves, she adds a little bit of rounding to the “little gullys”.
Step 16: At 22:24 – “There’s another detail I’m adding and this is so simple,” as she adds “speckled dots” to the leaves, “adding love”.
Step 17: At 24:06 – Molly adds a seed in one of the bottom triangle spaces on the template.
Step 18: At 25:12 – With the Indigo Blue Chalk pencil, Molly adds color at the base of the Fescu fronds then smooths it with a tortillion, then adds some graphite over it at the bottom.
Step 19: At 26:16 – She explains she’s going to use the Rose Madder and Canary Yellow Chalk pencils to add color to the blossom and begins with the Rose Madder, as Maria notes that she leaves the ruffle detail white for contrast. Molly then softens the Rose Madder with a tortillion.
Step 20: At 27:20 – Molly adds the Canary Yellow to the middle area and softens it with a tortillion, then adds a touch of graphite where there appears to be an overlap.
Step 21: At 27:54 – With the Black Micron 01, Molly goes over some of the strokes.
Step 22: At 28:21 – For the leaves Molly says she’s going to combine the Sap Green and the Indigo Blue Chalk, starting at the bottom. After adding those colors she blends them and then adds a layer of graphite shading, including on the tucker element.
Step 23: At 30:24 – She colors the seed.
Step 24: At 31:20 – Molly adds color around the inside of the oval frame and the triangular spaces then softens it with a tortillion.
Step 25: At 34:37 – She then adds graphite “to add sort of an antiquing effect” while she and Maria talk about how these details are “like frosting on a cake”.
Step 26: At 36:26 – Molly adds the Singing Mrth Blossom title and its descriptions – “our imaginative tall tale” – with the Black Micron 01.
Day 6 — Rambling Arukas
In Day 6’s video (28:35) – with Maria keeping him company and adding her observations, Rick tangles his imaginary Rambling Arukus botanical specimen combining Arukas, Rambles, and Tipple.
Step 1: At 00:00 – After introducing themselves, Rick explains, “We’re going to start with pretty much all of our gear.”
Step 2: At 00:45 – With the Black Micron 01 he begins to tangle Arukas on his specimen template.
Step 3: At 02:38 – He explains how Arukas came about “when Molly was on the phone with someone from Sakura,” and Arukas is Sakura spelled backwards.
Step 4: At 05:24 – He introduces a tangle Maria came up with, Rambles and demonstrates the basic strokes on a Phi tile.
Step 5: At 06:48 – Rambles is named in honor of their grandson, Ramsey.
Step 6: At 07:55 – Rick switches back to our template and begins to add Rambles around the Arukas, coming off each of the orb auras.
Step 7: At 11:50 – He uses the “Gold” (Yellow Ochre) Gelly Roll to add Tipple to the center of the original Arukas orb.
Step 8: At 12:29 – With the Rose Madder Chalk pencil Rick adds color to the orb auras then adds Canary Yellow Chalk Pencil to the “propellers” and the gold Tipple orbs.
Step 9: At 13:30 – He adds Sap Green Chalk Pencil to Rambles.
Step 10: At 15:33 – Rick adds graphite shading and smooths it out with a tortillion.
Step 11: At 16:42 – He adds White Charcoal highlights to Rambles.
Step 12: At 17:37 – He adds more graphite shading and spreads it around with a tortillion.
Step 13: At 18:18 – He adds Indigo Blue Chalk Pencil to the background around the blossom and spreads it out to soften the edge.
Step 14: At 20:25 – He adds Indigo Blue Chalk Pencil to the inside edge of the “support struts”, and Canary Yellow Chalk Pencil to the outside edge then blends the two together.
Step 15: At 21:11 – He adds Canary Yellow Chalk Pencil around the inside edge of the oval, smooths it out then adds a “really light” layer of graphite over it.
Step 16: At 22:33 – He uses a spare piece of paper over his illustration to protect it from smudging while he adds the title and fanciful tale around the edges of the template using the Yellow Ochre Gelly Roll.
Step 17: At 22:38 – He reveals that the name of this specimen “is called Rambling Arukas because it floats around on its own”.
Step 18: At 23:47 – He adds an illustration of “the seed”, and adds Green Chalk and graphite shading to it.
Step 19: At 26:40 – Rick adds color and shading in the triangle shapes then finishes by adding his chop in one.
Day 7 — Fee Fi Fo Foundabout
In Day 7’s video (44:33) – Martha and Molly tangle their imaginary Fee Fi Fo Foundabout blossom using Mooka, Foundabout and Printemps.
Step 1: At 01:59 – After Molly and Martha introduce themselves, they explain they’re going to be showing us a new tangle.
Step 2: At 02:10 – After a discussion and a pause for gratitude, Martha does a demonstration of the basic strokes of Foundabout on a Phi tile with a Black Micron 01.
Step 3: At 09:17 – “I’m ready now to put our notes and illustrations for their Fee Fi Fo Foundabout.”
Step 4: At 10:12 – Instead of the simple Foundabout spine Martha demonstrated earlier, today she’s going to be using Mooka to build this specimen.
Step 5: At 11:56 – She returns to the base of the stalk to add the leaf shapes.
Step 6: At 13:00 – She returns to the base to complete the other side, drawing behind where necessary.
Step 7: At 14:30 – In the spaces between the Mookas Martha adds small petal shapes, “halvsies … or half shapes here and there”.
Step 8: At 16:11 – Inside each of the original large petals she adds a Printemps spiral with small auras going up the stem.
Step 9: At 18:17 – She goes back to add a little weighting to the Printemps spirals.
Step 10: At 19:23 – In the remaining “half petals”, Martha adds curved shapes, “the illusion that it’s kind of popping out of the seed”.
Step 11: At 20:47 – “Maybe add some little striping in there.”
Step 12: At 20:56 – “So I’m imagining with this stock is that there’s often bubbles around it,” as she adds some nestled orbs/Tipple in spaces along the stalk.
Step 13: At 22:30 – She adds a tucker element at the base of the stalk.
Step 14: At 23:29 – Now that Martha has the basic specimen drawn, Molly takes over to add the “raw components” of the tangles used in each of the triangle spaces around the edge starting with Printemps, then Tipple, then Mooka, and then a “seed”.
Step 15: At 29:29 – Molly adds color and shading. She adds Sap Green Chalk pencil to the Printemps and graphite to the auras at the top of each.
Step 16: At 31:06 – She adds graphite shading to the “halvies” leaves.
Step 17: At 32:29 – “Now I’m going to do a little bit of background,” she adds Rose Madder Chalk pencil around the edge of the oval.
Step 18: At 33:01 – She layers Canary Yellow Chalk over the Rose Madder then softens them together with the tortillion.
Step 19: At 32:25 – Molly adds some graphite to “antique” it and softens it with the tortillion.
Step 20: At 35:07 – She adds the same coloring and shading to the triangle spaces.
Step 21: At 39:41 – With the Black Micron 01 Martha adds the specimen name: Fee Fi Fo Foundabout.
Step 22: At 41:27 – She adds the descriptions in the spaces around the edges.
Day 8 — Thorny Wishing Well Weed
In Day 8’s video (41:24) – together Molly and Martha tangle their fantastical Thorny Wishing Well Weed specimen using Well, Tipple, Striping, Locar and Pokeroot.
Step 1: At 01:58 – After they introduce themselves and take a few moments for gratitude and appreciation, Martha uses the graphite pencil to create a string up the middle of the oval.
Step 2: At 03:01 – Martha explains this specimen has “this crazy blossom at the end of it so we’re actually going to start at the top and then we’ll go to the bottom and finish that later.” With the Black Micron 01, first Martha adds an anchor point at the top outside of the oval and then adds “two orbs to anchor the center”, and this is where the tangleation of Well begins.
Step 3: At 04:51 – Using the take off and land technique, she goes around one orb and lands on the string line below it. She then mirrors that from the orb, creating a V shape.
Step 4: At 06:03 – Next Martha does the opposite of that, she aims for the anchor point from each orb, again with the take off and land technique.
Step 5: At 06:47 – She repeats the first take off and land sequence (Step 3) to add a shorter V shape within the overall shape.
Step 6: At 07:28 – She creates “a seed pod shape on either side”.
Step 7: At 08:01 – Inside the pod shapes she nestles some “smooshed” Tipple/orbs to fill them then she inks in the interstices.
Step 8: At 09:12 – She connects the anchor point down to the top V shape along the string, dividing the space in half.
Step 9: At 09:32 – She adds “a series of stripes going up to the top of the pod”, then fills them in with ink (creating Striping).
Step 10: At 11:40 – Martha switches to the Pale Brown Gelly Roll and adds ink to the Tipple orbs, leaving a tiny white halo around the ink by not going right to the edge of the orbs.
Step 11: At 12:51 – She changes to the Yellow Ochre (“gold”) pen to add anchored vertical lines in the base of the pod.
Step 12: At 14:26 – Molly takes up the steps and explains she’s going to add the tangle Locar (shares DNA with Verdigogh) to create the stem of the blossom.
Step 13: At 15:56 – With the Black Micron 01 she adds Locar.
Step 14: At 18:32 – She adds Pokeroot between and behind the Locar “thorns”.
Step 15: At 20:44 – After changing her mind about using the Pale Brown Gelly Roll, Molly uses the Yellow Ochre Gelly Roll to fill the berries but leaving a “sparkle” highlight on them.
Step 16: At 22:12 – “Before I do my shading I’m going to go back in an add a little love”, she darkens some of the black strokes on the stem.
Step 17: At 23:27 – She uses the Sap Green Chalk and Indigo Blue Chalk pencils to add color to the Locar stem and blends them with the tortillion.
Step 18: At 25:11 – She adds graphite shading on the blossom.
Step 19: At 26:45 – With the White Charcoal pencil she adds highlights and blends it with a tortillion.
Step 20: At 28:06 – She adds graphite over the stem.
Step 21: At 29:11 – Molly restates some of the black strokes that might have been covered by the shading.
Step 22: At 29:48 – Martha takes over now and after some overall thoughts about the specimen, with the Black Micron 01 she adds the seed in one of the bottom triangular spaces then adds some Yellow Ochre Gelly Roll ink in the orbs.
Step 23: At 31:38 – She adds an example of Striping in the adjacent triangle.
Step 24: At 33:05 – Martha adds Pokeroot in one of the top triangles.
Step 25: At 33:25 – She adds Well in the last triangle.
Step 26: At 33:56 – Martha begins adding color on the edges of the background starting with the Rose Madder Chalk pencil then overlapping with the Canary Yellow and blending them towards the middle.
Step 27: At 36:04 – She has added the Rose Madder and Canary Yellow Chalk colors to the tangle examples and now uses the graphite pencil to add shading to those areas.
Step 28: At 37:28 – “This very special plant is called the Thorny Wishing Well Weed“. Martha adds the title and completes the remaining descriptions around the template.
Wrap Up — How to assemble our Tangles of a Botanical Nature book
In the final video in the Project Pack 21 Series (24:32) – with Rick and Maria keeping her company and providing commentary, Molly demonstrates how to assemble and use the Japanese Stab Binding technique to bind our specimen book together.
Step 1: At 00:31 – After their introductions, Maria explains that Molly is going to show us how to sew our books together. Molly points out that we have extra templates and we may want to wait until later to sew the book together once we’ve created more pages. “So watch and take in how this is done and then you can sew yours up at your own pace”.
Step 2: At 00:49 – Rick notes that we’re going to be using the Japanese Four-Hole Binding technique for this Project Pack.
Step 3: At 01:40 – Molly shows the materials from the pack and suggests we will also want a pair of scissors and some small binder clips or paper clips.
Step 4: At 02:15 – Molly shows us how she has tangled her label to prepare it because it’s easier to tangle when it’s not attached on the book. Molly has done hers “to match the look and feel with how we tangled the inside of ours”.
Step 5: At 02:54 – She gathers her pages and the chipboard backing for them, then she clips them together with paper clips to keep them aligned.
Step 6: At 03:44 – She notes we’re going to use the brown envelope as our cover and shows what we’re doing with it, beginning with trimming off the gusset with the scissors, cutting along the folds. She demonstrates a couple of ways to do this, and you can tidy up the edges once you have it cut apart.
Step 7: At 06:46 – “If you wanted to be sort of crafty you could round the corners a little bit if you wanted to.” Molly runs her thumbnail over the edges to smooth them out.
Step 8: At 07:50 – “Now we have our cover ready to go, so we can put that aside.”
Step 9: At 08:22 – With the stack of inside pages clipped together (aka, the signature), Molly removes one paper clip and inserts the binding thread through the second hole and pulls out a 4″ length (not too much) of thread. She clips the signature back together so the clip holds the thread end in place.
Step 10: At 09:15 – They recommend we watch the next steps through a couple of times before proceeding.
Step 11: At 09:18 – Molly takes the long end of the string (“the holes are big so we don’t need a needle”) and pulls it back through the same hole in the signature and pulls it “taut but not too tight”.
Step 12: At 09:43 – She goes to the next hole and puts the thread down through the top then brings it around the end and back down through that same hole.
Step 13: At 10:16 – “Then we’re going to come through the next hole through the bottom, and then go through again.”
Step 14: At 10:38 – “And then we’ll go through the top this time. So it’s an every-other system.”
Step 15: At 11:05 – “So the trick is that whatever you’re leaving off on, that’s how you know what direction to come in on the next one. And every hole gets gone through twice on the journey.”
Step 16: At 11:24 – Rick notes, “When I was looking this up online there’s all these different patterns that they punch holes in so you can … create different patterns with where the holes are placed and how the stitching goes in.”
Step 17: At 12:31 – Molly notes you can cut the tip of the thread off if it’s fraying, or twist it back together.
Step 18: At 12:47 – “Once you get to the corner, this is a little detail … going around the corner carefully guide the thread … So now we’re going to do the same thing in the other direction. And because we have an even amount of holes, it allows us to go every other in the opposite direction.”
Step 19: At 15:12 – She ends up at the opposite corner, demonstrates how to do that and then finishes off by tying the two ends together.
Step 20: At 18:34 – Molly begins the cover assembly.
Step 21: At 18:59 – She turns the bound pages over with the chipboard side up, peels the double sided adhesive off one side of its backing and adheres it to the chipboard. For expediency Molly does her adhesive in one piece but she notes that it might be a good idea to cut ours into pieces so we can use one close to each corner. She smooths down the adhesive to make sure it’s well adhered, then peels the other piece of backing off, leaving the adhesive exposed.
Step 22: At 20:04 – “You’re going to have to eyeball it to see where the seams are” to adhere the booklet in place.
Step 23: At 20:45 – Molly closes up the now-covered booklet and then places the decorated label on the cover being careful not to smudge it. They mention it could be permanently sealed with a layer of Mod Podge.
Step 24: At 22:53 – Molly displays some wonderful prototypes “from when we’re working through ideas”.
Step 25: At 24:16 Molly says, “we have some challenges ahead for you all on this theme and we’re looking forward to sharing those with you.” (See below)
Bonus Challenge for Zentangle Project Pack No. 21
In this bonus challenge series we will choose two tangles to challenge and inspire you to create your own imaginative species. We are excited to see how each creation will grow into something so beautiful and different, just like all of you.
Stay tuned as we kick off this series on August 20th via our newsletter and blog.
The five challenges will be added to the list below after they’ve been posted every third day by Zentangle.
- August 20, 2023 – Day 1: Rixty + Crescent Moon – video announcement here
- August 23, 2023 – Day 2: Ing + Aquafleur – video announcement here
- August 25, 2023 – Day 3: Ravel + Cubine – video announcement here
- August 29, 2023 – Day 4: Toodles + Marasu – video announcement here
- September 1, 2023 – Day 5: Tripoli + Gourdgeous – video announcement here
This recap of Zentangle’s Project Pack #21 will make it easy for you to find all the related videos and any parts of them you may wish to refer to again.
Remember the images above are linked to their YouTube video, simply click the image to go to the video. Or, you can view the complete video on the corresponding tangle’s page on TanglePatterns, they make a fascinating “historical” record of Zentangle videos on each tangle.
For a complete list of Zentangle’s Project Packs click the PROJECT PACKS link in the pink alphabetic tangle menu bar.
|
.oOo. |
|
Enhance your Zentangle experience while supporting TanglePatterns: |
|
BRAND NEW! TanglePatterns.com TANGLE GUIDE, 2026 Edition |
|
 |
The 15th Edition of the TanglePatterns.com TANGLE GUIDE is an instant-download 123-page interactive digital eBook/PDF containing over 2,300 tangles on the site from May 2010 through December 31, 2025. It's a great resource and a must-have digital tool for using the site. Visit the STORE > E-BOOKS page and help keep TanglePatterns.com going by getting your copy now! |
|
"Linda, Thank you! I was relying on too few and getting stuck after 3 years of daily working with Zentangle. This has inspired me to ‘begin again’ with renewed excitement." ~ Barbara R. |
|
| See the BOOK REVIEWS page for more details on its features and view a sample page. Note: this is a digital product to download immediately when ordering, nothing will be physically mailed to you. | |
| If you're new to Zentangle® and tangling, my TanglePatterns.com BEGINNER'S GUIDE TO ZENTANGLE is just what you need to get started. Also available en Français and en Español. | |
|
|
|
 |
This is the only Zentangle book you'll ever need: the fabulous Zentangle PRIMER Vol 1. It's your CZT-in-a-book by the founders of Zentangle®. For more about the content and to read the rave reviews, visit the BOOK REVIEWS tab. |
| Available in KINDLE format for $9.99. Spanish Edition here. Japanese Edition here. | |
| "Absolutely the best Zentangle Book yet! As an accomplished artist I used to think I did not need instruction on this art form. How wrong I was! My tangling improved by leaps and bounds after reading this book. If you think you have Zentangle down then you need this book more than ever!" ~ Kris H | |
|
|
|
|
.oOo. |
|




Hi Linda, Thank for the supply details on Project Pack 21. I have been following along without the supply pack. I didn’t know what those color chalk pencils they use were/are. Thank you 🙂
What a detailed and exhaustive breakdown of each of the PP21 videos! The last one with the book binding in particular was quite detailed, and thank you for breaking the steps down so thoroughly! Honestly, I love coming here and having all the videos in one tidy place to work through at my speed, and I can pick up based on your steps breakdown and noted timing. I really appreciate all the time and effort you put into these. <3
Thanks so much, I really appreciate your feedback. It helps to know that it’s worth the effort. I’m going through it now to fix my typos! 🙂
Linda – Thank you once again for your extensive coverage of another Project Pack from Zentangle and for adding the appropriate crossreferences by tangle name A-Z on your site.
Zentangle HQ has begun a 5-day Bonus Challenge for Zentangle Project Pack 21. I’ve added the challenge information after Day 8’s Wrap Up on this page and am adding each of the five challenges as they’re posted. So if you’re interested, be sure to come back to check those out.
Linda, thank for the review of the project pack and supplies. Wondering what people are using if they didn’t order the supplies for the template for tangling on?
Hi Gem, a Zendala tile is a very good substitute. Perhaps the community may have other suggestions …
Hi Gem – I had some Phi tiles on hand so I used 2 side-by-side for each lesson – one for the bloom and one for the text. Each set opens like its own tiny book. This media choice also gives the option to use different tile colors.
I am following the Zentangle Project Pack 21 at my own pace and I’m really enjoying it. I’ve been using the normal Zentangle tile and 0.1 pen. I haven’t used any colour either, just graphite shading as I prefer the traditional black & white Zentangle. I have created different borders for mine, rather than giving a ‘botanical explantion’ of my mythical flower. They’re looking good and I’m very pleased with them so far!