


 Quoting from Zentangle’s Project Pack #15 introductory video:
There are many layers to the story of how the Zentangle Method™ was developed.
It is a tale of two people’s life experiences, a fascinating sequence of events, and the discoveries that resulted from that marvelous mix. When you dig deep into the story, you will learn that the art of lettering played a significant role.
In this Zentangle Project Pack we take a closer look at this part of the history behind the method. In true Zentangle fashion we will draw inspiration from the art of lettering and alphabets and how their forms can influence patterns.
In addition to studying how letter forms and alphabets influenced the birth of the Zentangle Method, we will look at how the Zentangle artform has become its own language. No matter what country you live in or what language you speak, we have found that almost anyone can create and express themselves through the international language of tangles. Over the years it has become clear that Zentangle artists create beautiful art that speaks of positivity, love, and courage in patterns of beauty and gratitude.
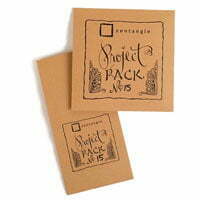
SUPPLIES: This Project Pack is available here ($32.95) in the zentangle.com store and it’s a convenient way to get all the supplies for the project.
PP#15 includes the Alphaborders template designed by Maria and printed on the same Fabriano Tiepolo paper of the Zentangle tiles. However, the first video reviews the remaining tools in the Project Pack and you might discover you have suitable alternatives in your own Zentangle tools and supplies:
- Sakura Micron PN pens: Pink (PN#21), Sepia (PN#117 “chocolately brown”)
- Sakura Micron 01 (or 05) pens: Orange (#5), Brown (#12)
- Sakura Gelly Roll Metallic pen, Gold (#551)
- Zentangle graphite pencil
- tortillion
- 5 square white Zentangle tiles, 2 Zentangle-branded glassine envelopes
- 4 white Bijou tiles, 2 glassine envelopes
- 4 white Phi tiles
The following chronology is a summary of the videos for this Project Pack with links to the individual videos. Either click the Day #’s title link or the image itself to view the full video on YouTube.
It isn’t necessary to watch the videos in sequence, but it will be very helpful for you to watch the Introduction video first.
CZT Molly Hollibaugh recommends we watch the tutorial videos completely through once before beginning our tiles:
“You’re going to have a little more confidence, you’re going to be a little more aware of what’s happening next. Then you might try something different, you might explore it in a different way“.
QUICK LINKS – Jump to: Day 1 – Day 2 – Day 3 – Day 4 – Day 5 – Day 6 – Day 7 – Day 8 – Wrap Up
Introduction
In the introductory video (17:19) – Join Rick, Maria and Molly as they introduce you to the theme and contents of this series.

Step 1: At 00:00 – Rick and Maria introduce themselves then Molly explains how this Project Pack came about.
Step 2: At 02:02 – Rick says he asked Maria to “grab some of her lettering examples so you can see some of the early Zentangle DNA“. They leaf through her portfolio pieces beginning with a Christmas Card done in 1998. We can clearly see Crescent Moon in this piece. This piece has appeared before in earlier demos and the humor of it is there’s no L. {Noel, Christmas Card …}
Step 3: At 03:41 – The second piece from July 2001 demonstrates the concept of aura-ing with letters.
Step 4: At 03:48 – As Rick leafs through more examples of Maria’s early art, Molly explains that she wasn’t introduced to Zentangle until she was 23 or 24 but she did grow up on with her Mom’s (Maria) passion for lettering and art.
Step 5: At 04:56 – Maria explains this example was an alphabet done for a box company and the entire alphabet is decorated with what we now call Flux.
Step 6: At 06:15 – An example done for a stationery company of “a strict Roman alphabet with all these flourishing“. [TIP: a good way to remember to spell stationery correctly is that stationery is papER … not stationary, which has a totally different meaning and drives me totally bonkers when I see it used out of context!] As Molly points out, Maria was using the letter forms as a string.
Step 7: At 07:48 – “What’s important here is to look at the letter forms with fresh eyes and seeing them as elements that could be put into patterns.“
Step 8: At 08:22 – As she shows another example Maria says, “This is one of my favorite logos that I ever designed.” and goes on to explain how she developed it.

Step 9: At 09:49 – “Even though we’ve shown you all this very elegant calligraphic work … we’re letting go of that because this really isn’t about calligraphy. It’s not about having any particular experience with penmanship. We really want you to use however you draw a letter and use that as part of the inspiration behind creating a form or creating a pattern. We’re going to be taking all sorts of approaches.“
Step 10: At 10:58 – Molly describes the contents of this Project Pack including the Alphaborders template designed by Maria and printed on Tiepolo paper. “This is going to get filled by the end of these videos.”
Step 11: At 12:11 – Maria points out that at some point we are going to be drawing on the back of the Alphaborders piece, so “not to draw on there before we have a chance to tell you what we’re going to do on there“. They also go over the tiles and glassine envelopes included in the Pack and explain their significance.
Step 12: At 13:59 – Molly describes the contents of the tool envelope and notes they try to create a palette of colors with the tools. “This is to me a very late summer palette.” [Sorry no tips on how to remember to spell palette correctly, but it’s definitely NOT palate, pallet, or any number of abominations 😉 ]
Step 13: At 15:05 – There is no black pen in this Project Pack but the Brown 01 appears to be Black, so Molly’s tip is to put a piece of tape around the end of the pen (Rick later demonstrates) so it won’t be confused for a Black pen.
Step 14: At 16:50 – Molly notes that we’ll be working with a Roman alphabet but they encourage us to “incorporate the letters of your culture and language.”
Day 1
In Day 1’s video (37:20) – “We invite you to join us we tangle our Alphaborders template. Tangle along with Rick, Maria, Molly, Martha and Julie in the first and second videos in this series. Today’s lesson will go through about half, followed by another lesson on Day 2.“

Step 1: At 00:00 – Maria introduces the theme of this Project Pack, “and it being about letters … we’re using a Roman alphabet and a very simple print-style letter to inspire us to create tangles using these letter forms.“
Step 2: At 00:53 – Rick, “we’re looking at letters as elements of patterns … an inspiration to take your imagination and look at letters in a fresh new way as forms, and what you can do with them and different ways you can put them together.”
MOLLY – A, D
Step 3: At 01:41 – Although they plan to “bounce around”, using the Sepia PN (dark brown) Molly begins with the letter A as Rick and Maria observe and comment.
Step 4: At 02:53 – “We purposefully did not draw all the way across because we want you to also do a version of your won letter afterwards.“
Step 5: At 03:05 – Molly uses the Brown 01 to add the crossbars in the letter forms. At 03:25 – Molly switches back to the Sepia PN to add a curve detail. At 04:06 – Molly adds graphite pencil “on both sides of the stripe, and this gives it a little gravitas, kind of lifts of the paper“. She also shades both sides of the curved strokes. At 04:37 – Molly blends out the graphite with the tortillion. Maria notes, “you can see now that it’s all of a sudden instead of a bunch of A’s, it’s becoming a patterned ribbon.“
Step 6: At 05:13 – Molly moves to the letter D and uses the Sepia PN for her letters. She mirrors the D forms then adds embellishments. Rick notes that it’s becoming like a form of Zentangle steganography (where messages are hidden in pictures). Molly uses the Brown 01 to color in some of the shapes then the Orange 01. At 07:49 – She adds graphite shading and blends it out.
MARTHA – E, H, J
Step 7: At 08:18 – Using the Brown 01, Martha does the letter E using the lower case script and adds curved stroke details. At 09:38 – Using the Gold Metallic Gelly Roll, she adds more detail. Be sure to let the gold ink dry, it takes a bit longer than the regular ink. At 09:56 – She adds shading with the graphite pencil and lightly blends it out.
Step 8 At 10:24 – Martha moves to the letter H and with the Orange 01 she adds orbs as a foundation for Huggins, which is her last name. She connects and auras the orbs in pairs. At 11:08, as Rick describes the origins of the tangle, Martha changes to the Brown O1 and adds more details. At 12:41 – Martha adds Gold Metallic Gelly Roll to the pattern.
Step 9: At 13:00 – Using the Pink PN, Martha moves on to the letter J. At 14:25 – She adds graphite shading and blends it out.
MARIA – C, G, O, ?, L, M, &, #
Step 10: At 14:59 – Maria uses the Sepia PN to do the letter C. At 15:52 – She changes to the Pink PN to add more details. At 17:58 – She adds graphite and blends it out. At 17:27 – She uses the Orange 01 to add color.
Step 11: At 17:47 – Maria moves on to the letter G, using the Sepia PN. At 18:40 – She auras inside the letters using the Brown 01, then “auras in different places“. Then she adds perfs/orbs inside the aura spaces and colors in some of the spaces. At 20:13 – With the Orange 01 she adds a dot inside the perfs. Then she adds shading just to one side of the stripe and blends it out.
Step 12: At 20:56 – Maria tackles the letter O using the Sepia PN. At 21:32 – She uses the Pink PN to add “perfs inside that crescent moon shape“, then a little Fescu tendril inside each O. She then repeats the Fescu shape with the Orange 01. She then adds some color triangle shapes “in the interstices” with Pink on the top and Orange on the bottom, and a dot inside each O with the Fescu. At 22:55 – Maria adds graphite shading and blends it out.
Step 13: At 23:18 – She tackles the Question Mark ? row, again with the Sepia PN. She adds reverse S strokes with the Pink PN then graphite shading.
Step 14: At 25:16 – Next up, the letter L. Maria uses the Sepia PN to make a script letter L. at 26:13 she adds a connecting stroke with the Pink PN. AT 26:43 she adds Orange 01 auras and triangle shapes.
Step 15: At 27:20 – Of course Maria has to do the letter M (and she has plenty of practice at it!), she uses the Pink PN. At 27:49, with the Brown 01 she adds an aura to the right of each stroke. Then she adds an aura to the left of the original strokes (creating a “Betweed-like” woven appearance). At 28:52 she adds “a flame shape” in the spaces created by the auras. at 27:19 she “goes with the flame idea” and adds orange to the base of those shapes. At 29:35 she adds a connecting stroke across the top and bottoms between the “flames”. at 29:50 she adds graphite shading and blends it out.
Step 16: At 30:12 Maria moves to the letter V, using the Sepia PN. At 31:01, using the Brown 01 she adds a rice shape between the V’s then another small one on each side of it. At 31:38 she turns the card and adds another rice shape inside the V itself. AT 32:01 with the Pink PN Maria adds a loop/rice shape between the other two. At 32:31 she adds shading and blends it out.
Step 17: At 32:35, using the Brown 01 Maria begins the Ampersand (&). At 33:24 she adds Gold Metallic Gelly Roll detail. At 34:02 with the Orange 01 she adds detail inside the counters. After the Gold ink dried, she adds auras with the Orange 01.
Step 18: At 34:34, with the Sepia PN and using varying pressure, Maria adds to the # sign row. At 35:05 with the Brown 01 she connects the individual signs, or hashtags as they’re commonly known today. At 35:50 she adds Orange details. At 36:04 she adds Pink details. At 36:12 she fills some spaces with graphite and softens them, then at 36:39 she adds a graphite aura, “and then I’m just going to pull it off“.
Day 2
In Day 2’s video (38:29) – With Rick and Maria observing and commenting on each letter, together with Julie, Molly and Martha, they all take on different letters of the alphabet as well a punctuation marks.

Julie – B
Step 1: At 00:00 – Rick and Maria provide commentary as Julie tangles the letter B and using the Pink PN she adds a row of mirrored capital B’s. At 00:41 Julie switches to the Brown 01 to add embellishments between the pairs of letters. At 01:02, changing back to the Pink PN she adds weight to the counters of the B strokes. At 01:19 she adds graphite inside the counters as well as the guidelines and smooths it with a tortillion “to tie all those elements together“.
Rick – P
Step 2: At 02:21 – Rick uses the Brown 01 to do the letter P and as he mirrors and flips the letter he makes a point of the importance of turning the “tile”. At 03:44 he adds graphite “to the overall shapes” he sees on one side, then blends it with a tortillion.
Molly – K
Step 3: At 04:53 – With the Brown 01 Molly adds a row of the letter K each attached to the next, creating a row of triangles. At 05:19 with the Sepia PN, inspired by ‘Nzeppel and what we now call ‘Nzeppling, she “squishes” a shape inside each space. At 05:55 she adds Gold Metallic Gelly Roll to fill in the spaces. At 06:18 she adds an outside aura with the Brown 01.
Rick – R
Step 4: At 06:34 – Rick uses the Sepia PN to do the letter R. He adds mirrors and rotated letters then at 08:16 he fills the counters with Gold Metallic Gelly Roll, covering up the stroke between the counters to make a large oval shape, “golden eggs”. At 08:33 he fills in another shape with the Sepia PN, so the letter shapes become obscured. A reminder that the Gold ink stays wet “for quite a while“.
Molly – T
Step 5: At 09:10 Molly begins with the Brown 01 to create a continuous line of lower case script letter T. At 09:33 Rick explains why it’s called lower case while Molly adds an aura to all the down-strokes, then adds the crossbars. AT 10:20 she adds strokes inside the crossbars. At 10:33 she fills the down-stroke spaces with the Pink PN. At 11:03 with the Sepia PN she adds a “shadow” to the filled down-strokes and uses it to aura the crossbars. At 11:21 she adds graphite shading.
Maria – U, Y
Step 6: At 11:45 – With the Sepia PN, Maria begins the letter U while reminding us to mark its barrel with tape because the dark brown can be confused with a Black PN because the color on their caps appears the same. She connects each U then at 12:36 she adds an aura to all the down-strokes (similar to Molly’s T, above). At 12:55 with the Orange 01 she adds a Crescent Moon-like “bit of color” to the base of each U. At 13:10 with the Pink PN she adds a teardrop shape above the Orange. At 13:19, back to orange she auras the Pink shape. With the Pink PN she auras the spaces between the letters and fills in the shape created by the aura and the guideline. At 13:46 she adds graphite shading, reminding us to be sure to let the color inks dry before adding shading.
Step 7: At 14:26 – With the Sepia PN Maria does the letter Y. She alternates them right side up and upside down, then connects the tops of each Y along the baselines. At 15:40 she auras the inside of the Y with Pink PN and fills in the triangle shape. At 16:03 she adds shading, leaving a space and blending it out.
Molly – N
Step 8: At 16:50 – With the Brown 01, Molly adds the letter N, then auras the crossbar and fills in the space created. At 17:43 she adds a serif to each; at 17:49, with the Sepia PN she adds a pair of down-strokes at the center of each letter. At 18:06, using “take off and land” she adds a “fleur de lys” from the top and bottom of each pair, “a Mom thing”. At 18:33 she fills the shapes with Orange. At 18:56, with the Sepia PN she restates the crossbars to make them a bolder accent.
Rick – Q
Step 9: At 19:33 – With the Brown 01 Rick adds the letter Q, alternating right side up and upside down. At 20:24 he fills the counters with Orange. At 20:37 he fills in some of the spaces with Pink PN. At 20:45, after the Orange dries he adds “a little bit of graphite on those orbs“. At 21:14 he adds Gold Metallic Gelly Roll to the remaining spaces.
Molly – I, X
Step 10: At 21:32 – With the Sepia PN, Molly adds the letter I, using a Roman style capital letter with serifs. At 22:10, with the Brown 01 she adds a line of dots down the middle of each letter then at 22:20 she adds “that familiar ladybug shape“, a Crescent Moon shape on both sides of the letters and fills them in, “so there’s the sense of an orb behind it“. At 22:45, using the Orange 01 she auras each ladybug shape. At 23:03 she adds a large dot between each letter using the Sepia PN then at 23:12 she adds graphite between the letters along the guidelines and blends it out.
Step 11: At 23:40 – Using the Brown 01 Molly adds a row of the letter X. At 25:06 she ‘Nzeppels the shapes inside the spaces. After reinforcing the X shapes, at 26:02 she adds graphite and blends it then she adds rounding to fill in the outer edges.
Rick – F, W
Step 12: At 27:33 – With the Brown 01, Rick adds the letter F, rotating his tile after each one so each is in a different orientation. At 28:44 with the Orange 01 he adds “the largest orbs that can fit” in all of the spaces. Still using the Orange 01, he adds a stroke “sort of tying them all together … then fill in the interstices“. At 29:30, for “an interesting contrast” he adds pink inside each of the orbs, then he adds a dot of Gold Metallic Gelly Roll inside each of those.
Step 13: At 30:02 – With the Brown 01 Rick uses two strokes “on what would be the down stroke” of each to add the letter W in an overlapping way then he adds serifs to connect them. At 31:40, he adds a Gold Metallic Gelly Roll dot “in the little triangles“. At 31:50, with the Orange 01 he adds aura strokes in the bottom triangles. At 32:15 he adds graphite to shade the bottom side of the row.
Molly – S, Z
Step 14: At 32:36 – With the Sepia PN, Molly adds the letter S. At 32:52, using Pea-nuckle, she connects each S with another S and fills the middle spaces with S auras. At 33:23 She adds aura strokes in the top and bottom spaces, filling in at the top of the original S shapes. At 34:09 she adds graphite to emphasize the “over-unders”, as my Mom calls them 🙂
Step 15: At 34:41 – Molly uses the Sepia PN to add the letter Z in a ribbon-style grid then at 35:34 she fills in the upper and lower spaces. At 35:56 with the Pink PN she auras the outside edges of the row. At 36:10 she adds graphite shading.
Martha – !
Step 16: At 36:32 – With the Pink PN, Martha adds a row of the Exclamation Point/Mark, “drawing the letter or the shape then going in and beefing it up afterwards“. At 37:00 she rotates the paper and with the Orange 01 she adds a row between the Pink. At 37:30 she auras the upper part of each exclamation mark. At 37:49 she adds graphite shading.
Day 3
In Day 3’s video (21:37) – With Rick keeping her company, Maria tangles a lesson on “Initial Caps“. Today’s the day we tangle on the other side of the Alphaborders card.

Step 1: At 00:00 – Maria introduces her lesson and explains the origin of Initial Caps. She shows a few examples and explains she’s going to break it down into a simple process.
Step 2: At 01:30 – She makes a simple pencil grid by drawing horizontal lines at the fold marks, then making ticks at the halfway point of each section and connecting them with a loose light vertical pencil line. At 02:48 she repeats that in each vertical section, creating 4 columns, then (03:11) she turns the card and repeats this process to end up with 16 blocks/grid squares in each third of the card. A total of 48 blocks.
Step 3: At 03:40 – With the Sepia PN, Maria “puts down a fairly basic Roman Alphabet, and we’re going to do two of each because we’re going to want to leave one naked and the other one we’re going to dress it up.“
Step 4: At 04:53 – Rick notes, “this is not about calligraphy as much as it is about creating a little structure on which tangles can grow.”
Beefing Up the Letters
Step 5: At 08:34 – Maria begins at the letter A: “We’re going to beef up these letters …. by beefing up these ends of the lines and then the curves on either side and a little bit of rounding. She moves down the page adding these to each letter giving tips and making observations as she goes.
Aura
Step 6: At 12:52 – With the Brown 01, she adds an aura around each letter, turning the paper as necessary so her hand is most consistently making strokes from “up and down instead of side to side … because you don’t have the same control of your pen side to side.”
Mooka, Rounding, Leaf Shapes, Aura
Step 7: At 15:13 – “So now that we’ve got that foundation we’re going to add some single Mookas where it looks like there’s space“. She begins with the letter A. Where there’s a bit of space left she adds “little looping like petals“. And rounding around the outside Mookas, bringing together those elements. Then she adds an aura around the entire motif.
Step 8: At 17:18 – She moves on repeat the process on the other letters.
Step 9: At 21:22 – “If you ever see an alphabet of these initial caps you’ll see now that there’s a formula for it. So you’ll be able to take the formula and deconstruct it and play with it.”
Day 4
In Day 4’s video (13:26) – With Maria keeping him company, Rick explains some ways to find different forms of a letter. He creates a set of four Bijou tiles as a result of his explorations and then demonstrates what can be done with them in a tiled mosaic.

Step 1: At 00:00 – Rick begins by demonstrating with a Roman capital R and a pair of mirrors how one can explore various configurations of a letter shape. At 01:42, “And I’ve used that to come with my inspiration.” He also shows how you can use two L shape cards or pieces of paper “as a framing device to isolate parts of a form“.
Step 2: At 02:22 – With the Sepia PN, he takes that idea to create a form of the letter R on a Bijou tile. Then using the concepts from Day 3’s video he “beefs up” the letter, including on the tail of the R where he uses the concept of “anchored auras, tethered at one end, tethered at the other“.
Step 3: At 04:14 – With the Brown 01, he adds an aura around the letter.
Step 4: At 04:33 – He changes to the Pink PN and adds Flux in and around the letter.
Step 5: At 05:35 – He uses the Orange 01 to add orbs in the Flux spaces then colors in the spaces.
Step 6: At 06:36 – He adds the “center spines” of each Flux with the Gold Metallic Gelly Roll and also uses it to add a Gold dot inside each orb. “So that’s one element.“
Step 7: At 07:30 – “Now I want to do another element,” and with a second Bijou tile he matches it up to one side of the first tile. “I want them to meet at the same place … and in this case we’re mirroring.” He repeats the same process as the first “element” but mirrors the first tile using the first one as a guide to line up the parts of the letter.
Step 8: At 08:48 – He has repeated creating the mirrored letter on two more tiles and demonstrates how they line up. By now the Gold ink has dried enough that he can add graphite.
Step 9: At 09:55 – “I will now go back and work on all of my other three tiles.“
Step 10: At 11:00 – He assembles all four tiles together in a mosaic.
Step 11: At 11:24 – “But wait, look what happens,” as he turns the tiles around to make a different configuration. “You can put them together in different ways and you have this meta pattern“.
Step 12: At 12:12 – “What if you have more of these? So I took a picture” and using Photoshop he created tiling patterns using all four tiles and shares a series of beautiful patterns composed from the set.
Day 5
In Day 5’s video (14:41) – With Rick keeping her company, Maria demonstrates how to embellish letters and add Alphaborders to create messages to use as gifts/letters to mail to someone.

Step 1: At 00:00 – Using the Sepia PN (I think in this video it looks black to me?), Maria makes a large letter L in the center of a white tile. She explains, “I’m following up on some of these letters we made the other day (Day3).” She beefs up the letter, then with the Pink PN she auras the form and adds “Kissing Mookas”, leaf shapes and curves in the spaces in and around the form. Finally she adds an aura around the outside to “kind of hold it together.”
Step 2: At 03:03 – “So what do you do with these letters?” As she talks about sending and receiving mail, and sending “brief messages” Maria adds weight and solid ink fills around the letter.
Step 3: At 03:40 – On a new tile she creates the letter J with the Sepia PN and following the same formula she auras it with the Brown 01, adds leaf shapes, some solid ink – “bits of concentrated color“.
Step 4: At 05:29 – With the Sepia PN she adds the letters o and y with some decorative swirls and weighting.
Step 5: At 06:06 – She displays a few of the letters done on Day 3 and begins another tile with the letter L, placing it off center to use it as a “drop cap” using the Sepia PN. She creates the word Laugh, adding the letters A, U, G. H. Then she writes the word “often” below it.
Step 6: At 07:47 with the Brown 01, “I’m going to put a detail in here .. we’ll imagine this is going to somebody [whose name begins with] with the letter J” as she adds a vertical alphaborder using the letter J. She mirrors the J’s, adds diamond shapes at their bases, then with the Orange and Pink pens she adds more details. “Just aura in the spaces between“. At 09:50 she adds graphite around the letter L to lift it visually from the tile, as well as along the edges of the Alphaborder “ribbon”.
Step 7: At 11:20 – She shows the “Joy” tile again together with some other ones done earlier that demonstrate ways of using Alphaborders to enhance the “logo” letters, “different directions and explorations we did“. At 12:05 she shows one with a message: “Oh Well” is in the border surrounding “Be Well” in the center.
Step 8: At 12:49 – Maria shows a tile using Y’s for the Alphaborder and demonstrates how she did the border.
Step 9: At 14:20 – Maria shows a mosaic of tiles she made as “Thank You” cards to the Zentangle staff who had sent her gifts for her recent birthday. “I just did a letter for each one and a little message on the back.“
Day 6
In Day 6’s video (32:44) – Molly and Martha explore using letters as strings, “lost in tangleation” (#lostintangleation).

Step 1: At 00:00 – Molly and Martha introduce themselves and Molly explains for their lesson they decided to explore using letters as strings, “lost in tangleation“. #LostInTangleation
Step 2: At 00:37 – Molly displays a Phi tile they wrote the word “Family” on, and “we decided to explore one tangle per letter … it sort of is a hidden message and kind of speaking in tangles.”
Step 3: At 01:02 – She points out the F is Pokeleaf, the A is Tripoli, M is Static, I is IX, L is Jonqal, and Y is hidden in radiating Flux petals (or Verdigogh Needles). “This is just a way to use these letters as a word or a string as a hidden language.”
Step 4: At 01:37 – They show several Bijou tiles created with the concept of the letter as a string.
Step 5: At 02:45 – On a blank Phi tile, “we’re not drawing the letters in pen, we’re drawing them in pencil as if they are our string.” Martha writes the word DRAW.
Step 6: At 03:48 – She starts with the letter D and uses the Brown 01 to tangle Verdigogh.
Step 7: At 07:56 – Using the Sepia PN, Molly uses the letter R as her string to tangle Mooka. At 11:45 she changes to the Orange 01 to add more Mooka and some orbs to fill spaces. At 12:43 with the Sepia PN she adds another layer of Mooka then more Orange orbs.
Step 8: At 13:40 – Martha skips the A and moves to the W with the Sepia PN to tangle Crazy Knightsbridge starting with a wonky grid. At 16:49 she changes to the Pink PN to fill in just one of the squares.
Step 9: At 17:35 – Molly does the letter A using Tripoli starting with the Brown 01. At 20:47 she adds “a classic filler” inside her Tripoli. At 21:15 she changes to the Pink PN to add a “smushed orb” inside each triangle.
Step 10: At 22:23 – Molly adds more Mooka fronds that travel through the Tripoli then adds rounding to the composition, “it’s like a little mortar“.
Step 11: At 23:31 – Martha comes in the the Pink PN to add orbs “sprinkled throughout“.
Step 12: At 25:35 – Martha adds shading to her D and W letters and blends it out.
Step 13: At 28:34 – Molly adds shading to her R and A letters and blends it out.
Day 7
In Day 7’s video (17:54) – With Rick keeping her company, Maria works with letters in circles today.

Step 1: At 00:00 – Maria explains we’re going to work in circles “with letters repeating but repeating in their regular form“. With a pencil she places a circle in the center of a tile then with the Sepia PN she adds the letter L growing from the circumference of the circle.
Love
Step 2: At 00:47 – Adding the letter O under the circle of L’s, “We’re going to spell out a word or a name and then work within those parameters after they’re down.” After the O’s have been laid down, she adds the letters V and E in the same fashion.
Step 3: At 02:06 – She notes “the only thing you have to be aware of is if you have a word that is really long, the letters have to be smaller”. She suggests writing “the word on a scrap piece of paper to get a sense of how long it’s going to be and how big the letters have to be.“
Step 4: At 02:23 – With the Brown 01 she adds “some love … no pun intended“. She adds auras, triangles, rice shapes …
Step 5: At 04:04 – She adds Pokeroot to the E’s. Then fills the O’s with a single Crescent Moon.
Step 6: At 06:30 – With the Sepia PN she adds an aura around the whole image, then adds (07:15) another aura next to the first one.
Step 7: At 07:53 – She adds graphite shading and blends it with a tortillion.
Step 8: At 09:58 – Using the Orange 01 she adds orbs in the center, “like a Bronx Cheer“, then “a little bit of graphite around the edge“.
Step 9: At 10:56 – “I’m going to hang one of my M’s here“.
Step 10: At 12:07 – After squinting at it, “Maybe it’s not done yet“. With the Sepia PN she goes back in and “bringing more concentration to the letters“, she restates them to make them bolder.
Rachel
Step 11: At 12:35 – She has begun a new tile with the letter R at the center and the letters are smaller because she’s doing her sister Rachel’s name.
Step 12: At 13:02 – “Be aware of how the letters fit together and what kind of opportunities you’ve going to have,” as she connects the crossbar of the A’s with a diamond shape using the Brown 01. After the C’s are added she repeats connecting using the Brown 01. At 13:25 after the H’s are added, she adds orbs at their crossbars to connect them with the Orange 01. Then she goes back into some of the diamond shapes and fills them with Orange ink.
Step 13: At 13:39 – After the E’s are added, she puts a Pokeleaf between each one with the Brown 01. “I love them because you can manipulate them to fit into pretty much any kind of space, and I think that’s why they were used in ancient manuscripts.” At 14:00, after the L’s have been added she places more Pokeleaf between them and connects them to the ones above in the row of E’s.
Step 14: At 14:54 – With the Orange 01 Maria adds small orbs around the outside edge. Then she sprinkles them throughout in various spaces.
Step 15: At 15:20 – She adds graphite shading between the columns of letters and blends out only one side of the graphite. This makes the name pop.
Step 16: At 16:08 – She adds a graphite aura around the whole motif and blends it outwards, raising the entire motif off the page.
Richard
Step 17: At 17:27 – She shows a Zendala tile with “Richard” spelled out.
Day 8
In Day 8’s video (19:37) – On the last day of the series, with Rick keeping her company Maria tangles a bold letter A border on a white Zentangle tile.

Step 1: At 00:00 – After introducing themselves, Maria shows us a way to use the tools, in this case the pencil, as “a comparative measuring device” to place our dots and border, which she proceeds to do.
Step 2: At 01:01 – With the Sepia PN she places a dot approximately half way along each side, “and we’re going to work with the letter A“. She adds a letter A between the border and the edge of the tile on each side.
Step 3: At 02:20 – She adds another A at each corner of the tile.
Step 4: At 02:59 – She goes around the tile and adds a “flipped” letter A between each of the others.
Step 5: At 04:05 – She goes back to each letter and adds boldness to them — “beefs them up” (see Day 3) — gradually building up each letter. (07:18) The letters end up connected to each other.
Step 6: At 08:18 – With the Brown 01 Maria adds an aura around the inside of the connected A’s and then inside the shapes created by the letter forms.
Step 7: At 10:48 – With the Orange 01, Maria “adds some tangly things inside“. She adds rice shapes and auras inside the first row of A’s, so you can consistently repeat the same thing within each one.
Step 8: At 13:02 – She adds the same Orange rice shapes and auras inside the second row of A’s.
Step 9: At 13:51 – Next she goes to work on the spaces between the A’s.
Step 10: At 14:30 – She adds a graphite aura insides along with a heart and softens the graphite in one direction away from the line. She spends a good deal of time using the tortillion, blending and softening the graphite to get the effect she wants.
Step 11: At 18:27 – She shows another version of the same tile done with the Pink PN instead of the Orange 01.
Step 12: At 18:35 – She shows a partially done black Zendala with white ink. “Then Molly says, ‘yeah, there no black and there’s no white and there’s no Zendalas in [this Project Pack] right?’. So I took the idea of what I had done and did it on the square. But you can see the white on black is very powerful.”
Wrap Up
(10:15) – In the wrap up video for Project Pack 15, Rick, Maria and Molly discuss their experiences and challenges from the “elegance of limits” presented by their concept and the tools.

Step 1: At 00:00 – After introducing themselves, Rick comments that initially he thought this concept would be easy but he actually felt himself challenged by it at first, “It took me a little while to get some traction.“
Step 2: At 00:48 – Molly gives her overview of the experience and that they had each “hit a wall” coming up with what they wanted to do for the lessons. They took a bit of a break and reset, then they began to get momentum.
Step 3: At 02:01 – “But once we got that momentum we were all like ‘this is so fun’! But just to let you all know we too have times where things don’t feel right and we have to take a break and revisit them.“
Step 4: At 02:39 – Maria talks about how when you reach a block, letters are always there for you to play with, in all of the forms we’ve explored in this Project. You can just pick any letter, word or combination of letters to get going.
Step 5: At 03:39 – From there they all discuss how much they enjoyed all the different explorations they tried as they were working out the lessons and they display all the tiles and practice runs they did.
Step 6: At 05:40 – Molly explains why they included the little glassine envelopes.
Step 7: At 06:30 – Molly notes that “since the beginning of Zentangle, Zentangle itself has become sort of it’s own language and we’ve been able to cross cultures and spoken languages and oceans and all these different things to have this community that’s come together that speaks one common language. The language of tangles.“
Step 8: At 07:16 – Maria says, “I want to throw in too that why stop at numbers?” and she gives some ideas about those.
Step 9: At 07:36 – Rick responds to Molly’s comment about the language of tangles, “I think that this is a common language among people because it’s also a common language throughout all of nature. So many of the tangles that we do are things that you see in nature and and how how we perceive our world. And it transcends language, it transcends dogma, it transcends politics, it transcends age, and it transcends abilities. And it’s a wonderful place to meet that is based on creating something beautiful. You’re no longer being passively in the audience but you’re actively adding to this language. So you’re not just learning a language you’re creating the language along with everybody else.“
Step 10: At 08:31 – He shows one of the Alphaborder pages they all contributed to, “I think probably Maria did most of it.” Maria responds how she enjoyed “stretching my creative muscles“. They follow with a discussion of all of the work they’ve been seeing on the Mosaic App based on this Project and how people took the ideas to levels they never expected.
Step 11: At 09:50 – Rick explains, “It’s like we plant these seeds and sometimes you know you get a seed and you don’t know what plant it is but you plant it and then it comes up and it’s like totally unexpected. We’re putting these seeds out there and just watching what grows in the Zentangle community and we’re so grateful for all of you.“
BONUS LESSONS – in the near future Zentangle will be adding #LostInTangleation (see Day 6 above) bonus lessons. Keep an eye out, I’ll be adding them to the site. If you aren’t already subscribed to the FREE TanglePatterns newsletters, visit the SUBSCRIBE page to sign up so you don’t miss a thing!
This recap of Zentangle’s Project Pack #15 will make it easy for you to find all the related videos and any parts of them you may wish to refer to again.
Remember the images above are linked to their YouTube video, simply click the image to go to the video. Also: each of the complete videos are included on the corresponding tangle’s page on TanglePatterns.
For a complete list of Zentangle’s Project Packs click the PROJECT PACKS link in the pink alphabetic tangle menu bar.
|
.oOo. |
|
Enhance your Zentangle experience while supporting TanglePatterns: |
|
BRAND NEW! TanglePatterns.com TANGLE GUIDE, 2026 Edition |
|
 |
The 15th Edition of the TanglePatterns.com TANGLE GUIDE is an instant-download 123-page interactive digital eBook/PDF containing over 2,300 tangles on the site from May 2010 through December 31, 2025. It's a great resource and a must-have digital tool for using the site. Visit the STORE > E-BOOKS page and help keep TanglePatterns.com going by getting your copy now! |
|
"Linda, Thank you! I was relying on too few and getting stuck after 3 years of daily working with Zentangle. This has inspired me to ‘begin again’ with renewed excitement." ~ Barbara R. |
|
| See the BOOK REVIEWS page for more details on its features and view a sample page. Note: this is a digital product downloaded immediately when ordering, nothing will be physically mailed to you. | |
| If you're new to Zentangle® and tangling, my TanglePatterns.com BEGINNER'S GUIDE TO ZENTANGLE is just what you need to get started. Also available en Français and en Español. | |
|
|
|
 |
This is the only Zentangle book you'll ever need: the fabulous Zentangle PRIMER Vol 1. It's your CZT-in-a-book by the founders of Zentangle®. For more about the content and to read the rave reviews, visit the BOOK REVIEWS tab. |
| Available in KINDLE format for $9.99. Spanish Edition here. Japanese Edition here. | |
| "Absolutely the best Zentangle Book yet! As an accomplished artist I used to think I did not need instruction on this art form. How wrong I was! My tangling improved by leaps and bounds after reading this book. If you think you have Zentangle down then you need this book more than ever!" ~ Kris H | |
|
|
|
|
.oOo. |
|


RECENT COMMENTS