


 Greetings folks and welcome to a special holiday edition Zentangle-inspired tutorial.
When Canadian tangler Cyndi Knapp sent her Estrella tangle for the site recently, she included a brief introduction to her idea to decorate her windows for the holidays with Zentangle-inspired chalk art. This is such a fun concept that I decided it deserved its own post.
In the following, Cyndi shares the inspiration for her suggestion and the tips and ideas she learned from her initial experiments in tangling her windows for the holidays.
Here’s Cyndi …
.oOo.
I thought the tangle Estrella would be lovely as a seasonal window decoration – a great excuse to try Window Chalk Art. The idea didn’t come to me in time to do more than a test run before I needed to submit the pattern, so I debated whether to include it. In the end, I decided it might at least give others an idea to try before the holiday season is upon us.

Holiday window chalk art by Sarah Reeves, screenshot from her video below.
There are many tutorial videos online for window chalk art — I liked the tips and tricks in this one from British clay artist Sarah Reeves:
I’m certainly no expert having only tried it the once but I did learn a few things that might also be helpful.

Best Seller on Amazon. 8-Pack 6mm Chalk Markers with reversible tips – $7.99 Also comes in 16-Pack, $16.88. In her video description, Sarah notes she used Chalkola markers which are slightly more expensive.
1. Start with one chalk marker to see if you like this technique
I bought one white chalk marker (with a rounded tip) to see if I liked window tangling before buying more supplies.
I thought white would show up against the natural beauty of our rural setting and a morning’s hard frost:
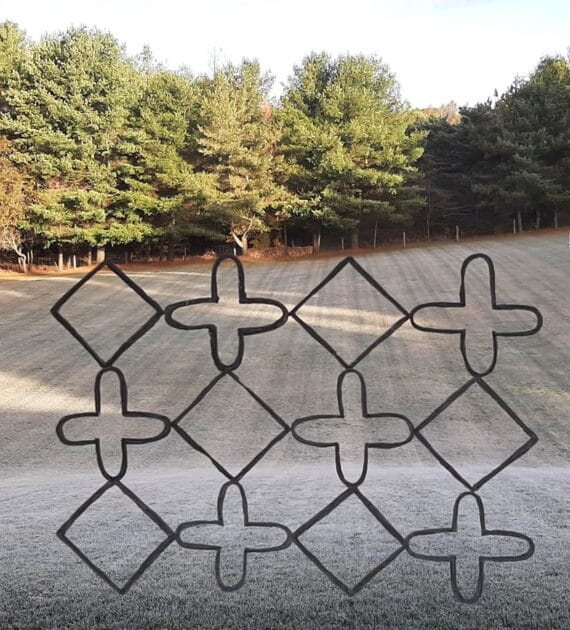
However it didn’t really, it looked better at night:
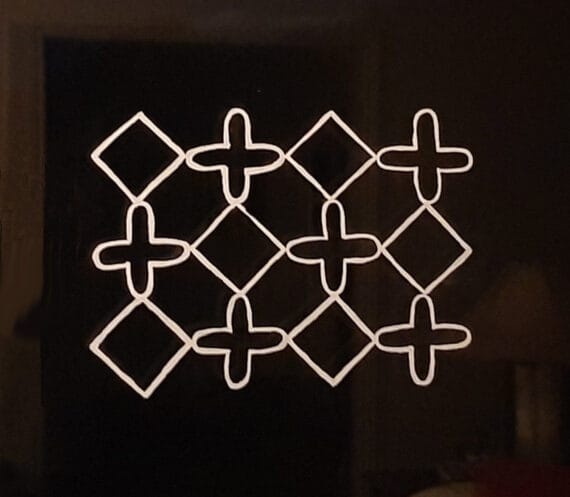
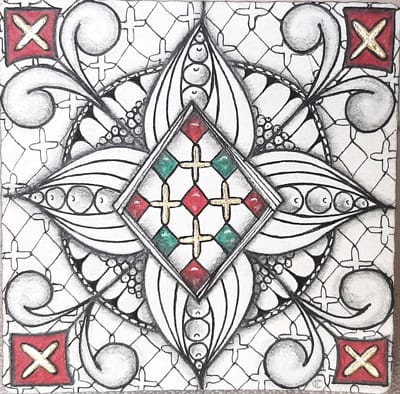
So I’m thinking for a soon-to-be snow blanketed setting, it would be a pretty window tangled in gold, red and green like the medallion centre of the coloured Zentangle illustration for Estrella.
2. Do a test run to help you determine …
- what tangles you want to use
- what size you want to tangle them
- placement of the tangles on your window, if you’re not tangling the whole window
- the chalk marker colours that might work best for your setting
- the chalk marker tip sizes you might need
I’m thinking medium or large tips are a good general size, smaller tips for embellishments and chisel tips for writing … depending on the tangles you choose and how bold you want them to look.
3. Choose your tangles wisely
The more precise, detailed and dense (as in fill) the tangle, the more time it will take you to finish your window project. As you’d imagine, more simplistic tangles for example Printemps, Tipple, Flux, Pokeroot, Pokeleaf, etc. will tangle up more quickly.
4. Make a template
As suggested in the above video, I drew a template which was helpful.
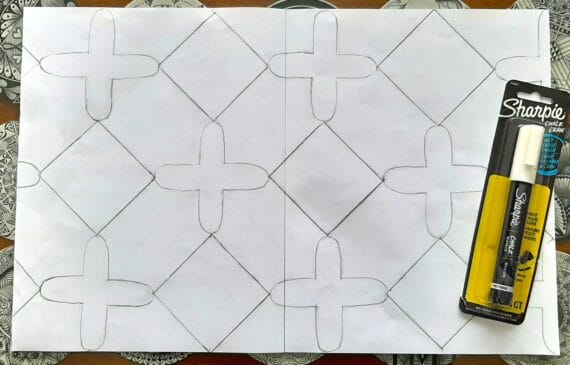
Templates are great for window tangling sentiments and more precise tangles like Estrella. However, taped on the outside of a double or triple paned window, expect some distortion when you go indoors to tangle.
5. Keep a clean-up cloth handy
Since the position of your hand and arm is much different when tangling on a window than on a tile, you might want to keep both a damp and a dry paper towel or cloth on hand. Although there are no mistakes in Zentangle, if you really want to change something, it’s best to do so as you go along rather than after your window tangle design is finished.
6. Work from left to right
One of the best tips in the above video is to work from left to right (if you’re right handed) so as not to brush your arm across your art and smudge it.
.oOo.
Thanks so much for sharing this fun idea and the results of your experiments, Cyndi.
I’m thinking if you don’t want to go all the way with your windows, you might like to decorate a mirror or two using this idea. UPDATE: Cyndi experimented with this too and found it’s possible the chalk could run if your mirror is affected by a lot of steam such as in a bathroom. A good thing to bear in mind before proceeding.
This is a colorful fun way to add a Zentangle touch to your seasonal decorating. Get tangling with chalk markers!
And if you try this and have any more tips and suggestions to offer, please feel free to add them in the comments 🙂
Have a great weekend …
|
.oOo. |
|
Enhance your Zentangle experience while supporting TanglePatterns: |
|
BRAND NEW! TanglePatterns.com TANGLE GUIDE, 2026 Edition |
|
 |
The 15th Edition of the TanglePatterns.com TANGLE GUIDE is an instant-download 123-page interactive digital eBook/PDF containing over 2,300 tangles on the site from May 2010 through December 31, 2025. It's a great resource and a must-have digital tool for using the site. Visit the STORE > E-BOOKS page and help keep TanglePatterns.com going by getting your copy now! |
|
"Linda, Thank you! I was relying on too few and getting stuck after 3 years of daily working with Zentangle. This has inspired me to ‘begin again’ with renewed excitement." ~ Barbara R. |
|
| See the BOOK REVIEWS page for more details on its features and view a sample page. Note: this is a digital product to download immediately when ordering, nothing will be physically mailed to you. | |
| If you're new to Zentangle® and tangling, my TanglePatterns.com BEGINNER'S GUIDE TO ZENTANGLE is just what you need to get started. Also available en Français and en Español. | |
|
|
|
 |
This is the only Zentangle book you'll ever need: the fabulous Zentangle PRIMER Vol 1. It's your CZT-in-a-book by the founders of Zentangle®. For more about the content and to read the rave reviews, visit the BOOK REVIEWS tab. |
| Available in KINDLE format for $9.99. Spanish Edition here. Japanese Edition here. | |
| "Absolutely the best Zentangle Book yet! As an accomplished artist I used to think I did not need instruction on this art form. How wrong I was! My tangling improved by leaps and bounds after reading this book. If you think you have Zentangle down then you need this book more than ever!" ~ Kris H | |
|
|
|
|
.oOo. |
|


Wow Cyndi! What a great idea. Question … how well do the chalk marker marks wipe off the window and mirror? Any tips for us about clean-up?
Thanks lots, and happy holidays!
Good question Barb,
My window tangle test was only 17″ x 11″ (43.18 cm x 11/27.94 cm) so when I removed it, it was easy peasy. I simply swiped a somewhat more than damp sponge across it and, after rinsing out the sponge, repeated this a second time to remove the initial smear. Then I dried the area and there was no trace of any chalk. Removing a larger area, I’d expect to be as easy, it would just take more time.
For any slippages (or things you want to change), it’s more difficult in that you have to be more precise so as to not wipe off lines you want to keep. In this instance, I wrapped a piece of damp paper towel around my index finger to remove the slip up. Still, I did remove a tiny bit of another line and because I only went over the removed area once, there was a slight white smear. Had this been the real deal, I probably would’ve gone over it a second time but it was hardly detectable. Tangling a busier pattern or using fill over the faint smear would likely have covered it. (If you do happen to remove something you don’t want to, you can go over it with the chalk marker, but Sarah Reeves was right, this is not ideal on already dried lines.)
As for mirrors, the same applies. However, when I did the steam test with a kettle, the chalk design literally started to run down the mirror which made removal even quicker and easier.
Hope this helps.
Cyndi
Yes! Thanks so much Cyndi! What a great response. Now to find some chalk markers!
Oh now this looks like such fun, and I can see tangling on glass around my house all year round! Thanks for the updates on how to wipe it off, and making sure it’s not a humid location haha
Great idea! Thank you for the detailed video.