


 Introduction: This is Part 2 of Cyndi Knapp’s 2-part tutorial on cardmaking.
In Part 1 – Making a ZIA Template, Cyndi shows us step-by-step how to make a template (4-up or 6-up as we used to say in the old desktop publishing world) from our ZIA art which we can then use to make multiple copies.
Here in Part 2, Cyndi guides us step-by-step through making multiple cards from our newly created template copies and shows examples of some ways you might customize the end results for different effects. Both tutorials are chock full of tips and advice to help you avoid any potential pitfalls.
Here’s Cyndi …
.oOo.
In 2004 my long time dear friend Barb introduced me to card making. Ever since December of that year, I’ve made my own cards for all occasions. I’m not proclaiming to be an expert but I do have some experience – according to my records, about 3,094 cards to date (not including prototypes). Over the years, my techniques have expanded from rubber stamps to photos to happily now include Zentangle®.
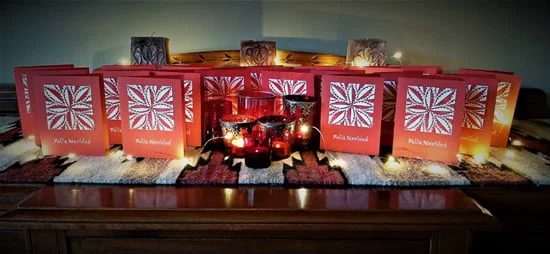
It’s great to be able to make personalized cards. Recipients love getting them in the mail instead of bills and many even collect them to frame or incorporate into their seasonal decorations. Some even send photos of how they display their seasonal collection. How nice is that!
This tutorial is the second of two parts in this series. Part 2 is about making ZIA copies into cards but the basic principle can be applied to most any type of card you want to make.
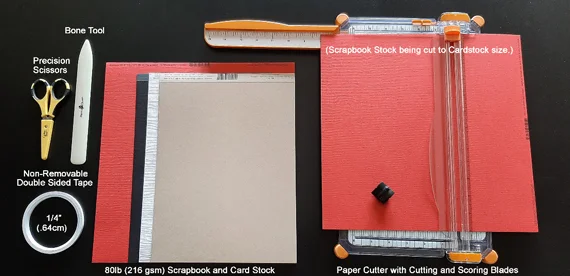
SUPPLIES
- Zentangle tangling tools
- 80lb 8.5 x 11 cardstock (216gsm, 21.5cm x 27.9cm) OR 12 x12 (30.5cm x 30.5cm) scrapbook stock cut to cardstock size; any texture, colour of choice. Makes two 4.25” x 5.5″ (10.8cm x 13.9cm) cards per sheet
- Non-Removable 1/4″ (.64cm) double-sided permanent tape
- Paper cutter
- Paper scoring tool – to make the fold line of a card
- Scissors
- Bone Folder Tool (optional) – to make the fold line crisp
- A2 “Invitation/Announcement Envelopes” – fit 4.25” x 5.5″ (10.8cm x 13.9cm) cards
NOTE: Dedicated card making tools are not the only options but provide the quickest method and give the best results when making your own cards. One alternative to investing in card making tools would be to buy ready made note cards – you won’t get the colour choices but they come with matching envelopes.
Before you start
When making multiple cards, I recommend making a prototype first. Doing so helps iron out any bugs, you may come up with ideas to improve your card, assembly of the rest of the cards ends up being faster and, last but not least, allows you to choose the cardstock colour before starting your project. (Keep prototypes to remind yourself of techniques and/or to use for your own seasonal display.)
I approach the process of making multiple cards in assembly line fashion starting with embellishing/colouring the ZIA copies and scoring the cardstock. It’s a quicker method than making each card individually because you: A) don’t break your rhythm or concentration per step and B) can put supplies away as you go to free up space. So, the following instructions reflect this method.
Step 1: Finish ZIA Copies and Choose Cardstock
- Embellish and/or colour all copied ZIAs. Doing this step first with small ZIAs (as below), reduces the amount of handling and clutter but Steps 1 and 2 are interchangeable.
- Cut all ZIAs to the desired size.
- Choose the cardstock colour (and texture if applicable). It’s best to choose the cardstock colour once your ZIAs are completed, unless of course, you made a prototype and already have this sorted out. It’s amazing the role that cardstock colour plays on the look of a card. Sometimes there isn’t a perfect colour so it’s a matter of settling for the best one but more often, there are multiple colour options. With the Christmas card example below, it was a hairsplitting decision between white and red cardstock.

Example of colouring a sheet of ZIA copies
Kazique ZIAs filled using Tombow #845 red and blended with a slightly wet Waterbrush
A Gelly Roll Stardust red pen was used to add glitter to the zigzag lines.
Step 2: Cut One or More Sheets of Cardstock to Card Size
NOTES:
- This assumes if you are using 12 x12 (30.5cm x 30.5cm) scrapbook stock, it’s already been cut to 8.5 x 11 (21.5cm x 27.9cm) cardstock size (see supplies photo above) and leftover scraps were kept for future uses.
- Usually cards are scored and cut for vertical use and simply flipped for horizontal use. But with a top fold, horizontal cards have a tendency to tent. However, if they’re made as per instructions below, the side fold ensures they’ll stand.
- There may be discrepancies in each half of a card. If the score line was not dead centre, one side of a card will be larger. If the cardstock was not cut perfectly square, the top and bottom of the card won’t be square. Depending on the severity of the discrepancy, most of the time it’s not worth trying to trim. However, if you must, trim both halves together. Or, if one side of the card is a little wider, attach the ZIA to the slightly wider side.
- Score all required sheets vertically according to the position of the cardstock:
-
- For a vertical card, the cardstock will be in a vertical position (as shown in the supplies photo).
- For a horizontal card, the cardstock will be in a horizontal position.
- Cut all scored sheets horizontally according to the position of the cardstock:
-
- For a vertical card, the cardstock will now be turned in a horizontal position.
- For a horizontal card, the cardstock will now be turned in a vertical position.
- Fold all the cards on the scored centre line.
- Drag the edge of a bone folder tool along the spine of all the cards to make their folds crisp. (Optional but Suggested)
Step 3: Assemble One or More ZIA Cards
- On the back of all ZIAs, place non-removable double sided tape around all 4 sides as close to the outer edges as possible.
- Per ZIA, peel the backing from the tape and mount it onto the card.
-
- A straight pin comes in handy to remove the backing from the tape.
- Hold the ZIA on either side between forefingers and thumbs and starting at the top of the card, position the ZIA carefully and lightly. You can usually see right away if the positioning is off. In this instance, sometimes but not always the ZIA can be lifted and repositioned.
- “Not Perfect is also Good” (Medi illustration, quote by Ria Matheussen) is usually the best policy to adopt and adds to the charm of handmade cards.
- Ensure the ZIA is securely attached on the card.
- Repeat Steps 2 and 3 until all ZIA cards are assembled.
- Add sentiments or personalized addons to all cards, if desired.
- Sign the back of all cards.
- If you’re going to make a lot of cards, consider having a pre-inked personalized stamp (eg. Handmade by name) made at a local office supply store.
Examples of ZIA Cards made from Templates
(Refer to Part 1 – Making a ZIA Card Template tutorial)
1. ZIA printed on 65lb (176gsm) white cardstock:

ZIA printed on 65lb (176gsm) white cardstock
Tangles: Afterglo, Facets, Triral and Zonked
Embellished with graphite pencil and Gelly Roll black sparkle pen
Mounted with a 1/8″ (.31cm) border on 80lb (216gsm) white canvas textured* cardstock
Glittery personalized numbers attached with permanent double-sided tape
* Bazzill canvas textured papers are smooth on one side so the inside of a card made with this stock is suitable for handwriting sentiments on.
2. Adding a sentiment:
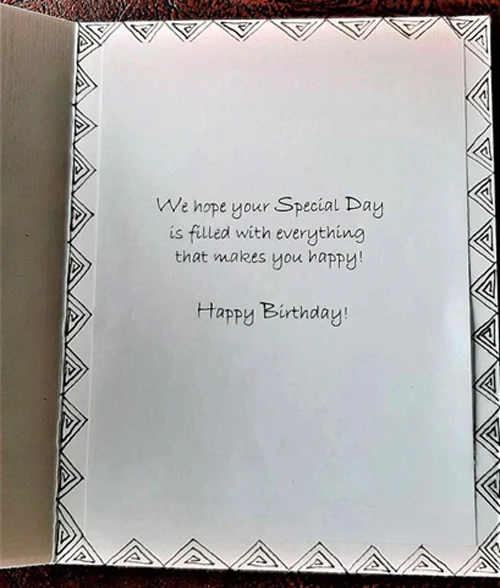
Adding a sentiment inside the card.
TIP: Cards with a dark coloured cardstock, may require a photocopy paper insert cut to desired size in order to write a sentiment. Inserts only need to be taped top and bottom with double-sided permanent tape. This example shows an insert with a printed verse attached within a tangled border on the cardstock.
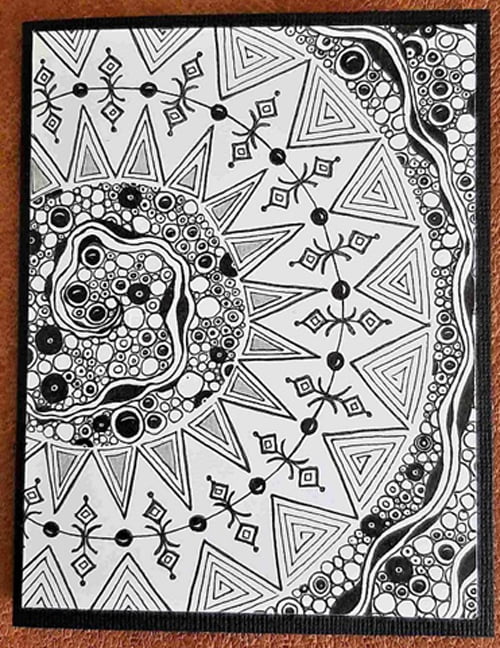
3. ZIA printed on 65lb (176gsm) white cardstock:
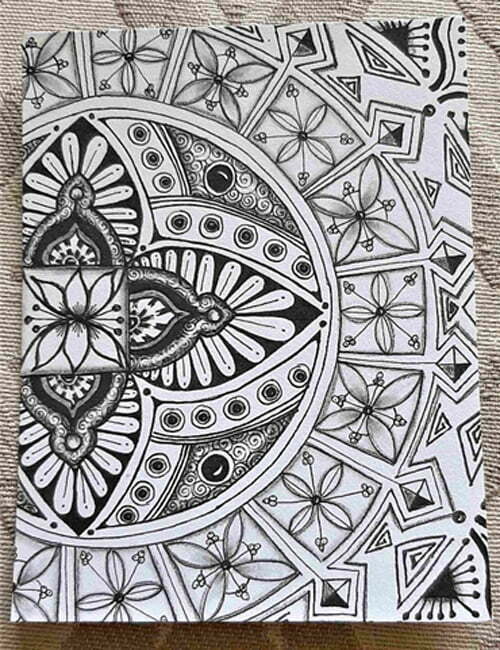
ZIA printed on 65lb (176gsm) white cardstock
Tangles: Copada (v), Jewelz, Jewely, Lotus Flower, Pinch, Printemps and Triral
Embellished with graphite pencil and Gelly Roll black sparkle pen
Mounted without a border on 80lb (216gsm) white canvas textured cardstock
4. Same ZIA template as #3 above but printed on 65lb (176gsm) kraft cardstock:
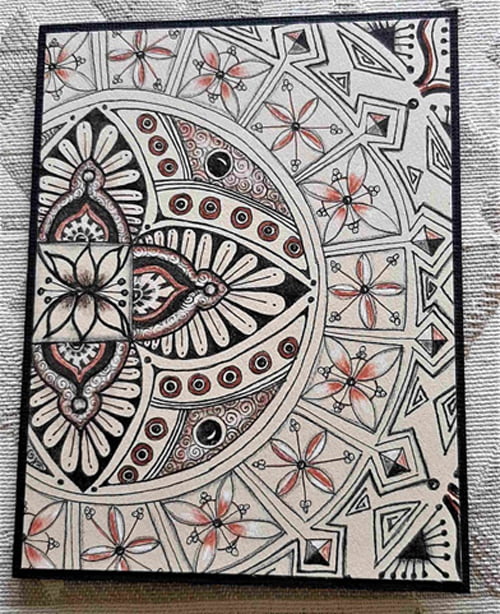
Same ZIA template as above but printed on 65lb (176gsm) kraft cardstock
Embellished with brown/graphite pencils and Gelly Roll black sparkle pen
Mounted with a 1/8″ (.31cm) border on 80lb (216gsm) black canvas textured cardstock
5. ZIA printed on 65lb (176gsm) white cardstock:
ZIA printed on 65lb (176gsm) white cardstock
Tangles: Diva Dance, Kiki, Tipple (v), Triral and Velos (v)
Embellished with graphite pencil and Gelly Roll black sparkle pen
Mounted with a 1/8″ (.31cm) border on 80lb (216gsm) black canvas textured cardstock
6. Same ZIA template as #5 above, again printed on 65lb (176gsm) white cardstock:
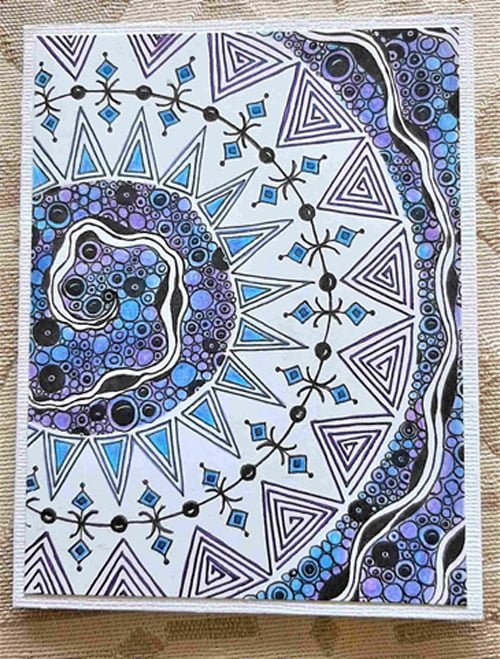
Same ZIA template as above, again printed on 65lb (176gsm) white cardstock
Coloured with blue/purple pencils
Embellished with Gelly Roll black sparkle and Pentel Dual Blue + Metallic Green pen
Mounted with a 1/8″ (.31cm) border on 80lb (216gsm) white canvas textured cardstock
7. ZIA printed on 65lb (176gsm) white cardstock:

0909Eiffel Card – see How to draw 0909EIFFEL
Coloured with graphite and various pink pencils
Embellished with Pentel Duel Black + Metallic Red pen
Mounted with a 1/8″ (.31cm) border on 80lb (216gsm) burgundy canvas textured cardstock
8. ZIA printed on 65lb (176gsm) white cardstock:
When I started this tutorial, my intention had been to use the Uulie template as my example and Christmas cards but after finishing the notan illustration for Kazique, I saw a highly stylized poinsettia. This led to a snowball effect … a red and white version of the notan … which led to another Christmas card prototype … which led to a new template and different Christmas cards … and last but not least, which led me to use a rubber sentiment stamp I’d had for 15 years but had never found the perfect card to use it on – until now. Love it when things fall into place like that!

ZIA printed on 65lb (176gsm) white cardstock
ZIA printed on 65lb (176gsm) white cardstock
ZIA mounted on 80lb (216gsm) canvas textured Bazzill “Lava” red scrapbook stock (the only size this colour was available in)
Sentiment stamped on card using rubber stamp and white ink pad
2023 ZIA Christmas Cards made!
Well almost … I’m awaiting a paper order to finish the rest. So my final TIP would be: Plan multiple identical cards well in advance and make sure to have all supplies on hand before starting to make them.
Thank you for taking the time to read these tutorials and happy card making!
Cyndi
.oOo.
As you can see, Cyndi has put a tremendous amount of thought, time, and work into creating these tutorials for the benefit of us all. Please join me in thanking her profusely for these excellent cardmaking tutorials and sharing her experience and guidance with us!
If you missed it, here is the link to Part 1 – Making a ZIA Card Template.
|
.oOo. |
|
Enhance your Zentangle experience while supporting TanglePatterns: |
|
BRAND NEW! TanglePatterns.com TANGLE GUIDE, 2026 Edition |
|
 |
The 15th Edition of the TanglePatterns.com TANGLE GUIDE is an instant-download 123-page interactive digital eBook/PDF containing over 2,300 tangles on the site from May 2010 through December 31, 2025. It's a great resource and a must-have digital tool for using the site. Visit the STORE > E-BOOKS page and help keep TanglePatterns.com going by getting your copy now! |
|
"Linda, Thank you! I was relying on too few and getting stuck after 3 years of daily working with Zentangle. This has inspired me to ‘begin again’ with renewed excitement." ~ Barbara R. |
|
| See the BOOK REVIEWS page for more details on its features and view a sample page. Note: this is a digital product downloaded immediately when ordering, nothing will be physically mailed to you. | |
| If you're new to Zentangle® and tangling, my TanglePatterns.com BEGINNER'S GUIDE TO ZENTANGLE is just what you need to get started. Also available en Français and en Español. | |
|
|
|
 |
This is the only Zentangle book you'll ever need: the fabulous Zentangle PRIMER Vol 1. It's your CZT-in-a-book by the founders of Zentangle®. For more about the content and to read the rave reviews, visit the BOOK REVIEWS tab. |
| Available in KINDLE format for $9.99. Spanish Edition here. Japanese Edition here. | |
| "Absolutely the best Zentangle Book yet! As an accomplished artist I used to think I did not need instruction on this art form. How wrong I was! My tangling improved by leaps and bounds after reading this book. If you think you have Zentangle down then you need this book more than ever!" ~ Kris H | |
|
|
|
|
.oOo. |
|


Thanks Cyndi for sharing your card tutorial. Gives me a couple of ideas.