


 Introduction: Greetings all! Thanks for joining me today for some wonderful bonus content 🙂
Today we have a very special set of tutorials in two parts for you by Canadian tangler Cyndi Knapp. These detailed tutorials will help you develop a system of easily making multiple cards using your own original tangled art. This will come in very handy as we think about making our Christmas/holiday cards but it’s also applicable any time you want to make a batch of greeting or note cards.
Here in Part 1, Cyndi shows us step-by-step how to make a template (4-up or 6-up as we used to say in the old desktop publishing world) from our ZIA art which we can then use to make multiple copies for our cards.
In Part 2, Cyndi guides us step-by-step through making multiple cards from our newly created template copies and shows examples of some ways you might customize the end results for different effects. Both tutorials are chock full of tips and advice to help you avoid any potential pitfalls. As Cyndi says, “It’s all straightforward but was compiled for those with little to no experience.”
Here’s Cyndi …
.oOo.
Some occasions require multiples of identical cards but making them is time consuming, especially if they’re tangled! The thought of finding a way to make multiple tangled cards a little easier and more achievable had been niggling at me.
Although I was deeply skeptical, I finally decided to experiment with photocopies of different tangled prototypes to see if any would pass muster. So it was exciting when prototypes with little to no fill or embellishment were acceptable (to me) when copied.
I understand this may not be kosher to many in the Zentangle community but for someone who suffers from the symptoms of CTS (carpal tunnel syndrome), it’s a game changer.
My absolute limit had been 10 tangled cards (see Heartgram) and the success of this experiment would allow me to make Christmas cards with the Uulie prototype I’d teased myself with last year.
It led me to wonder if others might be interested. So I put together this and the subsequent tutorial – Part 2 – Making Multiple Cards with ZIA Copies – each having Steps interposed with tips and examples. It’s all straightforward but was compiled for those with little to no experience.
SUPPLIES
- Zentangle tangling tools
- Printer with scanner glass (my printer is an HP OfficeJet Pro 9025 All-in-One Inkjet)
- Regular photocopy paper (Linda’s note: the higher the Brightness number, the whiter the paper)
- 65lb, 8.5 x 11 cardstock (176gsm, 21.5cm x 27.9cm)
- Smooth texture
- White or pkg of mixed neutral colours including white
- Makes 4 card size or 6 Zentangle size ZIA’s per sheet
- NOTE: This paper weight should feed through most printer rollers
- Repositionable, Removable double-sided tape
- Paper cutter

NOTE: Dedicated tools are not the only options but provide the quickest method and give the best results.
Step 1: Tangle a ZIA Prototype on Cardstock
1. Cut a sheet of white cardstock into quarters (or required size for your ZIA idea).
It’s better to trim to the exact size at this point instead of when assembling cards, that way no tangling detail is lost. For example if you want to end up with a 1/8″ (.317 cm) cardstock border around the ZIAs when the cards are finished, cut the quarters to 4″ x 5.25″ (10.2cm x 13.3cm). See example in Part 2 – Making Multiple Cards with ZIA Copies.
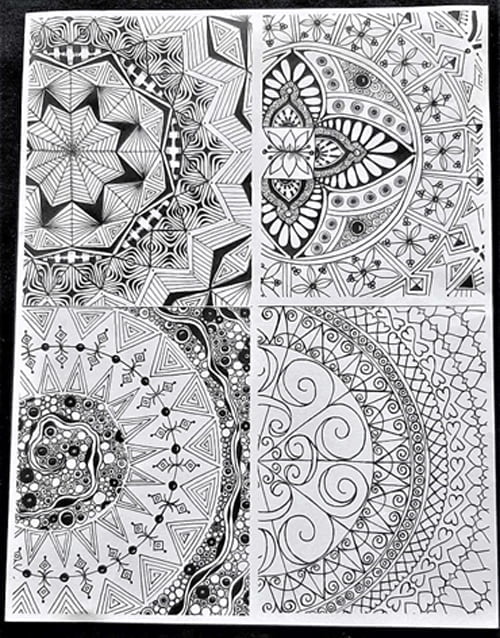
2. Tangle a ZIA prototype on one of the quarters. If you tangle in colour, you have the option of printing in colour or black and white. Moderate embellishments and fills work well for a ZIA tangled in black but not so much for one tangled in colour.
3. Repeat for each quarter, when different ZIAs are desired (see next example).
Step 2A: Make a Template Using Multiple ZIA Prototypes
- On the back of each ZIA prototype, place a very small piece of removable double-sided tape just large enough to make it adhere to a sheet of photocopy paper but not so large it will peel the back off the prototype when it’s removed from the sheet.
- Per each prototype, peel the backing off the tape and attach it to a sheet of photocopy paper. A straight pin comes in handy to help remove the tape backing.
- Place the sheet of prototypes face down on the printer scanner glass.
- Print a copy. Use photocopy paper – it’s better to waste it than cardstock in the event of a copying error. Keep original ZIAs and template for future use – eg. individual personalized cards or note card gift sets.

Example of ZIA Prototypes ready to be copied
Resulting photocopied ZIA Template:
Step 2B: Make a Template Using a Single ZIA Prototype
NOTE: This involves reinserting the same sheet of photocopy paper into the printer paper tray multiple times. If you don’t already know how paper feeds through your printer, it’s a good idea to do a test.
For what it’s worth … with my printer, a sheet of paper is reinserted into the paper tray with the copy side face down and with the top end first (ZIA positions #1 and #4 in the collage below).
TIPS for this multi-copy process:
- For a visual example, see the “Building a Template” collage below.
- As the collage shows, I found it easiest to work from top to bottom, one half of the sheet at a time.
- After the first copy is printed, lightly pencil an “X” on the back of the sheet over the copy as a reminder of which end to reinsert first throughout the rest of the process.
- On the back of your ZIA prototype, place a small piece of removable double-sided tape. Just large enough to make it adhere to a sheet of photocopy paper but not so large it will peel the back off the prototype when it’s removed from the sheet.
- Attach the prototype in the desired position on a sheet of photocopy paper. Do so in such a way as to maximize the end number of copies on the sheet to suit your project yet gives you a little wiggle room between each.
- Place the sheet with the attached ZIA prototype face down on the printer scanner glass.
- Print 1 copy using photocopy paper – it’s better to waste it than cardstock in the event of a copying error.
- Reinsert the copied sheet (the same one as in Step 4) into the paper tray. (See NOTE above.)
- Gently remove the ZIA prototype from its sheet and move it to the next desired position.
- Repeat Steps 2 – 6 until the maximum number of ZIA copies on the sheet have been reached. Keep the original ZIAs and the template for future use – even seasonal ZIAs can be useful in other applications when printed in black.

Example of Building a Template using one ZIA prototype.
Example of two differently configured ZIA Templates:

Step 3: Use Your ZIA Template to Make Multiple Copies
- Load your printer paper tray with the desired neutral colour cardstock. The number of sheets required will depend on the number of ZIA’s on your template and the number of cards you want to make.
- Place your ZIA template face down on the printer scanner glass.
- Print the number of desired copies. It’s prudent to print 1 copy at a time in case of paper feeding issues.
Step 4: Use Your ZIA Template Copies to Make Cards
See Part 2 – Making Multiple Cards with ZIA Copies for detailed instructions on how to turn your template(s) into cards.
|
.oOo. |
|
Enhance your Zentangle experience while supporting TanglePatterns: |
|
BRAND NEW! TanglePatterns.com TANGLE GUIDE, 2026 Edition |
|
 |
The 15th Edition of the TanglePatterns.com TANGLE GUIDE is an instant-download 123-page interactive digital eBook/PDF containing over 2,300 tangles on the site from May 2010 through December 31, 2025. It's a great resource and a must-have digital tool for using the site. Visit the STORE > E-BOOKS page and help keep TanglePatterns.com going by getting your copy now! |
|
"Linda, Thank you! I was relying on too few and getting stuck after 3 years of daily working with Zentangle. This has inspired me to ‘begin again’ with renewed excitement." ~ Barbara R. |
|
| See the BOOK REVIEWS page for more details on its features and view a sample page. Note: this is a digital product downloaded immediately when ordering, nothing will be physically mailed to you. | |
| If you're new to Zentangle® and tangling, my TanglePatterns.com BEGINNER'S GUIDE TO ZENTANGLE is just what you need to get started. Also available en Français and en Español. | |
|
|
|
 |
This is the only Zentangle book you'll ever need: the fabulous Zentangle PRIMER Vol 1. It's your CZT-in-a-book by the founders of Zentangle®. For more about the content and to read the rave reviews, visit the BOOK REVIEWS tab. |
| Available in KINDLE format for $9.99. Spanish Edition here. Japanese Edition here. | |
| "Absolutely the best Zentangle Book yet! As an accomplished artist I used to think I did not need instruction on this art form. How wrong I was! My tangling improved by leaps and bounds after reading this book. If you think you have Zentangle down then you need this book more than ever!" ~ Kris H | |
|
|
|
|
.oOo. |
|


Or instead of step 2B, you could scan the image and import into a bitmap drawing program such as Paint, or Paint.net – the former should come with any Microsoft PC and the latter is freeware.
a) Scan your image as a photo. Open it in your drawing program.
If you like, you can use the effects such as brightness/contrast to tune your image slightly, and get rid of any accidental smudges or hairs on the glass.
b) Save your image.
c) Some printers will happily print several copies or an image to a page depending on what settings you use. If you can do this, it’s a lot easier. If not, move to the next step.
d) Select the image, and copy it (Ctrl+C).
e) Change your canvas size. If you want 6 images, you should make it twice the width and three times the height, plus 5% or so for going in between the images so you can cut them out.
f) Paste the image (Ctrl+V), and drag it to a new place, aligning it with one of the edges. Repeat till you have all six images on the image.
g) Save the image again (as a new name) and print.
Brilliant!! And well-explained. Thank you!