 Today we have a special treat — a Zentangle®-inspired tutorial from CZT Marguerite Samama to expand your Zentangle creativity.
Marguerite is a CZT from Amstelveen, a suburb of Amsterdam in The Netherlands and a member of CZT#16. She’s a writer and text editor, a radio presenter and a Zentangle teacher. Through her HappyTangling business she has taught many classes including teams, primary school classes, teenagers, kids, families and women of all ages and backgrounds. You might also be familiar with Marguerite from her Valentangle project in February of each year.
 Marguerite writes,
“I love to read, practice yoga, walk my dog, reflect, spend time with friends, besides being crazy about Italy, languages and music. I sing and I have a keen interest in the subjects Stoicism, mindset, mindfulness and giftedness. I am married to David and am the mother of Shira (16) and Gil (14).“
I received permission from Zentangle co-founders Rick Roberts and Maria Thomas to reproduce their copyright-protected images from the Zentangle PRIMER Vol 1 book which Marguerite references in her tutorial. Page references given are to the PRIMER.
And here’s Marguerite with her tutorial … enjoy!
* * *
How to create a Zentangle®-inspired zenbutton
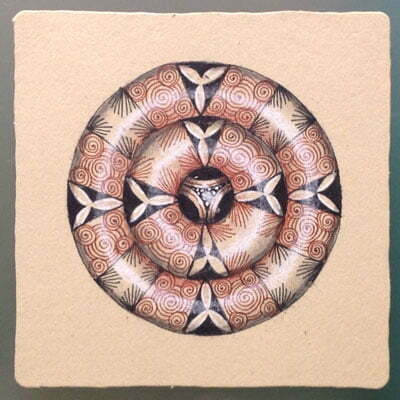
© Marguerite Samama, ALL RIGHTS RESERVED. #zenbutton
About one year ago, in the beginning of March 2017, I was looking for a reticulum (reticula is plural) with triangles, circles and squares in it.
I found this one on page 125 of the Zentangle PRIMER Vol 1: R-H2.
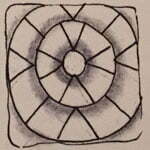
Reticulum (grid) R-H2 – © Rick Roberts and Maria Thomas and used with permission.
Creating the String
I decided not to go with the outer square representing the border on the image above, but instead to isolate the circle on a Renaissance tile.
I took a water glass and traced it with my pencil. This gave me a big circle. I added two smaller circles within, as shown below. To make it easier to divide the big circle, you can draw a cross inside it. That way you know where the center is. After you have made the circles, just erase the cross.
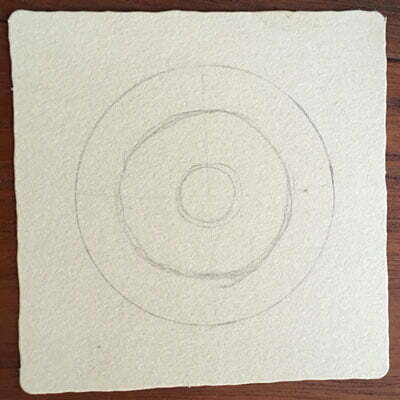
The outer two circles I divided into squares and triangles. I usually make the division with pencil first, to see how the space is best divided.
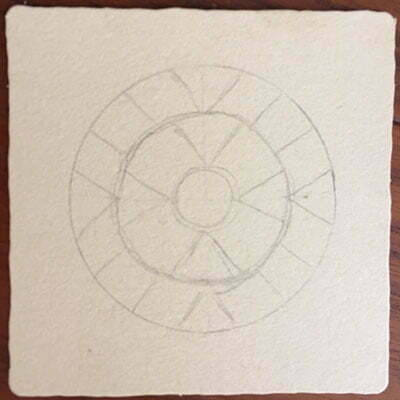
Adding tangle fragments to the zenbutton
In the small circle in the center, I added a fragment H21 from page 121 (the page filled with round fragments).
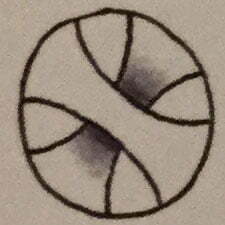
Round Fragment H21 – © Rick Roberts and Maria Thomas and used with permission.
Tile with Fragment H21 in the center:
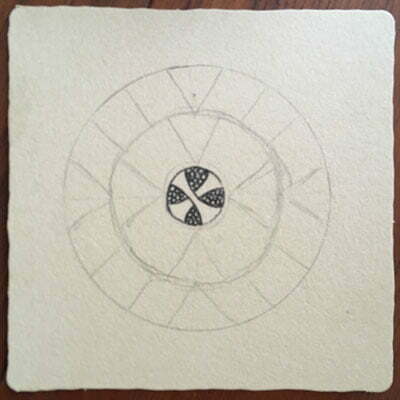
The next step was to fill the two outer rims with fragments (or tangles) of my choice. In the example, I have used C13 (page 120) for the triangles and X7, V3 and M6 (page 115) for the squares.
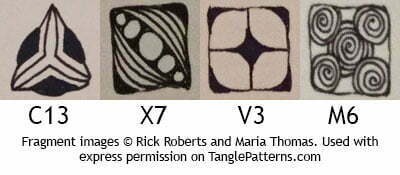
Adding C13: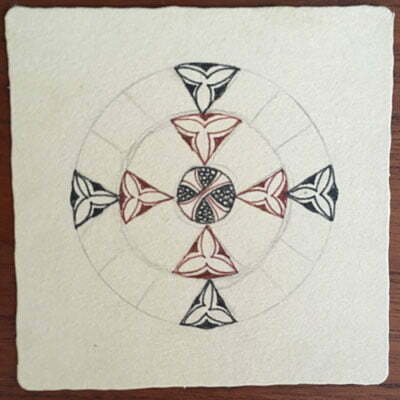
Adding X7 and V3:
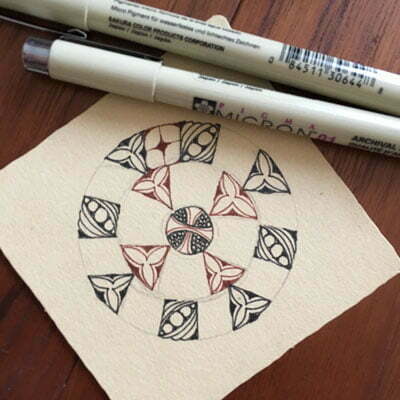
Adding M6:
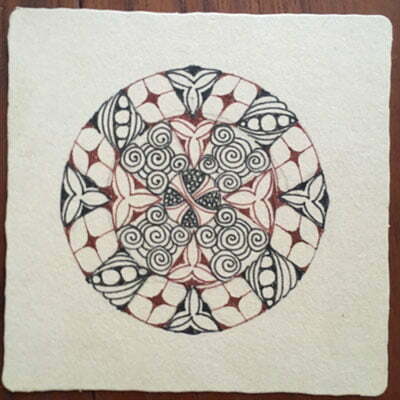
Adding shading is key to the finished zenbutton
The final touch is KEY here:
After I added the fragments, I took my graphite pencil and shaded inside the two outer rims on both sides.
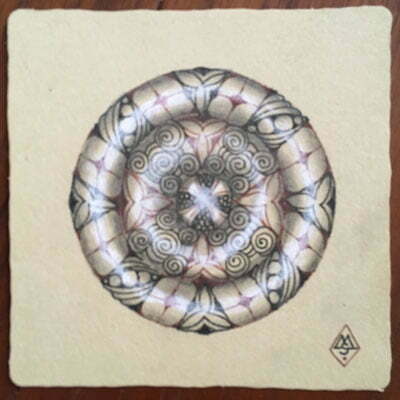
© Marguerite Samama, ALL RIGHTS RESERVED. #zenbutton
NOTE: I am not shading OUTSIDE the button.
TIP: Use your tortillion and play with pressure, more pressure close to the side of the rim, less towards the middle.
Then take out your white pencil and generously highlight the middle of the rims, gently massage the white into the fiber of the tile with the tortillion you save for white pencil. Et voilà!
This zenbutton is an adaptation of reticulum R-H2 from the Zentangle PRIMER, page 125. It is a great way to explore fragments and combinations of fragments and colors.
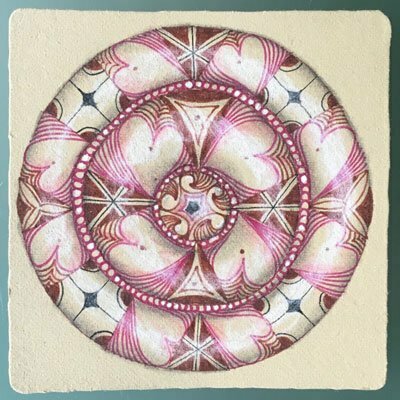
© Marguerite Samama, ALL RIGHTS RESERVED. #zenbutton
You can draw them with colored pens but you could also color a tile and draw the button on that. Want to work on a Zendala? Just add an extra rim.
I have lived in Florence, Italy, for a while and have admired many paintings and frescoes from the Renaissance there. The result of my tangling reminded me of the lush buttons on embroidered robes and cloaks…hence the name zenbutton. Some people tell me they think they look more like turbans or pillows… also fun but for now I am sticking to the name zenbuttons.
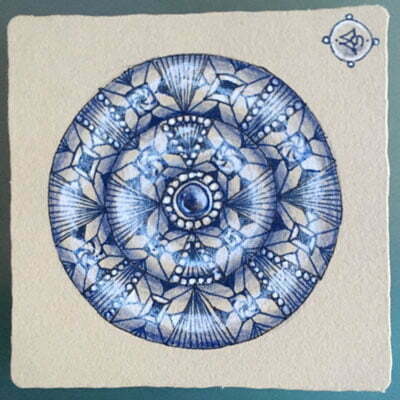
© Marguerite Samama, ALL RIGHTS RESERVED. #zenbutton
The zenbutton works very well on Renaissance tiles, but is lovely on a white or grey tile as well. Hope you’ll feel inspired!
SUPPLIES:
For a standard zenbutton you will need:
- a Renaissance tile
- a graphite pencil
- a white charcoal pencil
- tortillions for both your graphite and white pencils
- a black Sakura micron 01 pen
- a brown Sakura micron 01 pen
- a circle template to trace, (or improvise, use a water glass or small bowl).
- the Zentangle PRIMER Vol 1 book* or another tangle/fragment resource like TanglePatterns.com
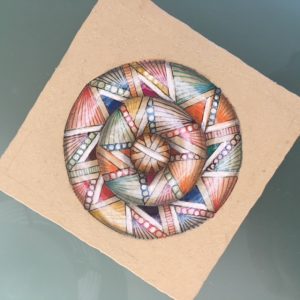
© Marguerite Samama, ALL RIGHTS RESERVED. #zenbutton
* * *
Thank you so much for sharing your zenbutton technique with us, Marguerite. I suspect many tanglers will be exploring zenbuttons this weekend …
In addition to the concentric circles Marguerite describes, zenbuttons work equally well in other sets of nested shapes such as ovals, squares, triangles, diamonds, or hearts – try them!
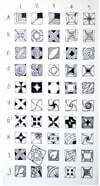
*Although it’s hard to beat Maria’s 77 square fragments, 66 triangular fragments and 45 round ones in the Zentangle PRIMER Vol 1, another great resource for her tangle fragments is the chart of some 50 “starter fragments” from the June 2013 Zentangle® newsletter in the article Grid (Un)Locked.
If you post your zenbutton online or in the Zentangle Mosaic app, please use the hashtag #zenbutton. And be sure to visit Marguerite at HappyTangling.com.
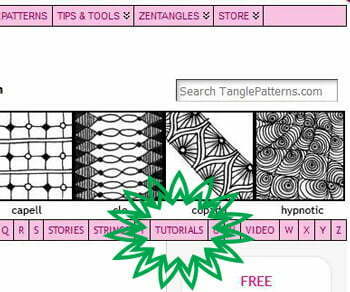
For future reference you can find Marguerite’s tutorial located on the TUTORIALS tab on the pink alphabetic menu bar.
Have a great weekend!
.oOo.
Like some help with shading your Zentangles?
It's fun and easy — forget about traditional "art rules" for shading, this is Zentangle and those rules do not apply!
As we are coached in the chapter on Shading in the Zentangle PRIMER Vol 1, "Ignore the light source ... in Zentangle shading we do not consider the type or direction of the light source. ... More often, shading is a component of the tangle itself that we use to play with dimension, emphasis, and contrast."
Everything you need to know is here in two free tutorials on TanglePatterns.
- TanglePatterns Shading Mini Clinic, Part 1 by CZT Marizaan van Beek, and
- TanglePatterns Shading Mini Clinic, Part 2 by CZT Sandy Bartholomew
You can always locate these and many other helpful tutorials by visiting the TUTORIALS tab on the pink alphabetic tangle menu bar as shown here:
.oOo.
|
.oOo. |
|
Enhance your Zentangle experience while supporting TanglePatterns: |
|
2025 EDITION! (2026 COMING SOON) TanglePatterns.com TANGLE GUIDE, 2025 Edition |
|
 |
The 14th Edition of the TanglePatterns.com TANGLE GUIDE is an instant-download 117-page interactive digital eBook/PDF containing over 2,000 tangles on the site from May 2010 through December 31, 2024. It's a great resource and a must-have digital tool for using the site. Visit the STORE > E-BOOKS page and help keep TanglePatterns.com going by getting your copy now! |
|
"Linda, Thank you! I was relying on too few and getting stuck after 3 years of daily working with Zentangle. This has inspired me to ‘begin again’ with renewed excitement." ~ Barbara R. |
|
| See the BOOK REVIEWS page for more details on its features and view a sample page. Note: this is a digital product you download immediately when you place your order, nothing will be physically mailed to you. | |
| If you're new to Zentangle® and tangling, my TanglePatterns.com BEGINNER'S GUIDE TO ZENTANGLE is just what you need to get started. Also available en Français and en Español. | |
|
|
|
 |
This is the only Zentangle book you'll ever need: the fabulous Zentangle PRIMER Vol 1. It's your CZT-in-a-book by the founders of Zentangle®. Visit the STORE tab on the top menu bar or click on the image. For more about the content and to read the rave reviews, visit the BOOK REVIEWS tab. |
| Now available in KINDLE format for $9.99. Spanish Edition here. Japanese Edition here. | |
| "Absolutely the best Zentangle Book yet! As an accomplished artist I used to think I did not need instruction on this art form. How wrong I was! My tangling improved by leaps and bounds after reading this book. If you think you have Zentangle down then you need this book more than ever!" ~ Kris H | |
|
|
|
|
.oOo. |
|







Thank you so much for the Zenbuttons tutorial – I’d seen them around & wondered how to go about it. This is a real gift…… & so much appreciated.
Such a lovely gift, Marguerite. I’ve been admiring your zenbuttons, but was a bit stymied on how to begin. I’m sure I’ll give it a GO, now. Thank you for giving permission for Linda to post…much appreciated.
Thank you for graciously sharing your tutorial on how to create zenbuttons. It is a real gift to those of us on Tanglepatterns.com
Thank you, Marguerite, for so generously sharing the steps to making the Zenbutton. Your talent is so awesome.
Absolutely beautiful zen buttons!
Thank you!
Thanks a million for sharing
There I was,looking for that something I could not put my finger on… here I am with a big smile on my face, having found just that ! ?
Thank you so much, Marguerite and Linda, for sharing this beautyful idea.
Thank you Marguerite and Linda for providing such an easy tutorial for these zenbuttons. I’d tried one earlier, but this inspires me to go play with them more.
What an awesome Tutorial! That you so much for sharing. I have seen these and tried to do one of my own but with no success. Your tutorial has inspired me to try again.
thank you.they are beautiful. feeling inspired.
Thanks for sharing the tutorial! I’ve tried two Zenbuttons since seeing this and enjoyed the experience. I’m on to my third now.
A question: The raised/rounded effect inside the rings is eluding me. It looks flat. I have shaded both inside and outside the small circles, as I understood from the tutorial. What can I do to achieve that? Can Marguerite or anyone else help?
The first place to look for fantastic guidance on shading are the two free TanglePatterns Shading Mini-Clinics: Part 1 is by Marizaan van Beek, CZT, and Part 2 is by Sandy Steen Bartholomew, CZT. You’ll find them on the TUTORIALS tab on the pink tangle menu bar but I’ve also added their links at the end of the zenbutton tutorial above.
Also, adding the white charcoal pencil is the finishing touch to emphasize the raised effect as Marguerite describes above.
Thank you so much for this tutorial! Everybody talks about Zenbuttons and i didn`t have a clue, how do do them…I really love them! Greetings from germany, Marion
This is fabulous !!! Thank you so much Marguerite Samama and also to Linda for forwarding this one on…I know I am late to acknowleging this.. I have seen soooo many beautiful Zenbuttons, but just haven’t managed to experiment yet ! NOW I have the tutorial, so looking forward to doing so…Beautiful work and fantastic tutorial presentation….
Thinking of doing the buttons on fabric !
Thank you Marguerite, I am thinking of doing a series of these on Zendala tiles!
Marguerite,
Beautiful those zenbuttons. ik go try it. thank you ver much
greetings anna
Thank you for sharing your Zenbutton technique!