 Greetings my dear tangling friends, it’s Linda here with an awesome new tutorial to enhance your Zentangle® art. So select your beverage of choice and settle into a comfy chair.
Recently I received an email from new tangler Julie K, who wrote:
“TanglePatterns is a spectacularly awesome resource and I thank you for the site and for all of your work to help fellow tanglers. I’m quite new to Zentangle with no artistic background and find myself overwhelmed with the possibilities for adding color to my work. … Any question you can think of for adding color, I have it and would love some guidance.”
Naturally since she’s the author of one of my favorite Zentangle books, Time to Tangle with Colors, I immediately thought of Canadian CZT Marie Browning. I was so excited when Marie readily agreed to write this TanglePatterns tutorial as an introduction to adding color to your Zentangle-inspired projects.
Thanks to Julie for her questions and MANY thanks to Marie for generously sharing her expertise on the subject. As she encourages in Time to Tangle with Colors, “Unleash your inner child” with color!
And now we turn the page over to Marie for her advice and her glorious, colorful Zentangle-inspired art …
* * * * * * * * * * * * * * * * * * * * * * * *
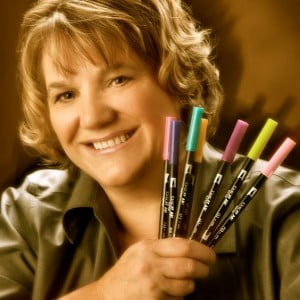
Marie Browning, CZT
I know many of you who have discovered Zentangle are now wondering how to add color to your creations. I will venture to give you an overview of materials and hints on how to start adding color. Some of you may know that I am the signature designer for Tombow, so my suggested materials are a bit biased!
Q: I’m quite new to Zentangle with no artistic background and find myself overwhelmed with the possibilities for adding color to my work. What are the most popular color tools among Zentangle devotees?
A: It’s easy to be overwhelmed with all the different materials available out there! I can share with you my favorites, and some of the most popular materials that other tangle enthusiasts are using.
Remember, these are only a few recommended resources available to you!
1. Water-Based Brush Markers
These, by far, are my favorite colors to work with on my Zentangle-inspired art.
I like to use the best, so double-ended Tombow Dual Brush Pens are my preferred brand. They come in 96 glorious colors and you can find them in craft and art stores, or online directly from Tombow. The packages of 10 pens including a colorless blender are great start-up packages for the beginner.
There are many different techniques that you can explore with the markers, including many different ways to blend them. They are compatible with the Pigma Microns and don’t require specialty paper.
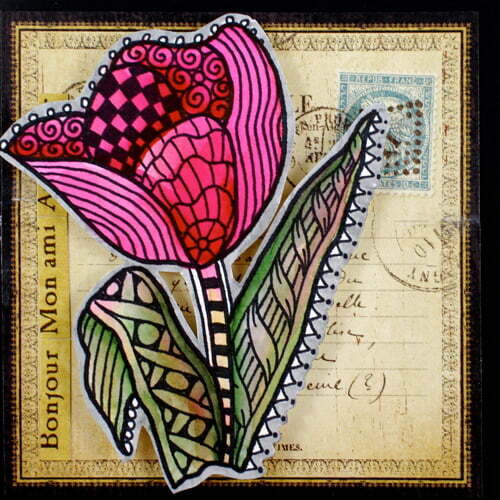
Samples using Dual Brush Pens in ZIA projects.
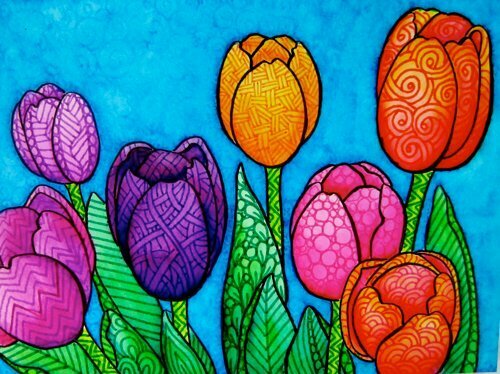
2. Alcohol-Based Markers
Copic and Spectrum Noir are two popular brands of alcohol-based markers, as well as the Sharpie Brand.
These are very different from water-based markers. You need to make sure you do your tangles with a compatible black pen, and they also require specialty papers for best results. They come in lots of different colors and smaller packages with selected color groups.
They can be more challenging to blend with, but when mastered, give you beautiful results.
3. Traditional Wax Based Colored Pencils
If you love to color, these are for you! You layer the colors gradually and you have lots of control for a very ‘Zen’ way to add hues to your tangles.
Colored pencils are available in many different brands. Here I would encourage you to choose a pencil that fits your budget, as there is a wide range of prices.
I use Tombow Irojiten Colored Pencils. They come in 90 yummy colors, and are available in 30 pencils sets and 5 pencil sets. I use the Tombow colorless blender to blend my colored pencils. It is very effective and easier to use rather than a solvent or oil. I especially love the Irojiten Sepia 5 pencil set and Irojiten Grayscale 5 pencils set for working on the tan renaissance tiles.
Smaller sets or even purchasing individual pencils allow you to try out different brands and decide if colored pencils are for you.
All brands of wax-based pencils are compatible with each other, so you can add any brand to your collection.
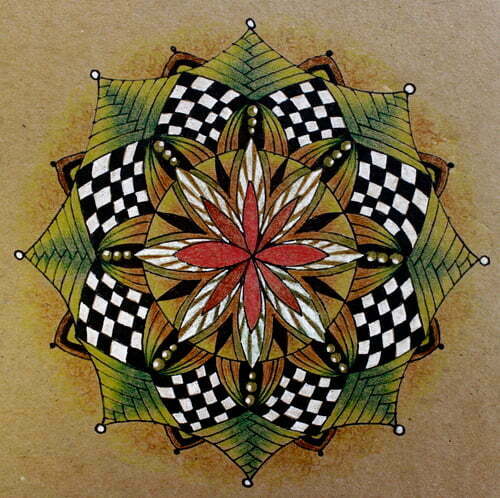
Irojiten Colored Pencils and a white gel pen on kraft paper.
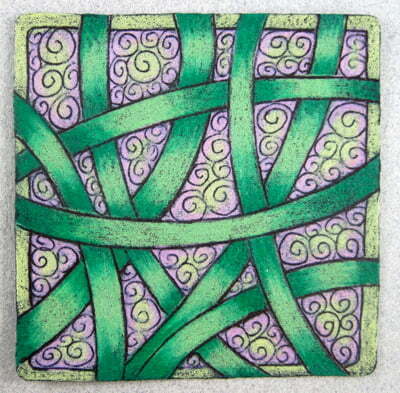
Irojiten colors on a black tile
4. Watercolor Colored Pencils
Don’t confuse watercolor colored pencils with traditional colored pencils. They are applied, and then blended with brush and water to create a soft watercolored effect. Again, lots of brands available at your local art store.
5. Traditional Water Colors
Traditional water colors are a little harder to master but offer brilliant color and beautiful blended watercolor effects. Again, there are numerous brands to choose from and available in both lower cost student grade and professional grades.
I tend to add tangles to my watercolor paintings, rather than adding watercolors to my tangles!
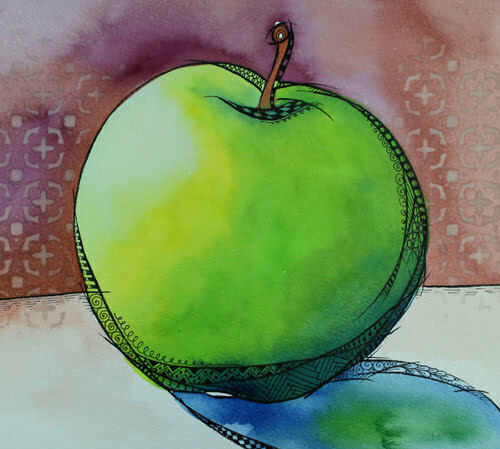
Tangles added to a watercolor painting
6. Gel pens
These I would recommend for everyone! Sakura is the best brand out there, and they can add bright colored accents to any tangled masterpiece. They now have a fine .06 gel pen that’s great for drawing tangles in color.
I also love the clear glitter pen that adds a gorgeous soft glitter to waterbrush marker colors.
Q: How do you choose color tools (pencils vs. markers, etc.)?
A: It’s hard to tell you what medium you should choose; what works for me may not be what you prefer to work with. It’s best to start out with a few pieces of one type, play with them before you go and purchase all the colors available.
I combine mediums all the time, so anything purchased can be used! For an example in mixing mediums, add the base color with water-based markers, then shading with colored pencils, and then add accents with gel pens. I would encourage you to ‘mix up your mediums’ for exploiting the best qualities of each medium.
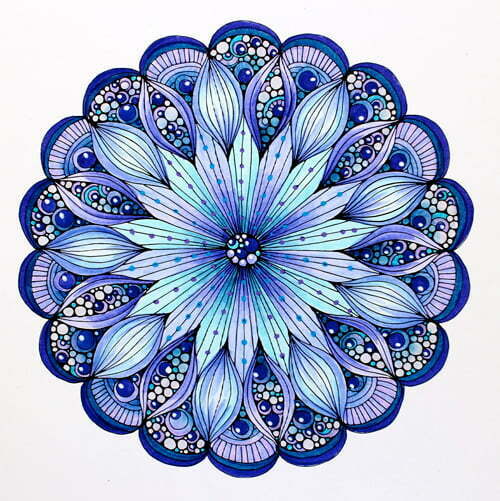
Design from Valentina Harper’s “Creative Coloring Mandalas“. Colored with the Dual Brush Markers, and accented with Gel Pens.
Q: I’d be interested in knowing which are easiest for a newbie to learn to use? What’s the most cost effective?
A: Books! It would be great if we all had bottomless wallets to travel to art events and classes (so many great ones out there!) but for great instruction and something you can refer to often, books offer a huge deal. Design Originals, an imprint of Fox Chapel Publishing, offer a great selection of Zentangle books!
Be sure to check out Marie’s publications on Amazon!
Q: What provides the coolest effects?
A: Mixing your mediums!
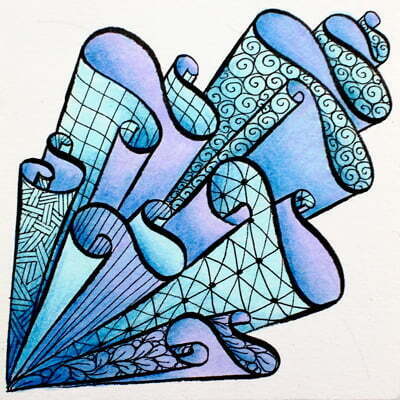
Colored with both Dual Brush Pens and Irojiten colored pencils.
Q: Color scares me, how do I start?
A: I wish I had a nickel for the number of times I have heard this question! First of all, it’s paper people! Nothing to be scared of, if you don’t like it, put it away and take it out after some time – your view may change! Don’t throw it out! It’s a good example of what you didn’t like. We all have pieces that didn’t work; I like to cut them up into ATC’s! Here are some helpful hints for starting:
Just start! – Practice makes perfect. You will quickly become relaxed with using color, it’s never too late to start, but you do need to dive in there and just start!
Start slow – Work on colored paper or create a monochromatic piece using different shades and tints of your favorite color.
Start small – Work on smaller pieces such as ATC’s so you are not intimidated by large pieces.
Add more colors – For example, use sepia tones along with red and white for a neutral color scheme. Smaller packages such as ‘Bright Tones’ or ‘Muted Tones’ are great to start with, as they picked out colors that go together for you!
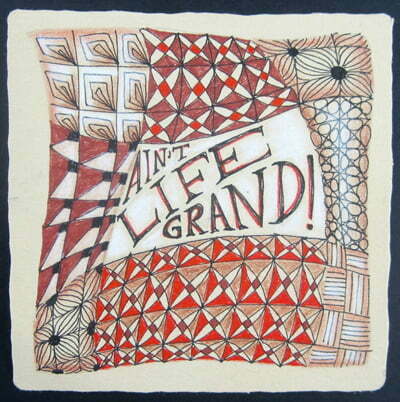
Black Pigma Micron on Renaissance tile, shaded with sepia colored pencil, highlighted with a white chalk pencil, accents added with red Pigma micron.
Practice – Hugely popular ‘adult coloring books’ are awesome to practice your color techniques and color combinations.
The following samples are from Valentina Harper’s Creative Coloring Mandalas.
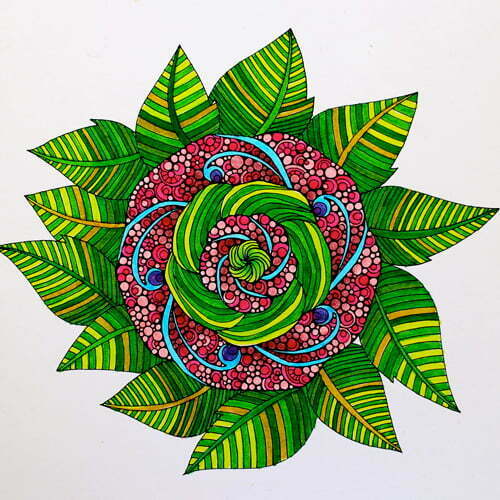
Dual Brush Pens, shaded with Irojiten Colored Pencils – Bright Tones
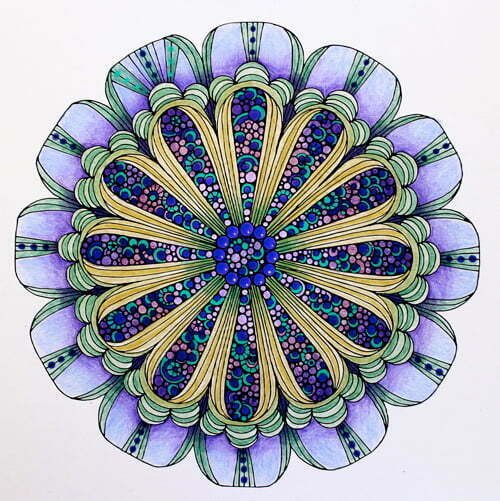
Irojiten Colored Pencils, accented with Gels Pens – Vivid Tones
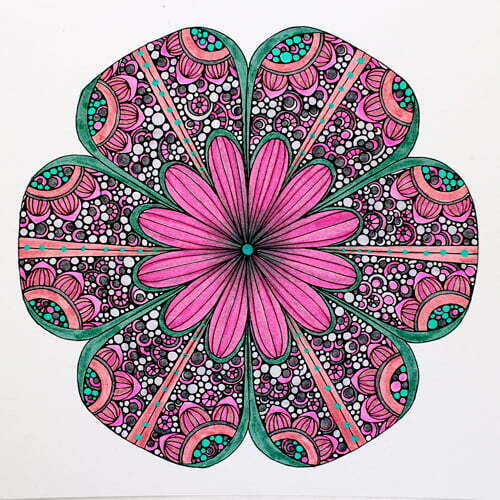
Dual Brush Markers, accented with Gel Pens – Muted Complementary Tones
Always do a test first – make sure your chosen medium is compatible with the pen you used to draw your tangles! It also depends on the paper you use, so every single time do a small test on the back or on a scrap piece of the same paper to avoid disappointing results.
All artwork in this article is © Marie Browning and used with permission.
You’ll find Tombow Markers here on Amazon.
* * * * *
 Marie Browning became a Certified Zentangle Teacher in October 2010. She is also the author of Time to Tangle with Colors, the first book on coloring Zentangles published by Design Originals. Marie also contributed to the book Joy of Zentangle.
She is a consummate craft designer who has made a career of designing products, writing books and articles, and teaching. As a bestselling author, Marie has written numerous books with over 2.5 million in print, reprinted in nine different languages. Marie is also a Creative Consultant, assisting manufacturers in developing innovative products and identifying new ways to market their products to the craft consumer. She has taught classes, demonstrated at trade show shows and appeared on TV and videos. Marie is currently the Signature Designer for American Tombow.
Marie was selected by Craftrends trade publication as a “Top Influential Industry Designer”. She lives, gardens, crafts and tangles in Brentwood Bay on Vancouver Island in Canada.
* * *
There you have it, my friends. Lots of useful information to ponder and beautiful examples to inspire your color creativity. Plus some luscious tools for your wish lists to help family and friends give you gifts you can use!
Kudos, questions, comments … it’s your turn …
PS – PLEASE PLEASE Share Share Share this page on all your favorite social media, Marie deserves it!
PPS – Happy Victoria Day up there north of the 49th parallel!


My husband is an artist and he has let me use his Derwent watercolour pencils. I didn’t ask him about the brush in the set container. Thank you, Marie, now I know. I bought a turquoise Faber-Castell (Polychromos) oil pencil to blend with the graphite pencils. It so amazing all the wonderful tools one can choose from to create art!
I’ve never used the Ranger Tim Holtz Distress Ink before though I have seen some examples of the ink used on paper art. It seems it might also be a good avenue to try in bringing color to a Tangle drawing. Has anyone in family of Zentangle ever used the Distress Ink? ~ Heather
I have used distressed inks for stamping and card making. I would think they would give a subtle effect to tangles.
Yes, Debbie, I think so, too.
I’m sorry, Marie, I didn’t know that Tombow is in competition with Ranger. I saw the tutorial of a beautiful ticket done by Jennie Garcia (blog: Earthy Scrap) with your method. http://earthyscrap.blogspot.com/2014/06/tombow-bird-challenge.html
Your sweet bird and message is so pretty. It is nice to see that Tombow also has distressed inks, too.
Take care all and God bless. ~ Heather
Everyone is in competition with everyone else. So it doesn’t matter which ones you mention . As long as your choice works, or even works together, does it really matter who is in competition with whom?
I love all creative materials!
When using different mediums what is the best paper type to use?
I use Inktense pencils on all of my colored tangle drawings. I love the brightness and blendability of these pencils and they come in a package of 72 colors (if you want all the colors available), so there’s lots of variety. I first lay down a thin layer of Fabric Painting Medium, then blend in the Inktense colors. This works especially well on upholstry fabric if you’re covering a new cushion for a chair, but I’ve used it on watercolor paper also.
Thanks for the ideas, especially the tips for doing tangles on fabric. I will certainly be trying them, for gifting.
I am new to tangling, only a few months in, but am “hooked”.I have been just highlighting with pencil colours, and it has been fine so far. I will certainly start being more adventurous with colour though. Has anyone used Amos Colorix crayons in their tangles. They can be used 3 ways, as watercolour, as pastel and as a crayon.
I love adding color to my tangles and have been doing it from the beginning.
I use colored pigma pins as well as colored pencils. You can add so many different looks, it’s a lot of fun.
This is great! Very helpful in distinguishing the different media, their effects, and their degrees of difficulty! Thank you so much, Marie, for taking the time to answer my questions and also for adding visual examples. Linda, thank you so much for acting on my email. And so quickly, too! This fabulous tutorial on color just gives me one more reason to keep returning to Tangle Patterns again and again. Thank you very much!
Echoing Julie K’s thanks here, Marie! You’ve covered a lot of ground and introduced many intriguing ideas, without being at all overwhelming. I’ve been coloring my tangles since 2012 but found lots of inspiration here. And thank-you for posting such beautiful examples . . . makes me want to go home and get out my pens!
I so appreciate the tangle community, as some of the best and most experienced tanglers are so generous in sharing their ideas and expertise!
Thank you!
Thank you Marie for sharing your knowledge on coloring our Tangles! Your sample work is beautiful!
Thank you Marie, beautiful work to inspire us.
Thank you Linda, I am aware of the time and effort it took to prepare this tutorial. Your love shows in all you do for the Tangle Community.
Doreen
Thank you Marie and Linda for a great informative article lots of tips and inspirations!!
Thank you for this great article! As a color-phobic tangler, I really appreciate the information!
I too was scared, and perhaps am still a little tremulous about using colour with my ZIA. Before I found Marie’s wonderful little book about adding colour to tangles, I decided on my own to ‘start small’ and initially on my first piece of ZIA, I used only two colours, a watered down vermillion and a watered down olive green, both traditional Winsor & Newtown trad watercolours. Even now I TRY to limit colours on my ZIA to no more than three & shades of those colours from light to dark. I like to use water pencils or water colours as I find them easiest to blend. Plus, I guess I am a bit of a “stick in the mud” as I have been using watercolours in my calligraphy over the last 35 years and I know how far I can push them! Marie’s article is prompting me to try other ways of colouring now ! Thanks Linda for putting in this little tutorial of Marie’s, it reminds me that there is a WORLD of colour out there, which I havn’t even touched yet!
Beautiful & inspiring. I think I’ll try to add a little color now and again.
What a great introduction to color. I love using color. I figure that if I can use a micron pen and have only opportunities and no mistakes, then anything with color would be the same, right? 😀 But I end up with ZIA’s all the time so I have to be sure to use just the black micron and pencil shading now and then also.
I already had Prismacolor colored pencils from a Botanical Illustration class I took years ago. I added the Tombow Dual Brush Pens when I read about them here. Now I just need more colors of those. And I recently bought the Derwent Inktense Pencils when I found them on sale at a local art store. I couldn’t pass up a 40% off sale since I wanted to try them anyway. Hee hee. I still have to try them though. I guess I do have a little fear in there somewhere about trying new things. I also have some inexpensive water colors around here somewhere too. I wonder how Crayola Crayons would work? I have a large box of them hanging around from many years ago. I’ll have to give all these a try and see what happens. ;D I’ve always had art in the background as something to try but Zentangle really got me going on this. I love it!!
Thank you Linda for following up on this, and Marie for writing up this tutorial.
Do not neglect the use of colored sparkle pens!!! They make Zentangle POP!
what are colored sparkle pens?
Hi Louise, Try searching Google or Amazon for “colored sparkle pens” and you’ll find loads. Sakura’s Gelly Roll pens are very popular, see this link:
http://amzn.to/1QQn1T1
Hope that helps! 🙂
The moment I saw Zentangles at MY WONDERFUL STAMPING STORE (The Stamp Addict) I knew I was hard wired for it????!!!!! It is my passion.
awesome!
To look at all those vibrant colours and designs was awesome and gave me all sorts of ideas. Thanks Marie for adding colour to our already incredible world.
This is a great and helpful site. Kind of intimidated by the talent displayed though.
Thank you very much for this beautiful and helpfull tutorial to cheer up our tiles. Such a wonderful aspect of Zentangle is sharing different experiences with everyone!
Beautiful work!!! I love coloring, it brings me such joy and peace, and really stimulates my creativity!!! Thank you for the inspiration.
Thank you so much for this tutorial.
A suggestion for the fearful: scan and print or make photocopies of the tangles you’re wanting to color. Experiment with your color combinations on the photocopies before moving to coloring your originals.
Thanks for the illustrations and directions. The colors and shapes are beautiful and I really love doing this type of tangle drawings.